Battlewagon: M4A3E8 ETO
- Thread starter errains
- Start date
errains
New Member
- Joined
- Apr 10, 2011
- Messages
- 288
Construction Complete Ready for Paint....But not to soon 
It took longer then I planed but the first half of this build is done....more like 99.8% done.
Overall I'm quit happy with the results. While not a perfect Sherman (since there is no such thing), I think it's ok. But building it is the easy part. Now come the make or break point...Applying the finish. :-\
No matter how good your build is a poor finish will detract from the overall impression of the finished model.
But enough of me blabbing...on to the pictures. Hope you enjoy them and as always constructive comments are welcome!
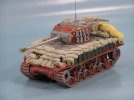
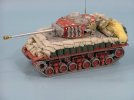
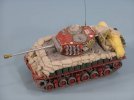
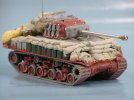
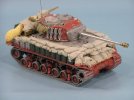
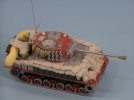
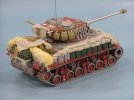
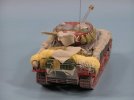
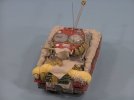
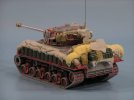
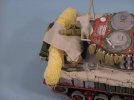
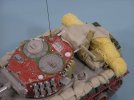
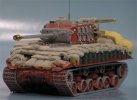
That's it for Now... 8)
It took longer then I planed but the first half of this build is done....more like 99.8% done.
Overall I'm quit happy with the results. While not a perfect Sherman (since there is no such thing), I think it's ok. But building it is the easy part. Now come the make or break point...Applying the finish. :-\
No matter how good your build is a poor finish will detract from the overall impression of the finished model.
But enough of me blabbing...on to the pictures. Hope you enjoy them and as always constructive comments are welcome!


That's it for Now... 8)
S
ScaleModelMadman
Guest
Looking really good.
Nothing like a heavily laden Sherman man! ;D
Nothing like a heavily laden Sherman man! ;D
panzerace007
New Member
- Joined
- Dec 17, 2010
- Messages
- 2,118
ERIC,
This Sherman has a Mean lookin' stance !! I dig it !! I can't wait to see it painted-n-weathered & I can't wait to see it inna couple of weeks at th AMPSCV meeting !! It's turned out Great !!!
This Sherman has a Mean lookin' stance !! I dig it !! I can't wait to see it painted-n-weathered & I can't wait to see it inna couple of weeks at th AMPSCV meeting !! It's turned out Great !!!
f2k said:It's looking better and better...
Forgive me if I missed it somewhere in the thread, but what's the red stuff covering the tank?
Errains, I really understand you when you say that you are a slow modeller ... simply it is impossible to get a top nocht detailed model like this one of yours in "Speedy Gonzalez Modelling Mode" ... the sandbags are a-we-so-me
Awesome build, Errains...
RG
errains
New Member
- Joined
- Apr 10, 2011
- Messages
- 288
Thanks everyone for the Kool words!
@Ken; When I checking out reference photos in books and on the net I'm always drawn to vehicles that are piled high with the fix'ns of living in the field, it just adds so much to the personality of vehicle, the human touch I guess. I get the felling that will become an fundamental part of my future projects.
@noname; It probably will as bad as I am dragging feet about starting to finish this tub it could vary well take another year....I sure hope not!
@Scott; I think you might be right. I'll taker her back to the bench and add a few more for good measure.
@Quaralane; Thanks it has been a long time in coming!
@Eric; She was done at the last AMPSCV meet. But if you think it would be Kool I'll bring her back for some more Q&A.
@Frank; Dude! Thanks for the kind words on you E8 post, I'm flattered and a bit surprised.
@JELLY!!!! (love that call-sign!); Thanks for fielding that question I seemed to have missed that one somehow....sorry about that f2k. Yeah I just don't think building fast or even somewhat quicker is in my blood. Right now I'm trying to build up 3 OOBs so I can practice my finishing techniques , but man I just keep doing non-OOB things to them...I'll never learn. BTW I'm rereading your post to pick up some your painting and weather methodology. (and I was not offended by the chicken, thought it was rather funny!)
@downhell; Thanks Bro...I'm impressed I got it this far!!!!
13aceofspades13
lets kick some tires and lights some fires!
- Joined
- Oct 12, 2010
- Messages
- 2,292
that is awesome, the thought of using sand bags as armor, the model looks awesome, excellent job with the details.
Cave_Dweller
New Member
- Joined
- Mar 18, 2011
- Messages
- 812
That is certainly an excellent model, very bold and different. I love it. I especially like how you showed how to make handle bars and lift bars, that's good idea I've never considered before and I'm eager to get home and try thinking outside the box like that to make my own little details for models. Very nice and I'm eager to see this bad boy painted up and covered in filth and battle damage!
geegad
New Member
- Joined
- Jun 8, 2011
- Messages
- 1,669
nice been a kiss arse but this is one of the best model ive seen.. the work you've put into this is unbelievable
i can only aspire to this level of modelling
just cant wait to see it painted
real top marks 10/10 for this work of art...............i will leave you to be sick now sorry
geegad
i can only aspire to this level of modelling
just cant wait to see it painted
real top marks 10/10 for this work of art...............i will leave you to be sick now sorry
geegad
schweinhund227
New Member
- Joined
- Jun 24, 2009
- Messages
- 2,511
Ok ! Nice build... what is the RED stuff ??? it seems to be adding texture ? if I am correct ! you basically have it everywhere....
Never seen this color before.... and it doesn't look like RED Bondo .... what is it my friend ?
the Tank is Nuts !!! Luv it ! can't wait for the paint to land on it !!!
Norm.
Never seen this color before.... and it doesn't look like RED Bondo .... what is it my friend ?
the Tank is Nuts !!! Luv it ! can't wait for the paint to land on it !!!
Norm.
S
ScaleModelMadman
Guest
schweinhund227 said:Ok ! Nice build... what is the RED stuff ??? it seems to be adding texture ? if I am correct ! you basically have it everywhere....
Never seen this color before.... and it doesn't look like RED Bondo .... what is it my friend ?
First or second page Norm:
errains said:Part 4: What a Bloody Mess!!
Actually that would be a muddy mess!!
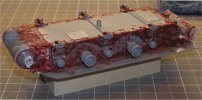
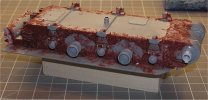
Since I’m basing this build off of a photo that shows heavy accumulation of mud I decided to give my Sherman a heavy coat of mud in the suspension areas. I understand many builders prefer not to do this feeling that inclusion of such a heavy effect is meant to hide poor building technique. For myself I follow the idea that armored vehicles move more through terrain, then over it and therefore becoming caked in mud and dirt. After reading about this technique in the recently published book I figured I would give it a shot.
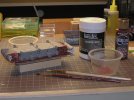
The picture below shows the materials used for applying a coat of mud. Both the Liquitex and paint are acrylic and therefore easy to use and was purchased at local craft store (Michael’s). The Liquitex ran about twenty dollars for the size shown and should last a lifetime. When applied it is white in color then dries more on the clear side making it hard to see when adding layers. By adding just a drop or two of the Heritage Brick acrylic paint makes it easier to see, but any color will work.
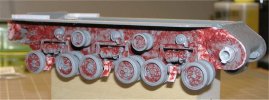
This Mud was applied in three layers. The first layer was to see how workable the Liquitex would be on the plastic of the kit, which was quite easy. One good thing about using this is that once dry, after about 24 hours, you can sand it and carve it with a hobby knife to further shape it. The second layer was applied before attaching the bogy assemblies.
Once the second layer was dry and the bogies were attached, the third layer was applied. Attention was paid to adding accumulation on the upper surfaces of the bogies as shown in the reference photo.
Once the tracks are assembled and attached, a fourth layer will be applied for final effect. This mud effect will be painted and weathered accordingly during the finishing process. Also built during this process was the exhaust deflector with styrene details added.
errains
New Member
- Joined
- Apr 10, 2011
- Messages
- 288
Hey Norm,
As Ken pointed out the red on the lower hull is for mud effects. But the red in the turret is actually bondo it was use to correct my first attempt at applying a texture which was a bit over done. The bondo helped to smooth it out a some.
Thanks Ken for feilding the question.
I haven't started painting yet as I'm currently building the display base and figure to go along with it. I'll be posting an update soon.
I wish to thank everyone for their nice comments....So Thanks! ;D
errains
New Member
- Joined
- Apr 10, 2011
- Messages
- 288
A Quick Update
No I haven't started painting the Battlewagon yet..... ???
Got side tracked and started working on the display base.
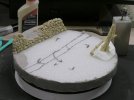
The stone wall was build using Woodland Scenics Medium, Coarse, Extra Coarse Buff Talus...aka Rocks. They come in 10oz bags for about 4-5 buck, so not to bad of a deal. The wall was built stone by stone so it took a bit of time.
Will Thats it for now...Enjoy
No I haven't started painting the Battlewagon yet..... ???
Got side tracked and started working on the display base.

The stone wall was build using Woodland Scenics Medium, Coarse, Extra Coarse Buff Talus...aka Rocks. They come in 10oz bags for about 4-5 buck, so not to bad of a deal. The wall was built stone by stone so it took a bit of time.
Will Thats it for now...Enjoy
Similar threads
- Replies
- 18
- Views
- 2K

