Bronco Buffalo MPCV " BoneCrusher"

Water soluble flux is where it's at!!!! Solder flows soooooooo much better on the brass
 
10 Down....6 more of these and another 15 total structures.....Friday night guys.....Friday night
 
Dude! This is an awesome thread to be sure. I recently added on of these hulking brutes to my stash, and a friend has offered to share pics of his time in these things in Afghanistan. Tell me- would it be possible to sub out brass rod for slat armor? I'm under the impression that the real thing has bars, not slats- or am I all wet?

Cheers-
chuk
 
Yeah, I'd say it could easily be substituted. You would need a VERY accurate measurement of the holes in the kit supports. Plus, you'd wanna have a little jiggle room to allow for solder or glue to take hold.

The actual bar and slat armor varies on manufacture dates and companies. I've only seen round rod but I know there are square bar versions, which I believe were the early adaptations. I'm not part of a bomb unit, but conveniently there's an EODMBU here at my base and they're pretty friendly so I could always ask them for references.
 
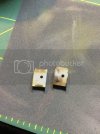
16 of Assembly (a) and 1 of Assembly (c) complete. 8 more assemblies till I can touch styrene again!!

photo-16.jpg
 
2 more assemblies to build....small ones. Will be done when I get home from work. Midnight tonight. Then building the dig arm!!
 
The slat armor is completely soldered. The last unit fought me by getting soldered to the jig, all I need to do now is wash in laquer thinner and then rinse thoroughly in DI Water to remove residues....I'm hoping to prime these soon so they can cure in the sun to outgas fully. I'm glad the slats are finished though. It was somewhat a terror :-\
 
Claw finished, mirrors finished / soldered and sanded, small PE detail pieces added, fingertips burnt :)

All I need to do is build the armature , mock up the arm in extended position, take measurements and saw up a frame for the base. I'm planning the entire rig to be primed by tomorrow night.
 
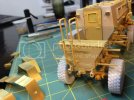
Sanded up the mirrors before i attached them to the housings.....they look very clean after the solder and are outstandingly strong.
image-1569.jpg
Attached the ID plate and the other bits and bobs to finish it all out really....i only have a few more parts to attach such as antennae and lighting.
image-1877.jpg
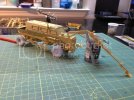
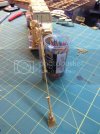
I built and positioned the arm just the way I would want it on the display base.....I'm gonna need a 19" long 8" wide base to house this monstrosity. I'll need input from the community when the time comes. Scott's Libya build will be an inspiration for sure.
image-1122.jpg
image-331.jpg
 
Man you really made short work of this kit! Looking forward to seeing the paint start to tie it all together, looking good so far!
 
Back
Top