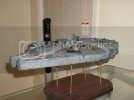
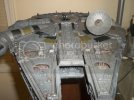
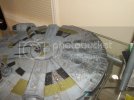
Corellian freighter
- Thread starter ulvdemon
- Start date
Quaralane
Well-Known Member
- Joined
- May 22, 2009
- Messages
- 11,263
--nods--
Your color layout is good. Just a slightly different set of colors could make this pop in all the right ways.
You may also want to consider making the main color of the hull something other than the original plastic or white. It can help with the rest of the colors as well
Your color layout is good. Just a slightly different set of colors could make this pop in all the right ways.
You may also want to consider making the main color of the hull something other than the original plastic or white. It can help with the rest of the colors as well
Splashcoat
New Member
- Joined
- Oct 9, 2010
- Messages
- 421
If I could offer up another piece of advice, try using a better grade of masking tape for the actual paint demarcation lines. If you lay out your design with high quality tape (Tamiya modeling tape is my favourite) and then use regular, inexpesive masking tape to cover the rest of the model from overspray, you'll find that the modeling tape will you a cleaner, tighter paint edge. Modeling tape is thinner and more flexible than painter's masking tape and will follow surface irregularities much more closely.
Check out the "go faster" stripes I applied to a Viper MK2 model I built for an example of the technique:


I also agree with Quaralane, a base coat of paint is an essential foundation to start the rest of the paint scheme. Even if you just apply a thin layer of grey sandable primer from a rattle can, you'll find that the subsequent layers of paint will have something to grip to and give you a more even finish.
Keep it up and don't get discouraged. This forum is a great resource and it's full of people willing to offer well meaning, constructive advice.
Cheers.
Check out the "go faster" stripes I applied to a Viper MK2 model I built for an example of the technique:


I also agree with Quaralane, a base coat of paint is an essential foundation to start the rest of the paint scheme. Even if you just apply a thin layer of grey sandable primer from a rattle can, you'll find that the subsequent layers of paint will have something to grip to and give you a more even finish.
Keep it up and don't get discouraged. This forum is a great resource and it's full of people willing to offer well meaning, constructive advice.
Cheers.
ulvdemon
Active Member
- Joined
- Jul 16, 2012
- Messages
- 297
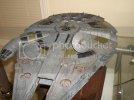
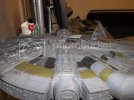
Thank you all again. If my previous answer sounded snippy, I apologize. The current paint scheme was made using Model Master Acryl Flat whitewith acouple drops of gunmetal. The green is emerald green and the dark is gunmetal. It is still shiny due to the glosscote. The masking was with liquid mask and Tamiya tape. I am on the fence on the liquid mask. So I now have it soaking to strip the paint and will go for try number 3! Please tell me I'm not the only one to go through this!!!

Splashcoat
New Member
- Joined
- Oct 9, 2010
- Messages
- 421
ulvdemon said:Thank you all again. If my previous answer sounded snippy, I apologize. The current paint scheme was made using Model Master Acryl Flat whitewith acouple drops of gunmetal. The green is emerald green and the dark is gunmetal. It is still shiny due to the glosscote. The masking was with liquid mask and Tamiya tape. I am on the fence on the liquid mask. So I now have it soaking to strip the paint and will go for try number 3! Please tell me I'm not the only one to go through this!!!

Ditching the liquid mask isn't a bad idea for this application; it's impossible to get a clean, straight line using that stuff.
For sure you're not the only person who's had to go back a few times to get the result that you're looking for, that's part of the learning process. I think my personal record is 6 strip-and-repaints before I achieved what I set out to do.
ModelMakerMike
"It's Slobberin' time""
- Joined
- May 28, 2011
- Messages
- 1,838
Oh yes, I have plenty of builds that I had to deal with more than once on the paint side of things. 
You are learning, and the more you do, the more you will learn.
You are learning, and the more you do, the more you will learn.
Grendels
Active Member
- Joined
- Nov 24, 2009
- Messages
- 9,092
For my current contest build, I stripped the paint twice before I got it right. This happens, and like the others have said, it is how you learn. The next time you go to build one of these, you won't have this problem.
Splashcoat is giving you excellent advice on tape. I have been using tamiya tape for a while now. Between that and silly putty I have about all the masking options I need. Masking fluid is nice, but it is hard to find one that works well. I still haven't found one.
Splashcoat is giving you excellent advice on tape. I have been using tamiya tape for a while now. Between that and silly putty I have about all the masking options I need. Masking fluid is nice, but it is hard to find one that works well. I still haven't found one.
ulvdemon
Active Member
- Joined
- Jul 16, 2012
- Messages
- 297
Came back to the evil that is this kit. I repainted it a Gunship gray and hand painted the green and the gun metal. This is actually the second attempt using the Gunship gray. the first go around the green was so bright, it hurt the eyes. So hopefully this go around, it works.
I am hoping to tone it down once I apply the dullcote and then I am going to use the Tamiya Weathering Master Set D I picked up for this kit.
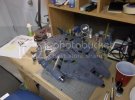
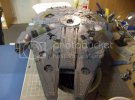
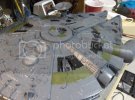
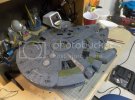
I am hoping to tone it down once I apply the dullcote and then I am going to use the Tamiya Weathering Master Set D I picked up for this kit.


ulvdemon
Active Member
- Joined
- Jul 16, 2012
- Messages
- 297
Re: Corellian freighter - additional question
I am thinking of using a wash of burnt umber in mineral spirits for the whole model? This will be after I drybrush some of the surfaces to show some wear around panel lines. Any thoughts on this or suggestion for a different color other than burnt umber?
I am thinking of using a wash of burnt umber in mineral spirits for the whole model? This will be after I drybrush some of the surfaces to show some wear around panel lines. Any thoughts on this or suggestion for a different color other than burnt umber?
amateurmodeler
Member
- Joined
- Aug 10, 2010
- Messages
- 529
“I have not failed 10,000 times. I have not failed once. I have succeeded in proving that those 10,000 ways will not work. When I have eliminated the ways that will not work, I will find the way that will work.â€-Thomas Edison
Good job on sticking in there with it.
Good job on sticking in there with it.
ulvdemon
Active Member
- Joined
- Jul 16, 2012
- Messages
- 297
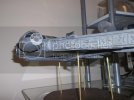
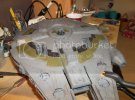
As for sticking with this build, here is some pictures of it after I applied the wash last night. As in all things doing with building a model, Murphy paid a visit. A piece that attaches from the inside that is visible, one of the circle indentions on the mandible popped out. So I had to seperate and repair. The wash is heavier on the top then the bottom, which was planned. This ol' bucket has more less been sitting around for a bit.
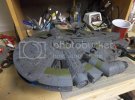
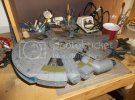
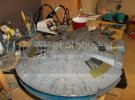
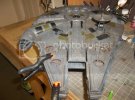
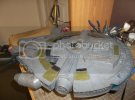
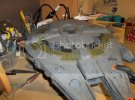


YOULI
That which does not kill us makes us stronger !
- Joined
- Nov 28, 2011
- Messages
- 947
Bravo. You've done it. You didn't give up.
Now I would have seen a lot more of washes and paint here and there, especially on the "trenches". The recesses can be treated with oil or acrylic washes very easily. As I already said months ago, it really makes the difference.
Now I would have seen a lot more of washes and paint here and there, especially on the "trenches". The recesses can be treated with oil or acrylic washes very easily. As I already said months ago, it really makes the difference.
Similar threads
- Replies
- 245
- Views
- 35K

