Group Build: Historical Warships of WWII

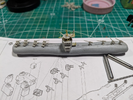
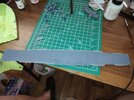
I admit that I underestimated the complexity and detail of this kit when I bought it. That said, I'm digging it, nothing makes you flow down like so much hyper-thin PE!

1738189307322.png

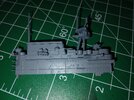
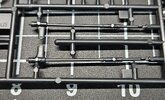
It is a bit blurry at the top there, but that indicates another error on my part. Those three tubular supports should all be at the same height, not sure if I installed the wrong part entirely or if I did not connect it correctly. No big deal to resolve of course, but that sideways bit in the center needs to sit on top of those posts. Going to wait until I put more PE on before I do that.
 
I do have a 1/350 Yorktown to finish, but I think this might be a chance/excuse to get this done instead

1738207688898.png

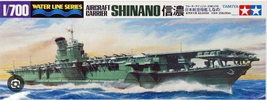
It is an interesting subject in that it started out as what was supposed to be the third ship in the Yamato-class after the Yamato and Musashi.
However, after the Battle Of Midway loss of 4 of it's carriers, and the dawning realization that battleships were no longer they key to victory, the partially completed hull was turned into an aircraft carrier.
She was sunk by the American sub Archerfish 10 days after commissioning on it's first mission sailing to Kure
Like the other Yamato class it had a design flaw which helped it sink so quickly and unexpectedly despite what should not have been as bad damage wise

Figured it should look good sitting next to the Yamato in the display case
 
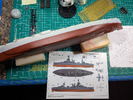
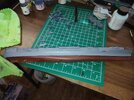
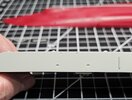
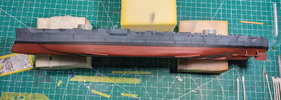
Took a break from the superstructure to work on the hull. I spent HOURS sanding the main seam underneath, frankly it needs more work, but the parts that show...will not show unless it is picked up and turned upside down.

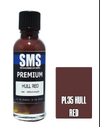
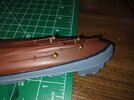
Instructions say to use Tamiya XF9, which is really a brown with very little red. So I think that Trumpeter and Tamiya are both wrong. I mixed it about 50-50 with XF7 which is extremely bright red and it is still a bit on the brown side of red, but I reddened it a lot so calling that one done too.

1738246095308.png
That light gray that is similar to the plastic is just primer, so ignore the color of it. I am thinking I need to complete the sides and clear them before I start putting the details onto the deck. What do you shipbuilders say? How to you keep the hull colors from getting on the superstructure? There
is no clear delimiter, well there is, but it is not a solid/smooth thing, do I need to cut a hundred little bits of tape to mask that?

The reason for this is the choice to paint measure 22, where there's a dark blue side with lighter blue upper and even gray parts. The guide shown above is what she wore at Iwo Jima and Okinawa (I think) and I'm wanting to attempt the more difficult D-Day colors.

Vertical Surfaces:
Navy Blue 5-N
To be applied to the hull to the height of the main deck edge at its lowest point. The upper edge of this Navy Blue are should be horizontal.

Haze Gray, 5-H
All remaining vertical surfaces and all masts and small gear.​

Horizontal Surfaces:
Deck Blue, 20-B.
All horizontal surfaces above the siding.​

============

Does this picture (from wikipedia) represent the correct application of colors to you?

1738246569348.jpeg

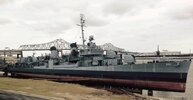
The navy blue stripe would not have that departure line the way it does on this destroyer of course, so it would go all the way up the sides? The black water-line stripe shows how dark the navy blue really is (if accurate), I cannot find any color photos of her in this color scheme, the black& white ones are just not clear enough. I'm thinking I'll cheat a little and make more contrast between the two.

Last question for now, thanks in advance, this is new subject matter to me...
Does the horizontal surfaces being deck blue include the top of the fighting towers and turrets, or just the main flooring/deck areas?
 
Thanks for sharing your work, and asking these questions in such a methodical way! I don't have answers, but your project is making for an excellent primer for others, like me, of a ship build!
 
Took a break from the superstructure to work on the hull. I spent HOURS sanding the main seam underneath, frankly it needs more work, but the parts that show...will not show unless it is picked up and turned upside down.

Instructions say to use Tamiya XF9, which is really a brown with very little red. So I think that Trumpeter and Tamiya are both wrong. I mixed it about 50-50 with XF7 which is extremely bright red and it is still a bit on the brown side of red, but I reddened it a lot so calling that one done too.

View attachment 136167
That light gray that is similar to the plastic is just primer, so ignore the color of it. I am thinking I need to complete the sides and clear them before I start putting the details onto the deck. What do you shipbuilders say? How to you keep the hull colors from getting on the superstructure? There
is no clear delimiter, well there is, but it is not a solid/smooth thing, do I need to cut a hundred little bits of tape to mask that?

The reason for this is the choice to paint measure 22, where there's a dark blue side with lighter blue upper and even gray parts. The guide shown above is what she wore at Iwo Jima and Okinawa (I think) and I'm wanting to attempt the more difficult D-Day colors.

Vertical Surfaces:
Navy Blue 5-N
To be applied to the hull to the height of the main deck edge at its lowest point. The upper edge of this Navy Blue are should be horizontal.

Haze Gray, 5-H
All remaining vertical surfaces and all masts and small gear.​

Horizontal Surfaces:
Deck Blue, 20-B.
All horizontal surfaces above the siding.​

============

Does this picture (from wikipedia) represent the correct application of colors to you?

View attachment 136168

The navy blue stripe would not have that departure line the way it does on this destroyer of course, so it would go all the way up the sides? The black water-line stripe shows how dark the navy blue really is (if accurate), I cannot find any color photos of her in this color scheme, the black& white ones are just not clear enough. I'm thinking I'll cheat a little and make more contrast between the two.

Last question for now, thanks in advance, this is new subject matter to me...
Does the horizontal surfaces being deck blue include the top of the fighting towers and turrets, or just the main flooring/deck areas?
This is what I used on the LST. It looks very close to the actual anti-fouling red.

Screenshot (124).png
 
@Edbert she is looking just fine! The best way to tackle painting this beast is to paint all your horizontal surfaces, let cure then mask. Yes you will have to use some small bits of tape for the tight areas around the gun shields and deck bits, but it will be an easier task and quicker than you think. Then you can paint away with all your vertical surfaces.
 
@Edbert I apologize I missed a good portion of your question regarding the Measure 22 scheme on the hull of the ship. The hull should be completed before you paint the horizontal decks and surfaces. First, mask off your lower hull up to the bottom edge of your hull red and mask above to protect the upper hull to spray your boot stripe in black, once that has cured, mask off the boot stripe taping edge to edge and remove the upper masking. So at this point you will paint from the top of the boot stripe Hazy Gray 5-H, and let it cure well. Final step of the hull is mask the top of the horizonal line using the lowest point of the deck which I am assuming are the gun placements of the secondaries. Mask that line parallel to the top of the boot stripe, this will be painted the final color Navy Blue 5-N. Once cured up, you can cover your hull work to start painting your Deck Blue horizontal surfaces and decks. I hope I explained this well enough, but if there are any questions, let me know and I will see if I can post some images of the process.
 
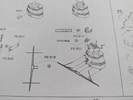
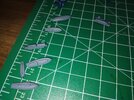
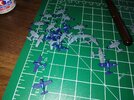
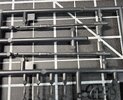
I'm feeling an urge to paint all the rubber life-rafts (30 of the little buggers) a bright color. Not neon orange or yellow, but something of a different color than the steel, to provide interest to the eyes if nothing else. Would that be a mistake? Seems most builders paint them the same color as the armor they mount to, you can see some of them stacked up in the 1st picture below.

I've started on the secondary and AAA, lots of those too. thinking I'll mount them near the end, just before paint to avoid breaking or knocking them around.

1738423561502.png

I am DEFINITELY leaving PE-B18 until the end, no way that remains unbent with so much assembly remaining.

1738423796107.png
 
I'm feeling an urge to paint all the rubber life-rafts (30 of the little buggers) a bright color. Not neon orange or yellow, but something of a different color than the steel, to provide interest to the eyes if nothing else. Would that be a mistake? Seems most builders paint them the same color as the armor they mount to.
Well it is your model, so you could do as you like. However, if you'd like it to be closer to what may have been, you can paint the stacks with some variation such as painting lower rafts in black rubber as they would be unpainted and newer with one or two on top either the vertical or horizontal colors of the deck/structure they are mounted to. The interior you could paint tan or wood color simulating the bottom structures of the rafts. This will give you enough variation to make them more interesting. HTH
 
Just noticed your 'rolling pins' in the AAA photo.
I have the same set, the best, great for bending curves... And if you have a smooth glass or ceramic surface with no give, they do a great job de-wrinkling and flattening too! :cool:
 
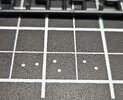
So it was a busy week and haven't been able to make it to the bench till today. Starting back up with lower hull work. The pin marks were filled and sanded smooth, looks good and moving on to fit check of rudder and shafts. The rudder is fine, but strangely the shafts have pin marks that are just big enough to see, but sanding them away isn't an option.
1000013028.jpg
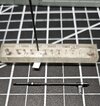
So it was back to the micro pin and die set to harvest some proper sized manhole covers to fill them in.
1000013032.jpg
Worked like a charm, just a light sanding after they cure up. Test fit of the first shaft was ok, so capped the pin marks and did the others on sprue so that will be ready moving forward.
1000013029.jpg
1000013033.jpg
Now moving on to the upper hull to fill location holes for prop guards where the plastic parts will be replaced by photo etched parts.
1000013035.jpg
There will be a lot of details that need to be removed on the upper hull for very nice photo etched plating over the torpedo plating. I will update on final lower hull completion and upper hull work before they are put together and seam checked.

If I start posting too much progress photos and info along the way, someone please slap me and let me know, got to share the thread with all the other great builds going on.
 
I'm feeling an urge to paint all the rubber life-rafts (30 of the little buggers) a bright color. Not neon orange or yellow, but something of a different color than the steel, to provide interest to the eyes if nothing else. Would that be a mistake? Seems most builders paint them the same color as the armor they mount to, you can see some of them stacked up in the 1st picture below.

I've started on the secondary and AAA, lots of those too. thinking I'll mount them near the end, just before paint to avoid breaking or knocking them around.

View attachment 136366

I am DEFINITELY leaving PE-B18 until the end, no way that remains unbent with so much assembly remaining.

View attachment 136367

Depends on whether you are concerned about being a slave to "historical accuracy" or painting what you like or what looks good to the eye.
Most people would probably not bat an eye at lifeboat colors being different
In the end, it will be sitting on your shelf, so do what you think you would like best

Instead of a different color, may just a lightened color of the hull color

As for historical accuracy, I can't speak to your particular color scheme for that measure, but I think the life rafts were made to blend in with the overall "camo" scheme/measure

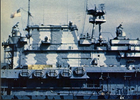
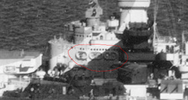
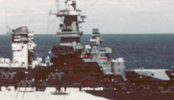
For example, in this pic of the USS Hornet, the life rafts appear to be the same color as the section of hull they are on, but they maybe reflect a bit more, catch more light, or just the nature of being a different material, they appear to look a tad lighter and that makes then stand out more1738558079914.png

On the other hand, here in this "dazzle" camo measure they clearly intended to be the same color as the section behind it

Not sure if actually painted that color here on the USS Iowa, or the rubber/vinyl or whatever is actually made in that color

In these schemes I guess it was a little more important to avoid breaking up the intended effect

1738558806675.png

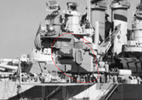
although in this extreme case on the USS North Carolina, it is obvious they are painted to not break up the camo and each lifeboat matches the sections color, even having multiple matching colors when crossing sections

1738559086163.png
1738559296843.png
1738559384766.png
 

Latest posts

Back
Top