Group Build: Historical Warships of WWII

I'm tossed between 3 and 9 o'clock. 12 looks too much like just wood stain and 6 looks a little too sun bleached for the time period.
 
I considered a wood deck for my kit, but the wood decks offered in 1/700 look a little too out of scale for me. I used them before and they all fit really nice and were easy to use, they just gave a clunky look to the model after it was finished.
 
@scottrc78 Yes, it is very hard to scale down the deck for 1/700 kits to where they don't look out of place. Even at 1/350 scale this can be an issue.
 
Last edited:
Gonna be some primer sprayed tomorrow.

1739242603265.png

A bit disappointed that the plastic part of the catapult (steam piston?) is skewed, it must have slipped while the CA dried.

Still working on an acceptable finish on the decking, the wash worked great is some areas, not so much in others. Plus I'll have to hand paint some of the bits that are gray not blue since the wash has impacted them. Right now I am wishing I had not chose measure 22, hopefully the end results will change that opinion.


Edit to add:
Those deck guns (5-inch?) are really wobbly, thinking I should glue them to whatever elevation is appropriate. What do you ship guys do, have them varied, or all pointing level, or something like 15-degree elevation?
 
Edit to add:
Those deck guns (5-inch?) are really wobbly, thinking I should glue them to whatever elevation is appropriate. What do you ship guys do, have them varied, or all pointing level, or something like 15-degree elelevation.
Actually I believe some variations in the deck blue will give a more realistic effect. As far as the 5" guns, if the model is static, I always pose them in a neutral position. That pretty much goes for all the main armament as well as secondaries and AA.

If modeling in a dynamic diorama, then I will play around with possible positions to reflect action at sea. HTH, you're doing an outstanding job on this Texas build Edbert!
 
I am still working up confidence to paint my deck. So many bits and bots on the deck that its a real challenge to mask and AB. I looked for some aftermarket masks but all the vendors are saying June delivery.
 
@scottrc78 It's the tiny details on the decks that slow things down at times. I have to remind myself during those masking times, "Rome wasn't built in a day." I find as I'm clicking along, it actually gets easier not trying to rush it.
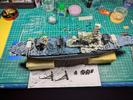
The PE is my biggest slow-down. I was worried about so many cuts, but the PE for this ship is the thinnest I've yet seen, so an old #11 slices fine. It does bend too easilly IMO, meaning not where it is supposed to bend, the railing is soooo fragile. Then again, if this were thicker 1/35 scale PE I'd be cursing how hard it is to cut. So, yeah.

I'm also wondering, why are the seaplanes cast in clear, is it just for the molded-in canopy? I understand why the planes are on their own sprue, but why clear? Clear plastic is very brittle, and harder to paint opaquely.

Just an update on where I'm at...

1739489969320.png
 
So I have started the IJN Shinano...but, I really felt obligated to finish up some other 1/700 ships that were close to done, but set aside for one reason or another.

I had the USS Hornet waiting to have the elevators plugged in and the decals for the deck as well as a whole slew of anti-aircraft guns to add

Disaster struck with the USS Hornet as the Trumpeter decals were brittle and broke into a whole lot of smaller pieces. I tried fitting them together best I could but it was a losing battle and in the end I will probably wind up removing then, and paint the lines if I can't clean them up sufficiently with paint/weathering. At the very least that small thin line has to be extended with paint

1739493280891.png

and finally got the boot stripe painted as well as the deck crane

1739494192684.png

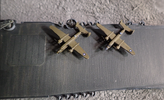
On the bright side, I am happy with the first few tests for the B-25s and can now move on to the rest of them

1739493460235.png


Unfortunately they are back heavy and will need to be glued to the deck to stand properly. I wish they were nose heavy to stand properly on their own as I kind of like being able to periodically rearrange positions like having more of the deck empty as most had taken off, or having them all packed in en route etc... Will have to figure out the configuration I like best before gluing
1739493598262.png

Then I had the USS Yorktown to finally try finishing once and for all. For quite a long time I did not have the elevator decks decaled, so I finally got around to that as well. Had to paint the dashed lines since I either lost, or maybe ran out of decals (I remember having a similar issue as the Hornet and wound up losing a few sections to replace others)
1739493948528.png
 
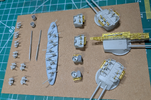
The large black and bare parts are just resting there, a dry-fit. The larger front section is missing at least 15 more bits of PE. The rear structure is missing the big flat grid, I assume a radar non-dish of some kind. Then there's another 30 or so single barrel 20mm to build, the entire anchor/chain/grille/winch etc. assembly too. All the cranes (those are pretty cool), the other black sub-structures in the foreground. Those clear (Wonder Woman?) airplanes, and most of the gray bit above deck will need to be repainted even before weathering.

That last part I intend to keep subtle, but not pristine, as I can try to imagine she would have been leaving the ETO, before heading to a re-fit/re-paint, which was before heading to Iwo Jima and Okinawa.

Edit to add: speaking of weathering, Blake just held class.
 
Last edited:
The PE is my biggest slow-down. I was worried about so many cuts, but the PE for this ship is the thinnest I've yet seen, so an old #11 slices fine. It does bend too easilly IMO, meaning not where it is supposed to bend, the railing is soooo fragile. Then again, if this were thicker 1/35 scale PE I'd be cursing how hard it is to cut. So, yeah.

I'm also wondering, why are the seaplanes cast in clear, is it just for the molded-in canopy? I understand why the planes are on their own sprue, but why clear? Clear plastic is very brittle, and harder to paint opaquely.

Just an update on where I'm at...

View attachment 137888
Your PE work is very good. I find that a very shard #11 blade is great to both cut and bend the PE. I can't remember, but are you using Tamiya brand paints?
 
Your PE work is very good. I find that a very shard #11 blade is great to both cut and bend the PE. I can't remember, but are you using Tamiya brand paints?
Yes, 100% XF so far.

I've had some great success with the PE and some near disasters too. The quality of my build varies to a great degree depending on where you're looking. I was mentioning it as a slow-down not a problem. By biggest issue with this kit was either the bottom of the hull or the fact that my deck laminate was the wrong color.

New topic...
Do any of you have a good source for the rigging? I've collected lots of pictures from other builders, but was hoping for something like a diagram. I cannot find one.
 
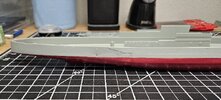
Just a quick update to my build. The upper and lower hull went together with little issue. However, there were a full spots along the seam that needed a little extra sanding to get them level.
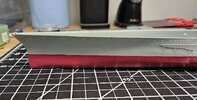
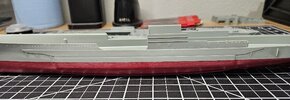
Starboard side of Indy has a lot more going on with covered portholes, bilge and discharge piping, and a long span of piping that needs to be removed and reconfigured with PE and scratch built plumbing. Here I have striped it all down and gave everything a good level sanding with 220/320 and a final wet sanding with 600 grit so primer and paint will have some bite, but level well.
1000013485.jpg
1000013486.jpg
1000013487.jpg
 
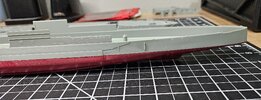
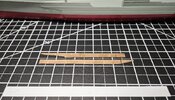
Port side received the same treatment, but was a bit more straight forward and cleaned up well. I also prepared sheet styrene strips for the torpedo belt which was a little thin once the PE heavy plating goes on above it.
1000013488.jpg
1000013489.jpg
1000013490.jpg
1000013492.jpg
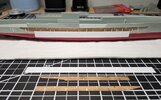
Next steps will be to place the shafts on, build up the torpedo belt, add the PE plating and scratch plumbing, and add all the proper PE portholes and covers before moving on to the main decking. More to follow soon.
 
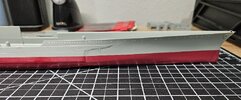
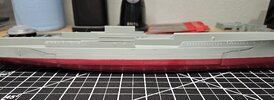
So just a quick update on the work going into the starboard side of the hull. The PE plating is on, but a few rivet plates that have to be added. The cleaned up torpedo belt is on and all the bilge/discharge plumbing more to scale is mounted. I just have the long round piping from aft midship to bow to go. It's a bit tricky, but going a bit smoother than expected.
1000013531.jpg
 

Latest posts

Back
Top