Jagdturret

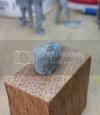
I'll just modify her face . It takes so little at 1/35 th.


I still have a bunch of Hornet heads on hand and like 6 or 7 more sets on back-order @ HLJ .
I'll just have to see what will stay and what will get swapped out with these additional figs ..

So what are you working on right now ?
Are you going to post some pics ?
 
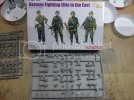
This is the other Dragon set labeled as Gen 2 :


20160629_143106_zpskaryrgmg.jpg


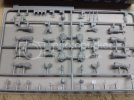
The detail is good , but it's no different than the other standard Dragon kits .
It's certainly not deconstructed and detailed like the other one :p


20160629_143117_zpszhoykpnw.jpg


Dragon's good at being less than loyal to themselves :(

Just something to keep in mind if you're ordering stuff


Hmmmm.. I guess the " gear " is Gen 2 , not the people ( sneaky ) .... . . seems just like " Gen 1 " gear ::)
 
Yeah, that was sneaky. Dragon is a little bit creative with naming kits.

Im doing figures, British dudes. Trying to work out a method. No pics at the moment.
Im painting 6 of them. One by one and changing a little between.
A method im exprementing with now is:

1. White basecoat
2. Thin coat with other colors so basecoat bleeds throug on higlight spots.
3. Citadel dark wash (thin or straight out of bottle)
4. Some highligtning.
5. Dry brush with bright pigments.
6. Flat clear

Trying to wash faces with rust wash. Pretty ok if deluted right.

Well, ill post them when all 6 are done.
 
Interesting .
Look forward to seeing it !


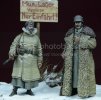
Check this Awesomeness out -


35064-1.jpg

Link to the Armorama page : http://www.armorama.com/modules.php?op=modload&name=News&file=article&sid=22711&utm_source=Armorama+News&utm_campaign=67b6423834-RSS_EMAIL_CAMPAIGN&utm_medium=email&utm_term=0_340b75aa74-67b6423834-305722769
 
20160629_191042_zpsazgbqn2v.jpg


-- It's a start . This doesn't include the armored car crews ( 6 men total ) or the civilians , - or the Panther crew
( looks like I might need to eat some more yogurt ;) )


These two guys that are up front join the group behind the Sturmschildkrote and all the rest are back between the Panther and building and around the corner , on the steps and down the sidewalk -

20160629_191053_zpspmnlftja.jpg


I'm hoping these tank riders will work on the steps - might need some tweeks .
... and the others will be used as necessary . I'll definitely have a better idea once stuff gets standing :


20160629_191617_zpstyx0yzsr.jpg
 
... It's gonna be a minute 8)

Intermission Movie Time


[youtube]https://www.youtube.com/watch?v=296E57CxNw4[/youtube]
 
Yeah, pure awsomeness. Its all about the details... Patience is a virtue and so on... This hobby got a lot of dimensions.
 
. .. . I don't know about all that ..


-- I just know
images


That girl better have his money !
 
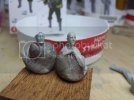
I forgot how time consuming all this figure clean-up is :p

All of these guys in this round are from Dragon - a lotta half-heads ::)

I'm not opposed to using the half-heads if they look good and have the appropriate expression , but so far it's been a steady Hornet Head swap ..


.. this face isn't bad but the expression is wrong .
He looks like he's waiting for you to decide on your ice cream order -
- not breathing Jagd fumes :
20160701_191753_zps7k8opgs1.jpg


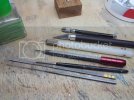
The tools used for figure clean-up :

20160702_130705_zpsxr11qhfb.jpg

... that little 1 mm flat file from Wave and the .25 mm needle file from Mineshima are indispensable ;)


20160702_123241_zpsfqlwyc8p.jpg
20160702_130619_zpsiu553ufv.jpg20160702_135053_zpsq6mry0iq.jpg

. .. . more Stick-In-Boot ,, gonna keep some of them ( I guess . For now )


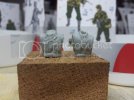
The detail overall is pretty good -
The torso at left is untouched and the one at right has been hollowed out for the Hornet Head install and the collars cut loose , and ( hard to tell here ) the strap has been defined further .
The torso at left will get the same treatment for the collars etc . - although that one barely needs it 8)

20160701_211747_zpswuwwxu3j.jpg


Now --- the madness that is the Panther K Quad Eight

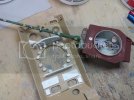
I added the additional magnets including another in the front of the turret to counter the " step-motor " characteristic of the setup -
20160703_092358_zpsyiy1hkma.jpg

It would be much simpler if there was steel on one side and a couple of magnets on the other - - - but I searched the parts bins when I began all this and couldn't find a suitable washer-esque component to bond to the hull roof ... and I wasn't going to fabricate one ( though I probably should have :mad: )

---- I welded those two pieces of 2 mm styrene scrap to the roof to stiffen it .
The magnets were bowing the roof up while trying to get to the turret , heh heh


How far she swings until she gets to the engine hatch :
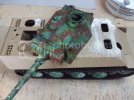
20160703_092541_zpsenedzmup.jpg

PLENTY


Hhmmmm - you can see an anomaly there inside the hull ;D


I had to cut the very last swing-arm free and make it poseable -
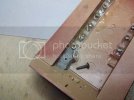

20160630_104057_zpswu9zrc21.jpg

Since it was welded in there ,
I had to cut it out and in the process remove the upper portion of the socket .

I just used Aves Epoxy Sculpt to construct a new socket ---- and a wood screw through a pilot hole is a done-deal .

The little piece of styrene tube stock is there to provide additional anchorage for the Aves ( has anchor holes drilled into it and its welded to the hull floor )
I always prefer mechanical bonds / interlocks with epoxy . They all have iffy adhesion with plastics -- that Locktite clear , 5 min epoxy was pulling away at that end . Not a surprise . I had to add to the first epoxy pour last week since 3 of the nuts were promptly jacked right out by the screw ;D -- again , not surprised .

Going the Aves /wood-screw route may be arguably the better method ....


I'm working on a little prototype for a torsion spring suspension unit for this - or other torsion bar suspension tanks .
It installs and works pretty much like the 1:1 version , and is adjustable .
 
I've added the phone talker's buddy and pointy man .
The phone-talker is Fig Prime . . he's the direct extension of the Sturmschildkrote's . - uh . milieu
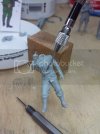
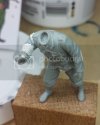


20160703_192755_zpsbmv2msco.jpg20160703_192714_zpshqsazlvz.jpg20160703_192628_zpsd8mwshp5.jpg


These five guys go in the 'point' of the triangle between the Panther & building :

20160703_192951_zps4ra9uk5h.jpg

.. . I needed some guys with 'active' binoculars ;

20160703_193635_zps8hdj90fv.jpg

They're from the only Zvezda fig kits I have . One tank crew ( in camo ) and one half-track crew .

I'll make the tanker up as the 223's commander .
The other guy is some zero from some group that's waiting around the corner - - -

.. he doesn't see what they're talking about and the one kid is trying to point it out
( the armored car guy is blowing him off ;D - mumbling nonsensical ... ;) )


The Zvezda figs are about like Dragon's -- I think they have a working relationship with them . At least in the past ???

20160703_193732_zpslsdajdvf.jpg


I like this face provided for that officer - but I'm using the Hornet at the left ;D fits right into what I'm hearing ;) :
you know those other two guys wouldn't need help :

20160703_192824_zpsulxnsgzg.jpg


This other guy's face is fine -- it'll be covered by the binoculars anyways :p :

20160703_193843_zpsmiv243ci.jpg

It depends on how well the joint at the hat works out

here's the back of the zero's head compared to the Hornet ones :

20160703_194648_zpsob74uj2q.jpg

not too bad . needs a little detail work but everything lines up and the facial features are really pretty good on these Zvezda examples .
 
I turned Pointing Man's head and changed his position , along with moving Faust-Dude and Margaret ( I call the waving guy Margaret ) :

20160704_134013_zps3wzrzk3p.jpg
20160704_134134_zpsa7zw6au7.jpg

.. . The guy holding everyone back is " Kojak "
Curly and Mo are at the point over there at the left of the Krote


... thinking 'bout making Fig Prime's buddy a radioman :


20160704_135433_zpswferx7so.jpg


I started researching man-portable transceivers of the time period .
Looks like the US was way ahead in that field 8)

If I do a back-pack unit on him , I'll model it on the American examples , maybe .

Anyone help me identify this type - ( if it's a real thing ) so I can research further :


radios.jpg
 
Ask @ Armorma and you'll usually end up with the answers ;D

The Feldfunksprecher b and c -
http://wehrmacht-awards.com/forums/showthread.php?t=409555

We're definitely doing this 8)

more : http://www.agder.net/la8ak/12345/n72.htm
 
I've been necessarily researching Wehrmacht uniforms --

heh heh , this vid was really helpful .
Cleaning up these figures and trying to determine where and what and how exactly things are strapped :

https://www.youtube.com/watch?v=kFjDgL4XRRw for full screen

[youtube]https://www.youtube.com/watch?v=kFjDgL4XRRw[/youtube]
 
I noticed that the rotisserie chicken I was pulling meat off of to make lunch , had 2 wings and four legs .
I don't know if it came that way or all that happened in the fridge . ???

Oh well .


Good time to build little plastic men ...


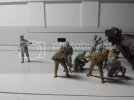
I'm doing these guys in their respective , interactive , groups . E. g. these , now 6 , guys near the front of the Panther .

-- Getting everyone built with necessary mods and ready for primer , then switching to some machinery . There's lots to choose from right now . Then back to the next group as we go around the corner .
Just to keep from getting burned out but keeping some kinda structured tempo .

It looks like there's going to be around fifty people total in the end . :eek:


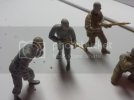
These guys are more of the same cleanup and head mods :


The Zevezda : really hard to make that neck joint look good , but I like that face - he might get used around the corner ..

20160704_171713_zpsdsfdkaa7.jpg

The Hornet replacement : ( Kriegsmarine )

20160704_172915_zpsfaoplnv6.jpg20160704_191833_zps4mbagjml.jpg


Fit is pretty poor . :p

. , . , and he don't get any of the big mess of kit to cover stuff up , like the infantry figs :(

20160704_212556_zps2pbrhwln.jpg


Beginning the 223 commander . all those cords were a pain :

20160705_092249_zpsbld7issd.jpg

20160706_165204_zps9kor3nty.jpg

Both of them have their binoculars positioned further down . The officer to fit the scene - but I dropped the other guy's down because I wasn't confident in making it look real with the thing up to his face .. ( well , ::) 'real' for little plastic men ;D )

That's pointy before I reposed his arm . They all need putty work at the joints now .


I'm going to be adding slings and be using separate strapping where it makes sense .

Probably most of the binocular straps .
Here's the horrid casting of this guy's binocular strap and eye-piece cover :p :p :


20160706_193142_zpsrba2nwa5.jpg


There's a whole lotta of Bomb-In-Belt TM

Only way to whip it !

20160707_225156_zpsudztdd38.jpg20160707_230824_zpslciflpmy.jpg


Lovely , Crisp Detail ! ;) :

20160708_120954_zpsrxzv3ktg.jpg


These sprue gates are horrendous -- they always require putty :

20160708_135010_zps4vkvvo7l.jpg

Uh ,, :p :p :p :p :

20160708_142647_zpso9syvfrl.jpg


Then we have pieces like this one -
Sharp , really decent molding . Enhanced with minimal chisel work . Really ideal :

20160708_162644_zpsks0ozf4u.jpg

But then you turn him :

20160708_163149_zpsbqzwmluy.jpg


There's a fair amount of this crazing -
You can see it well here at this arm joint , but they travel all around the surface and they have enough depth to be an issue .
The ceramic scraper is a perfect tool for removing them :

20160708_212341_zpszzdmlycs.jpg


Here's some progress :

20160708_121015_zps6sv1pcni.jpg


. .. . . still needs some hairs pulled out of there .


I've been picking at these 6 guys during the week , so I'll have some pics tonight of all of them on station Then I'm RUNNING straight to finishing the roof of the Panther ! I need a break from these peoples :p
 
A little further with the detail :


20160709_162958_zpsl3lmqjpy.jpg


Cleaning up the " fuzz " from the chisel-work is probably the most time consuming part .
One part cut to 2 parts scrape . And you have to be delicate in the scraping or you produce more fuzz and scratches :p
 
And then further with the belt and belt-loops ;


20160709_175359_zps6vo2gesb.jpg


.... you get the drift ..

They don't need to be done to this level all around since a fair amount gets covered up with equipment .
It still leaves a lot- a lot of doing :p but it's gonna be righteous ;D

From here on out , I'll just be posting them once they're built-up into their respective groups .
Hopefully once a week . Each group is ~ 4-6 figures .

I have plenty of PE stuff for them --- It will be used as logic dictates ;) The one thing I can see investing in is either the wet or dry transfer decals for the epaulets . I can see a real advantage over trying to paint all of them ...
 
Hey Q ;D

Some are better than others ... . I miss the Master Box examples :( . MB are far better all around .
The " Gen 2 " set will be next up after these 6 so I'm looking forward to some quicker assembly . Hopefully .

I crashed out pretty early last night - - so back at this for my Sunday . Although I have a lot of yard work to get done today too :p

Ciao
 
Here's that one torso from earlier , cleaned up and about to get built into Ponder Man
Before and after :


20160708_163149_zpsbqzwmluy.jpg20160710_142930_zpspil4t8xx.jpg
 

Latest posts

Back
Top