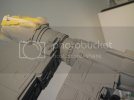
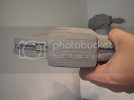
Merseajohn's Corellian YT-2400 'outrider' 1/72 Resin

Sorry I was away at work all day....

Wax paper is basically paper that has a wax coating. It is used for cooking so things like cookies don't stick to the surface. Over here in the states it is pretty easy to find.

Modelman Tom started a lighting business and in this video he is using it to show you how to get rid of hot spots:

Single-Density vs. Double-Density LED strips


Anything that will diffuse the light will work. I have used a plastic milk jug cut into the right shape to accomplish the same thing. The milk jug works really well because it has an irregular surface which will help scatter the light. The problem with LED's is that they are set up to focus the light right above them, which causes the hot spots.

Just keep in mind it will cut down on the amount of light that gets through.
 
JOHN,


WoW Dude ! I've lost track of this build :-[ ... This is starting to take off !! I'm tuned in Now !! I really Dig those Fans & the P.E. grills !! Light it up !!
 
Thanks for the kind words Q and hints Grendels! Igard I'v ordered from there before (large spool of fibre optics) and not been stung by customs...
And thanks Eric! Just put her together..she put up a good fight but I managed to tame her with 9 clips and 2 g clamps :eek: We'll see in the morning whether she's going to hold or not.. :-\
IMG_0661.jpg

Also this was unavoidable..letterbox size gap :mad: may try and pick up some aves to fill it? any idea were I can pick it up in the uk?
IMG_0666.jpg

The Gap Band - You Dropped A Bomb On Me
 
Yuk! What a huge Gap you have there Grand Ma!

I would bother with AveS for omitting this Big! Styrene strips sounds better! This is nuts!

Dude! I feel your pain!


Good luck with that!
 
Thanks Grendels, Scott and Norm man that gaps bad isnt it, do you think I'd be better off with steyrene strips? And how would you go about it? Put the strips down then filler over them? Aswell as that gap theres plenty more! The cockpit 'tube' meeting the ship is just a joke. About a quater inch gap :mad:. But the worst is behind me, I'm actually quite pleased. I should think myself lucky after the stress of trying to get it to fit. The actuall ship is together the lighting works and looks pretty good (in my humble opinion) and I think the glue is going to hold...baited breath untill tomorrow morning untill I can release the clamps :-\.
 
Congrats with getting to the "Let's glue this all together" stage, John! ;)
I think that one of nice ways of getting rid of this gap is just placing a styrene strip all along it, simply on the outside, following the shape of the hull. Then scribe it for the panels from the top and from the bottom meet each other. With the styrene of aprox. 0.75-1 mm thickness that would add an interesting effect IMHO.
 
I just had to fill a few gaps on the Brakiri cruiser that were something like this, not quite as bad, but close. I did use Aves. One reason is that Aves is an epoxy resin. It is very similar to the material on hand, and it will act just like glue. So it will help hold the seam together if you get enough of it in that gap. I did try gluing two resin pieces together with Aves a couple of weeks ago, that will be in my next video! It held almost as well as CA glue. I don't know if I would use it to glue together a model, but it will hold like glue on resin anyway...

I know that there are similar products over in the UK, but I don't know the name of them off hand. But I bet if you searched for a two part sculpting epoxy, you will find it.

The styrene strip idea sounds interesting!
 
John, I scoured a couple of forums in search for an Aves alternative and came up with Magic Sculp (no 't'). It's a 2 part epoxy and the word is that it's 'almost' as good as Aves. I've used it a bit and found it to be pretty good. Much easier to work with than squadron for seam filling. Just thin it with water until you get the right consistency, that was the only tricky bit.

Just checked ebay and I've found a taxidermy supplier who stocks Aves! Yay!

Here's his shop :-

http://stores.ebay.co.uk/JHT-Taxidermy-Supplies?_trksid=p4340.l2563
 
Wow thanks John and Igard! managed to grab that aves off ebay, but its coming from Wales so its ganna take a few days at least, Oh well that gives me time to sand!
 
Thanks Grendels. Just wasn't sure as it wasn't labelled 'Aves'. I'll be grabbing some of this too. I just found the site where I bought my Magic Sculp and it's slightly more expensive.
 
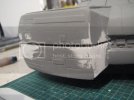
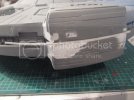
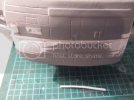
Well guys I couldnt wait for the aves to turn up, so I just started with steyrene strips which actually went ok:
IMG_0668.jpg
IMG_0670.jpg
IMG_0671.jpg
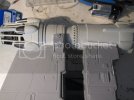
And drastic messaures had to be taken to get the f&^%$*+g cockpit walkway on!! :mad: :mad:
IMG_0672.jpg
I think I can hide it all with greeblees etc, but man am I looking forward to getting back to Fine Molds quality star wars kits!
 
Corrr Blimey !!!....now thats a fix :eek: :eek: But Im sure you'll cover it up well ;)

Chris.
 
Yeah, you'll get that hidden no probs.

Was that the result of the resin warping, or was it a glueing issue?

Great job with the styrene strips, John. :)
 
Excellent work on getting that together.
Beautiful thing about Star Wars is that things don't have to be "Perfect"
 
Thanks Chris, Igard and Q. The gap was due to the side Walls being too high! :-[
But I'm busting out 2 tank kits today and going to be doing some sneaky greebly covering up!
 
Ok Nerds getting there! Put some greeblees on, I think you have to be carefull when adding detail that wasnt meant to be there, sometimes it can be over done. Anyway heres the cockpit walkway, managed to hide the screwheads (I hope). Lots of sanding then priming repeat untill nessessary ::)
IMG_0673.jpg
This still needs quite a bit of work :(
IMG_0674.jpg
Comments welcomed! (need the support lol)
 

Latest posts

Back
Top