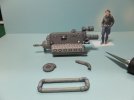
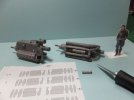
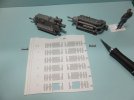
Messerschmitt Me-329

Great progress,,it's obvious that you're methodical with your builds!! Very impressive work!!! :)
 
Thank you Cargoman.
I try to look ahead constantly to look for problems and try to find a solution before it is a problem.

Jim
 
Hello guys. Life has been busy since the last update, and work has been progressing since the last update.
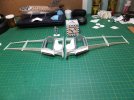
After the landing gear bays were finished and checking the skin installation around the engine nacelles, in order to install the engines, that work is going to have to come first.
So, off I go with the knife and cut out the skin support structures, to expose the engine bays. Making sure not to damage them as they are still necessary to shape the skins in that area.
Filed the inside area smooth and cut out the area for the prop-shaft. The interior skins for the engine bays were then applied. When dried were trimmed to match the formers.
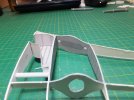
Engine1_zps6373016f.jpg

Next the coolant jackets were cut, formed and assembled.
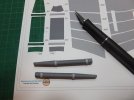
Engine2_zps953ba9a0.jpg

This was repeated for the other wing.
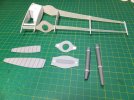
Engine3_zps09203d45.jpg

The radiators where also assembled and installed.
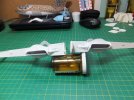
Engine4_zps6e92c66a.jpg

After these dried, the coolant jackets were fitted and installed.
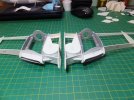
Engine5_zpsc1c63191.jpg

Engine6_zpsd27863da.jpg

With that part done, moved on to the engine mounts. The main support is made of double laminated paper with bushings greebled on to give a 3D effect. The lower support is steel wire. The back bulkhead is drilled to accept the wire brace and the assembly is glued to the back bulkhead.
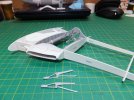
Engine8_zps6bd46980.jpg

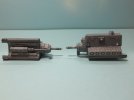
With the engine mounts in, time to start building the two DB-603 engines.
This is the assembly of the upper and lower sections of the main block.
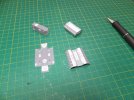
Engine9_zps18dd205f.jpg

I found that it was hard to line up the two pieces. the lower block edges just flexed too much.
By adding a support in the centre of the lower block this problem was fixed and the pieces went together easily.
Today the drive unit has been assembled and installed.
This is where I am at tonight.
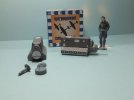
Engine10_zpsf4477727.jpg

More parts to add to these engines yet before they can be installed. I really like the detail of these engines, even if the instructions are sometimes lacking. Pictures of the actual engine have been a great help.

Thank you for following.
Questions and comments are welcome.

Jim
 
Good evening.
Between family stuff and a short break to do the TOS Chair, here is the latest update on the Me-329.
Still building engines. Lots of tiny little details, and they all take time. Still have parts with no locations on the drawings and having to check the real engine to locate them. Been successful so far.

This is where I am at tonight.

Engine11_zps767a87d2.jpg

Engine12_zps81232aaa.jpg

Hope to have more soon.
Thank you for following. Questions and comments welcome.

Jim
 
This is coming along nicely paperman! I always like to see what you're doing, with paper and Herculean amounts of patience and skill. Looks a lot more challenging than working with plastic!
 
Thank you Cave Dweller.
Patience yes, but more challenging, maybe in different ways. I would say more akin to scratch building.

Jim
 
Good evening all.
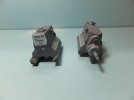
Still building those engines. These things are a build all on their own, but loving the detail.
Have been working on the compressor units for these engines.

Engine13_zpsa32222bb.jpg

The next up was the construction of the breather manifolds and their installation.
Also installed where the push rods for the rocker assemblies. Though these are mentioned in the installation proceedure and given a part no., there was no part on any of the sheets. I substituted styrene rod that I had in stock for the missing rods. Painted them light grey and installed them into position.
Started on the construction of the turbo units for these engines.

Engine14_zps7fd53976.jpg

This is where I am at tonight.
Thank you for following.
Questions and comments are always welcome.

Jim
 
Another update.
Since last time, I have finished the second turbine, and started working on the piping.
Here I have one down pipe built and the parts for the second.

Engine15_zpsd694957d.jpg

Inorder to keep the orientation of the pieces correct, I drew a line down the back of the parts before cutting them out.

Engine16_zpsd061ca4f.jpg

With the second down pipe constructed, more piping to be built for the turbo unit.

Engine17_zpsae1e8bba.jpg

The rest of this build of the engines is all piping.

Thank you for following.

Jim
 
Good evening.
Finished the building of all the pipes related to the turbo units.

Engine18_zpsb01b6ebf.jpg

The turbo units were then assembled and attached to the engine blocks.

Engine19_zps0e488ffb.jpg

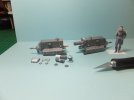
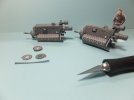
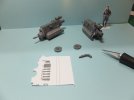
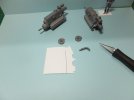
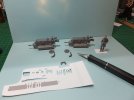
Tonight started on the assembly of the exhaust stacks.
More pipes to build. ::)

Engine20_zpsabaaa2a2.jpg

I'm hoping to get these stacks assembled and installed before the end of this weekend. Then the engines can be installed and I can move back to the wing assembly.

Thank you for following.

Jim
 
Thank you Patrick.
That is the thing with these builds. One cannot rush anything, hence very few quick builds.

Jim
 
Interesting and familiar design, hmmm....where have I seen this before. :)
 

Latest posts

Back
Top