Now… Voyager…
- Thread starter trekriffic
- Start date
trekriffic
Well-Known Member
- Joined
- Jan 6, 2012
- Messages
- 1,041
Thank you sir!You are doing a fantastic job!
Short video. Just a little more aztecing (?) to do and final touch up before airbrushing the final thinned basecoat over top.
USS Voyager WIP Vid - 009 by Steve J, on Flickr
trekriffic
Well-Known Member
- Joined
- Jan 6, 2012
- Messages
- 1,041
Oh I'll bet you can do TWICE as good as that!If I can do 1/4 as good as that on my Revell Voyager I'll be happy.
trekriffic
Well-Known Member
- Joined
- Jan 6, 2012
- Messages
- 1,041
Anyway ...
Aztecing (?) with chalk completed for upper secondary hull. These will be oversprayed with the "J" paint mix:
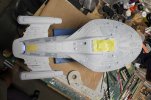
USS Voyager WIP Img - 349 by Steve J, on Flickr
Shuttle bay unmasked:
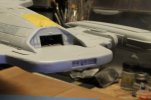
USS Voyager WIP Img - 350 by Steve J, on Flickr
Light test after unmasking:
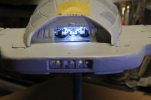
USS Voyager WIP Img - 351 by Steve J, on Flickr
Shuttle bay floor markings:
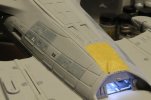 USS Voyager WIP Img - 352 by Steve J, on Flickr
Type 9 shuttle in bay. One of two. Note the string of lit fibers along the gallery wall:
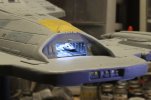
USS Voyager WIP Img - 353 by Steve J, on Flickr
Shuttles in bay. You can see the nose of a type 8 shuttle in the alcove to the left:
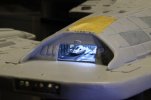
USS Voyager WIP Img - 354 by Steve J, on Flickr
Control room window and crewman visible in rear wall of bay. Stern fantail windows are stiil individually masked::
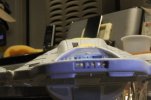 USS Voyager WIP Img - 355 by Steve J, on Flickr
Light test in shadow:
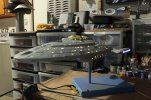
USS Voyager WIP Img - 359 by Steve J, on Flickr
Aztecing (?) with chalk completed for upper secondary hull. These will be oversprayed with the "J" paint mix:

USS Voyager WIP Img - 349 by Steve J, on Flickr
Shuttle bay unmasked:

USS Voyager WIP Img - 350 by Steve J, on Flickr
Light test after unmasking:

USS Voyager WIP Img - 351 by Steve J, on Flickr
Shuttle bay floor markings:
 USS Voyager WIP Img - 352 by Steve J, on Flickr
Type 9 shuttle in bay. One of two. Note the string of lit fibers along the gallery wall:

USS Voyager WIP Img - 353 by Steve J, on Flickr
Shuttles in bay. You can see the nose of a type 8 shuttle in the alcove to the left:

USS Voyager WIP Img - 354 by Steve J, on Flickr
Control room window and crewman visible in rear wall of bay. Stern fantail windows are stiil individually masked::
 USS Voyager WIP Img - 355 by Steve J, on Flickr
Light test in shadow:

USS Voyager WIP Img - 359 by Steve J, on Flickr
trekriffic
Well-Known Member
- Joined
- Jan 6, 2012
- Messages
- 1,041
Hello trekkers and fellow trek modellers. Sorry for the delay in posting. Been doing a lot of masking and painting...
Masking off nacelles for Tamiya chalk:
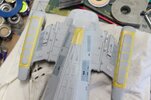
USS Voyager WIP Img - 362 by Steve J, on Flickr
Base Tamiya chalk layer done for secondary hull and nacelles. I will overspray with colors "A" and "J":
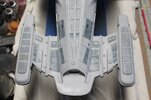
USS Voyager WIP Img - 363 by Steve J, on Flickr
Nice shot of underlying dorsal "aztec" patterns.
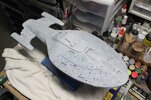
USS Voyager WIP Img - 364 by Steve J, on Flickr
Working on chalk staining the Aero Wing's underside:
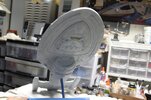
USS Voyager WIP Img - 365 by Steve J, on Flickr
Secondary hull upper grey "J" panels after airbrushing:
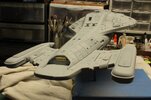
USS Voyager WIP Img - 366 by Steve J, on Flickr
Airbrushed slightly darker grey secondary hull panels unmasked:
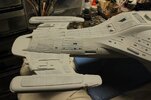
USS Voyager WIP Img - 367 by Steve J, on Flickr
Gratuitous beauty shot:
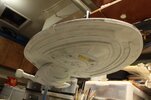
USS Voyager WIP Img - 368 by Steve J, on Flickr
Main sensor pallet painted flat black as a base to start:
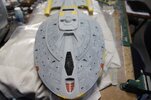
USS Voyager WIP Img - 371 by Steve J, on Flickr
Main sensor pallet brushed with dark grey, then medium grey, then dry brushed with steel.
There are other colors to be brushed on later - aluminum, copper, red, and blue - using a fine tipped brush:
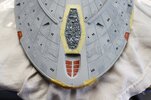
USS Voyager WIP Img - 372 by Steve J, on Flickr
Strong back sensor pallet brushed with dark grey, then dry brushed with medium grey enamel.
Once this dries I'll brush on the other color:
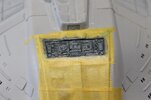
USS Voyager WIP Img - 373 by Steve J, on Flickr
More to come shortly.
Masking off nacelles for Tamiya chalk:

USS Voyager WIP Img - 362 by Steve J, on Flickr
Base Tamiya chalk layer done for secondary hull and nacelles. I will overspray with colors "A" and "J":

USS Voyager WIP Img - 363 by Steve J, on Flickr
Nice shot of underlying dorsal "aztec" patterns.

USS Voyager WIP Img - 364 by Steve J, on Flickr
Working on chalk staining the Aero Wing's underside:

USS Voyager WIP Img - 365 by Steve J, on Flickr
Secondary hull upper grey "J" panels after airbrushing:

USS Voyager WIP Img - 366 by Steve J, on Flickr
Airbrushed slightly darker grey secondary hull panels unmasked:

USS Voyager WIP Img - 367 by Steve J, on Flickr
Gratuitous beauty shot:

USS Voyager WIP Img - 368 by Steve J, on Flickr
Main sensor pallet painted flat black as a base to start:

USS Voyager WIP Img - 371 by Steve J, on Flickr
Main sensor pallet brushed with dark grey, then medium grey, then dry brushed with steel.
There are other colors to be brushed on later - aluminum, copper, red, and blue - using a fine tipped brush:

USS Voyager WIP Img - 372 by Steve J, on Flickr
Strong back sensor pallet brushed with dark grey, then dry brushed with medium grey enamel.
Once this dries I'll brush on the other color:

USS Voyager WIP Img - 373 by Steve J, on Flickr
More to come shortly.
trekriffic
Well-Known Member
- Joined
- Jan 6, 2012
- Messages
- 1,041
Thanks Q!
Paint and detailing continues...
Painting the color "J" panels, a slightly darker grey than the type "A" base hull color. After unmasking:
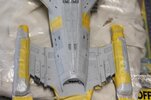
USS Voyager WIP Img - 374 by Steve J, on Flickr
Masking - both tape and brush on mask:
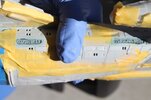
USS Voyager WIP Img - 375 by Steve J, on Flickr
Video - Grand obsession...
USS Voyager WIP Vid - 011 by Steve J, on Flickr
Paint and detailing continues...
Painting the color "J" panels, a slightly darker grey than the type "A" base hull color. After unmasking:

USS Voyager WIP Img - 374 by Steve J, on Flickr
Masking - both tape and brush on mask:

USS Voyager WIP Img - 375 by Steve J, on Flickr
Video - Grand obsession...

USS Voyager WIP Vid - 011 by Steve J, on Flickr
trekriffic
Well-Known Member
- Joined
- Jan 6, 2012
- Messages
- 1,041
Mycatistypingthis
Active Member
- Joined
- Sep 11, 2023
- Messages
- 78
This is such an inspiring build!
trekriffic
Well-Known Member
- Joined
- Jan 6, 2012
- Messages
- 1,041
Masking and painting sensor pallets:
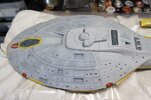
USS Voyager WIP Img - 376 by Steve J, on Flickr
Masking around strongback photorp tubes:
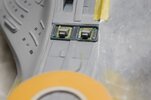
USS Voyager WIP Img - 376 by Steve J, on Flickr
I wanted to keep the nacelles from moving up and down while I worked on detailing other areas of the ship so I came up with a solution.
I trimmed four pieces of heavy cardboard to fit above and below the hinges on each side; then I clamped them down tight.
No problem with unauthorized warp drive activation after that!:
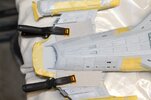
USS Voyager WIP Img - 376 by Steve J, on Flickr
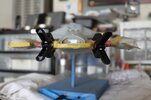
USS Voyager WIP Img - 380 by Steve J, on Flickr
I masked and painted the phaser strips using Revelle beige matte enamel:
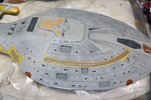
USS Voyager WIP Img - 377 by Steve J, on Flickr
Main bow sensor pallet details painted on using copper, light blue, fiery red, and steel enamel:
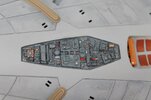
USS Voyager WIP Img - 378 by Steve J, on Flickr
Strongback sensor pallet detailing:
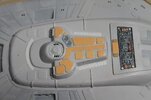
USS Voyager WIP Img - 381 by Steve J, on Flickr
Light test after main deflector dish unmasking and cleanup:
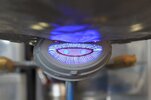
USS Voyager WIP Img - 382 by Steve J, on Flickr
Light test after impulse engine exhaust vent unmasking and cleanup:
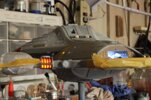
USS Voyager WIP Img - 383 by Steve J, on Flickr
Masking Aero Wing belly prior to hand brushing with enamel accent colors.
I used a wacky combination of tape and liquid mask for some reason:
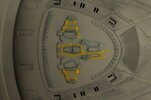
USS Voyager WIP Img - 384 by Steve J, on Flickr

USS Voyager WIP Img - 376 by Steve J, on Flickr
Masking around strongback photorp tubes:

USS Voyager WIP Img - 376 by Steve J, on Flickr
I wanted to keep the nacelles from moving up and down while I worked on detailing other areas of the ship so I came up with a solution.
I trimmed four pieces of heavy cardboard to fit above and below the hinges on each side; then I clamped them down tight.
No problem with unauthorized warp drive activation after that!:

USS Voyager WIP Img - 376 by Steve J, on Flickr

USS Voyager WIP Img - 380 by Steve J, on Flickr
I masked and painted the phaser strips using Revelle beige matte enamel:

USS Voyager WIP Img - 377 by Steve J, on Flickr
Main bow sensor pallet details painted on using copper, light blue, fiery red, and steel enamel:

USS Voyager WIP Img - 378 by Steve J, on Flickr
Strongback sensor pallet detailing:

USS Voyager WIP Img - 381 by Steve J, on Flickr
Light test after main deflector dish unmasking and cleanup:

USS Voyager WIP Img - 382 by Steve J, on Flickr
Light test after impulse engine exhaust vent unmasking and cleanup:

USS Voyager WIP Img - 383 by Steve J, on Flickr
Masking Aero Wing belly prior to hand brushing with enamel accent colors.
I used a wacky combination of tape and liquid mask for some reason:

USS Voyager WIP Img - 384 by Steve J, on Flickr
Mycatistypingthis
Active Member
- Joined
- Sep 11, 2023
- Messages
- 78
Somehow, this kit is in a shopping cart of mine now. It is not very expensive for its size.
trekriffic
Well-Known Member
- Joined
- Jan 6, 2012
- Messages
- 1,041
Thanks Q!
Main deflector dish array installed using Gorilla gel CA glue:
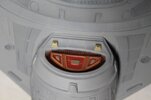
USS Voyager WIP Img - 385 by Steve J, on Flickr
Aero Wing accents almost finished:
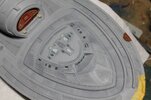
USS Voyager WIP Img - 386 by Steve J, on Flickr
I did some light weathering using CreateFX black acrylic wash around the borders of the raised panels on the belly, around the deflector housing,
and the bridge superstructure on top, etc, I had to be careful and wipe it off at just the right time to leave just a trace amount behind.
I didn't want it to get too dirty. It really looks good if you do it right. Detailing really pops too:
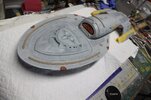
USS Voyager WIP Img - 388 by Steve J, on Flickr
Light weathering around lower secondary hull structures:
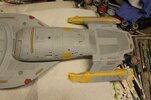
USS Voyager WIP Img - 389 by Steve J, on Flickr
Light weathering on lower saucer. Keeping it subtle:
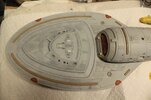
USS Voyager WIP Img - 390 by Steve J, on Flickr
Loving it...
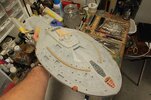
USS Voyager WIP Img - 391 by Steve J, on Flickr
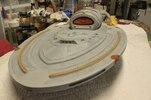
USS Voyager WIP Img - 392 by Steve J, on Flickr
Gotta unmask and finish painting the nacelles and it will be time for glosscoting before decals:
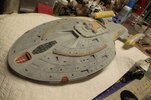
USS Voyager WIP Img - 393 by Steve J, on Flickr
Getting to the fun stuff soon! Stay tuned!
Main deflector dish array installed using Gorilla gel CA glue:

USS Voyager WIP Img - 385 by Steve J, on Flickr
Aero Wing accents almost finished:

USS Voyager WIP Img - 386 by Steve J, on Flickr
I did some light weathering using CreateFX black acrylic wash around the borders of the raised panels on the belly, around the deflector housing,
and the bridge superstructure on top, etc, I had to be careful and wipe it off at just the right time to leave just a trace amount behind.
I didn't want it to get too dirty. It really looks good if you do it right. Detailing really pops too:

USS Voyager WIP Img - 388 by Steve J, on Flickr
Light weathering around lower secondary hull structures:

USS Voyager WIP Img - 389 by Steve J, on Flickr
Light weathering on lower saucer. Keeping it subtle:

USS Voyager WIP Img - 390 by Steve J, on Flickr
Loving it...

USS Voyager WIP Img - 391 by Steve J, on Flickr

USS Voyager WIP Img - 392 by Steve J, on Flickr
Gotta unmask and finish painting the nacelles and it will be time for glosscoting before decals:

USS Voyager WIP Img - 393 by Steve J, on Flickr
Getting to the fun stuff soon! Stay tuned!
trekriffic
Well-Known Member
- Joined
- Jan 6, 2012
- Messages
- 1,041
Hope everyone had a nice Thanksgiving... or at least a n ice meal... 
Strongback sensor pallet done. A steady hand and a good pointy brush are all you need to paint these tiny details:
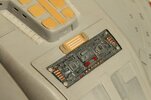
USS Voyager WIP Img - 394 by Steve J, on Flickr
Vinyl tape for masking around curves plus some subtle shading with acrylic black wash. Great stuff!
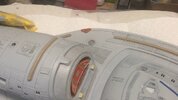
USS Voyager WIP Vid - 013 by Steve J, on Flickr
Mask removal of nacelles begins. Thick layers of dried liquid mask had to be chipped away.
I used my thumbnail to good effect on the bussard. This is some major cleanup:
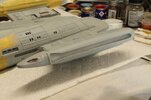
USS Voyager WIP Img - 395 by Steve J, on Flickr
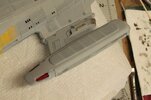
Nacelles after mask removal and cleanup. Microbrushes, swabs, dental picks, and isopropyl alcohol were a big help:
USS Voyager WIP Img - 396 by Steve J, on Flickr
Nacelle light test after cleanup and retouch:
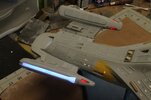
USS Voyager WIP Img - 397 by Steve J, on Flickr
Light test ruled a success:
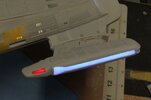
USS Voyager WIP Img - 398 by Steve J, on Flickr
Impulse engine exhaust vents painted Revelle Matte Beige on face.
I painted the inside surfaces of the vents metallic steel over aluminum:
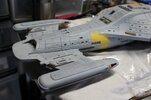
USS Voyager WIP Img - 399 by Steve J, on Flickr
Started framing the Aero Wing using black decal stripe material:
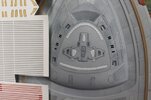
USS Voyager WIP Img - 402 by Steve J, on Flickr
Aero Wing after black border applied using hand trimmed sections of thin black decal stripe material.
To me this sells the illusion of this being a separate ship docked in the underside of the saucer:
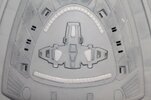
USS Voyager WIP Img - 403 by Steve J, on Flickr
Next up...
Acrylic black wash. I will use this for light weathering and shadows:
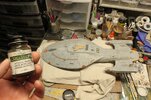
USS Voyager WIP Img - 404 by Steve J, on Flickr
Strongback sensor pallet done. A steady hand and a good pointy brush are all you need to paint these tiny details:

USS Voyager WIP Img - 394 by Steve J, on Flickr
Vinyl tape for masking around curves plus some subtle shading with acrylic black wash. Great stuff!

USS Voyager WIP Vid - 013 by Steve J, on Flickr
Mask removal of nacelles begins. Thick layers of dried liquid mask had to be chipped away.
I used my thumbnail to good effect on the bussard. This is some major cleanup:

USS Voyager WIP Img - 395 by Steve J, on Flickr
Nacelles after mask removal and cleanup. Microbrushes, swabs, dental picks, and isopropyl alcohol were a big help:

USS Voyager WIP Img - 396 by Steve J, on Flickr
Nacelle light test after cleanup and retouch:

USS Voyager WIP Img - 397 by Steve J, on Flickr
Light test ruled a success:

USS Voyager WIP Img - 398 by Steve J, on Flickr
Impulse engine exhaust vents painted Revelle Matte Beige on face.
I painted the inside surfaces of the vents metallic steel over aluminum:

USS Voyager WIP Img - 399 by Steve J, on Flickr
Started framing the Aero Wing using black decal stripe material:

USS Voyager WIP Img - 402 by Steve J, on Flickr
Aero Wing after black border applied using hand trimmed sections of thin black decal stripe material.
To me this sells the illusion of this being a separate ship docked in the underside of the saucer:

USS Voyager WIP Img - 403 by Steve J, on Flickr
Next up...
Acrylic black wash. I will use this for light weathering and shadows:

USS Voyager WIP Img - 404 by Steve J, on Flickr
trekriffic
Well-Known Member
- Joined
- Jan 6, 2012
- Messages
- 1,041
Thanks Q. This ship really grow on you when you build it.
I kinda thought the design was somewhat ugly at first but my attitude has changed now that I'm older and can appreciate it's nice curves more.
I kinda thought the design was somewhat ugly at first but my attitude has changed now that I'm older and can appreciate it's nice curves more.
trekriffic
Well-Known Member
- Joined
- Jan 6, 2012
- Messages
- 1,041
Plodding right along...
Fantail after use of acrylic black wash. I wanted especially to get the wash into the panel grooves. Most gets wiped off after application and a few minutes set time. I also used the wash around the impulse engines - including the tiny button in the horseshoe slot on top.
It really pops out with a little black wash and dry:
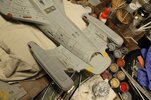
USS Voyager WIP Img - 405 by Steve J, on Flickr
Will be ready for gloss cote soon. Then ... decals! Over a hundred:
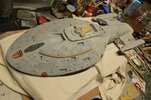
USS Voyager WIP Img - 406 by Steve J, on Flickr
Short video...
My apologies for the clothes drier running in the background. Also my nose was slightly running from the cool garage:
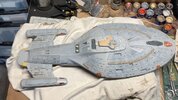
USS Voyager WIP Vid - 014 by Steve J, on Flickr
Light Test. You can see the ribs in the blue deflector dish:
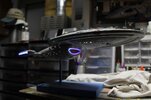
USS Voyager WIP Img - 407 by Steve J, on Flickr
Not any hot spots that I can see in this shot. The windows will be filled in with Elmer's white craft glue.
I may also cut a thin strip of clear styrene plastic to lay atop the drying white glue in each window port. The white glue dries clear of course:
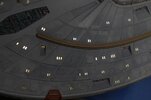
USS Voyager WIP Img - 408 by Steve J, on Flickr
Next... filling the windows and making tiny clear window panes.,,
Fantail after use of acrylic black wash. I wanted especially to get the wash into the panel grooves. Most gets wiped off after application and a few minutes set time. I also used the wash around the impulse engines - including the tiny button in the horseshoe slot on top.
It really pops out with a little black wash and dry:

USS Voyager WIP Img - 405 by Steve J, on Flickr
Will be ready for gloss cote soon. Then ... decals! Over a hundred:

USS Voyager WIP Img - 406 by Steve J, on Flickr
Short video...
My apologies for the clothes drier running in the background. Also my nose was slightly running from the cool garage:

USS Voyager WIP Vid - 014 by Steve J, on Flickr
Light Test. You can see the ribs in the blue deflector dish:

USS Voyager WIP Img - 407 by Steve J, on Flickr
Not any hot spots that I can see in this shot. The windows will be filled in with Elmer's white craft glue.
I may also cut a thin strip of clear styrene plastic to lay atop the drying white glue in each window port. The white glue dries clear of course:

USS Voyager WIP Img - 408 by Steve J, on Flickr
Next... filling the windows and making tiny clear window panes.,,
Last edited:
Similar threads
- Replies
- 3
- Views
- 1K

