You are using an out of date browser. It may not display this or other websites correctly.
You should upgrade or use an alternative browser.
You should upgrade or use an alternative browser.
Now… Voyager…
- Thread starter trekriffic
- Start date
trekriffic
Well-Known Member
- Joined
- Jan 6, 2012
- Messages
- 1,010
You can find it here. This includes the bay, the roll up door and wall, the shuttles, and Aero Wing.The shuttle bay addition looks great! Where did you come by that? I would love to add one to my Voyager model build.
https://www.shapeways.com/product/F...shuttle-set?optionId=299305309&li=marketplace
trekriffic
Well-Known Member
- Joined
- Jan 6, 2012
- Messages
- 1,010
Thank you Bear, Pantherman, and Q!
Back to the build...
The two 30 AWG kynar alcove LED wires are passed thru a tubular conduit that crosses above a type 8 shuttle on the alcove floor below to exit out the back wall and be soldered to the always on circuit wiring:
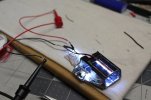
USS Voyager WIP Img - 275 by Steve J, on Flickr
5 fibers from the shuttle bay port side entrance wall also had to be fed thru the same tight tube to then feed into another tube attached to a 2mm white lighthouse style LED. Fibers from the starboard side wall also feed into this LED:
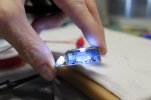
USS Voyager WIP Img - 276 by Steve J, on Flickr
These type 9 shuttles look kinda like triceratops IMO:
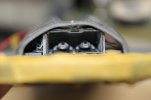
USS Voyager WIP Img - 277 by Steve J, on Flickr
Shuttle bay and main door wall glued in place. Lights look pretty cool:
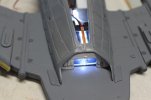
USS Voyager WIP Img - 278 by Steve J, on Flickr
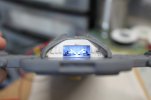
USS Voyager WIP Img - 279 by Steve J, on Flickr
Secondary hull wiring complete. Leads from power jack and flasher wiring ready for connection to lower saucer half:
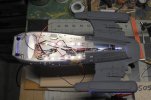
USS Voyager WIP Img - 280 by Steve J, on Flickr
Light test after installation of forward red photon torpedo LED's:
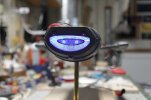
USS Voyager WIP Img - 281 by Steve J, on Flickr
Upper and lower saucer wiring is complete. Just need to solder the connections between the two halves and check the completed circuits by conducting another light test:
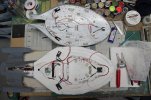
USS Voyager WIP Img - 282 by Steve J, on Flickr
Lower saucer flasher (red and white pair) and non--flasher (red and black pair)
LED wires are soldered to matching wires in the upper saucer half before being covered in shrink tubing.
The nearly opaque, translucent parchment paper will help diffuse and eliminate hot spots from the bright LED strip lights:
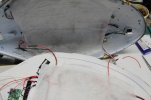
USS Voyager WIP Img - 283 by Steve J, on Flickr
Low light test after upper and lower saucer assembly. There are almost no hot spots behind any of the windows. The few that are there will be fixed later on when I start filling the windows with clear styrene plastic:
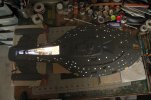
USS Voyager WIP Img - 285 by Steve J, on Flickr
Back to the build...
The two 30 AWG kynar alcove LED wires are passed thru a tubular conduit that crosses above a type 8 shuttle on the alcove floor below to exit out the back wall and be soldered to the always on circuit wiring:

USS Voyager WIP Img - 275 by Steve J, on Flickr
5 fibers from the shuttle bay port side entrance wall also had to be fed thru the same tight tube to then feed into another tube attached to a 2mm white lighthouse style LED. Fibers from the starboard side wall also feed into this LED:

USS Voyager WIP Img - 276 by Steve J, on Flickr
These type 9 shuttles look kinda like triceratops IMO:

USS Voyager WIP Img - 277 by Steve J, on Flickr
Shuttle bay and main door wall glued in place. Lights look pretty cool:

USS Voyager WIP Img - 278 by Steve J, on Flickr

USS Voyager WIP Img - 279 by Steve J, on Flickr
Secondary hull wiring complete. Leads from power jack and flasher wiring ready for connection to lower saucer half:

USS Voyager WIP Img - 280 by Steve J, on Flickr
Light test after installation of forward red photon torpedo LED's:

USS Voyager WIP Img - 281 by Steve J, on Flickr
Upper and lower saucer wiring is complete. Just need to solder the connections between the two halves and check the completed circuits by conducting another light test:

USS Voyager WIP Img - 282 by Steve J, on Flickr
Lower saucer flasher (red and white pair) and non--flasher (red and black pair)
LED wires are soldered to matching wires in the upper saucer half before being covered in shrink tubing.
The nearly opaque, translucent parchment paper will help diffuse and eliminate hot spots from the bright LED strip lights:

USS Voyager WIP Img - 283 by Steve J, on Flickr
Low light test after upper and lower saucer assembly. There are almost no hot spots behind any of the windows. The few that are there will be fixed later on when I start filling the windows with clear styrene plastic:

USS Voyager WIP Img - 285 by Steve J, on Flickr
trekriffic
Well-Known Member
- Joined
- Jan 6, 2012
- Messages
- 1,010
Shuttle bay lit up after main subassemblies all glued together.
You can see two type 9 shuttles in the main bay and the nose of a type 8 shuttle in the back alcove to the left:
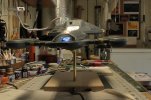
USS Voyager WIP Img - 286 by Steve J, on Flickr
Final? Pointing up of seams with PPP and Tamiya Basic putty.
Also need to glue in the rim RCS thruster panel and finish painting the RCS thruster clusters.
Will do saucer hull painting first though with formula A enamel airbrushed:
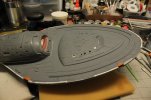
USS Voyager WIP Img - 288 by Steve J, on Flickr
Rim pointed up and brushed with Mister Surfacer 500.
Special attention was given to PPP still stuck in between the sensor strip detailing after saucer rim seam filling.
Offending residue was removed using warm water and a microbrush:
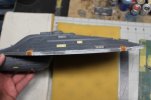
USS Voyager WIP Img - 289 by Steve J, on Flickr
Shuttle bay was masked off and brushed with light grey hull color mix A. The paint is almost airbrush ready IMO and brushed very smoothly:
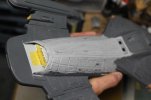
USS Voyager WIP Img - 290 by Steve J, on Flickr
Spine after puttying, sanding, and brushing with Mister Surfacer 500. She'll get another light sanding before priming:
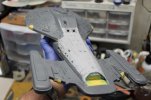
USS Voyager WIP Img - 291 by Steve J, on Flickr
After first primer coat. I see some divots along the rim. I'll need to wait an hour to fill, sand, and prime again:
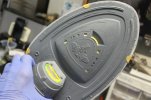
USS Voyager WIP Img - 292 by Steve J, on Flickr
More uber detailing with PPP. I sanded and am ready to prime again:
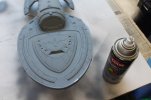
USS Voyager WIP Img - 293 by Steve J, on Flickr
Final primer coat on:
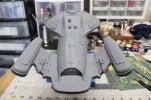
USS Voyager WIP Img - 294 by Steve J, on Flickr
Priming done. Moving on to final hull coats:
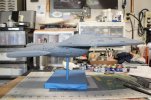
USS Voyager WIP Img - 295 by Steve J, on Flickr
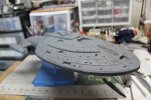
USS Voyager WIP Img - 296 by Steve J, on Flickr
Next... some more primer shots and a blue grey Voyager under flash.
You can see two type 9 shuttles in the main bay and the nose of a type 8 shuttle in the back alcove to the left:

USS Voyager WIP Img - 286 by Steve J, on Flickr
Final? Pointing up of seams with PPP and Tamiya Basic putty.
Also need to glue in the rim RCS thruster panel and finish painting the RCS thruster clusters.
Will do saucer hull painting first though with formula A enamel airbrushed:

USS Voyager WIP Img - 288 by Steve J, on Flickr
Rim pointed up and brushed with Mister Surfacer 500.
Special attention was given to PPP still stuck in between the sensor strip detailing after saucer rim seam filling.
Offending residue was removed using warm water and a microbrush:

USS Voyager WIP Img - 289 by Steve J, on Flickr
Shuttle bay was masked off and brushed with light grey hull color mix A. The paint is almost airbrush ready IMO and brushed very smoothly:

USS Voyager WIP Img - 290 by Steve J, on Flickr
Spine after puttying, sanding, and brushing with Mister Surfacer 500. She'll get another light sanding before priming:

USS Voyager WIP Img - 291 by Steve J, on Flickr
After first primer coat. I see some divots along the rim. I'll need to wait an hour to fill, sand, and prime again:

USS Voyager WIP Img - 292 by Steve J, on Flickr
More uber detailing with PPP. I sanded and am ready to prime again:

USS Voyager WIP Img - 293 by Steve J, on Flickr
Final primer coat on:

USS Voyager WIP Img - 294 by Steve J, on Flickr
Priming done. Moving on to final hull coats:

USS Voyager WIP Img - 295 by Steve J, on Flickr

USS Voyager WIP Img - 296 by Steve J, on Flickr
Next... some more primer shots and a blue grey Voyager under flash.
trekriffic
Well-Known Member
- Joined
- Jan 6, 2012
- Messages
- 1,010
Super detailing... going over every square millimeter with a magnifying glass, dental tools, and sanding films to remove any gremlins before final hull colors go on...
Saucer still masked after final priming coat:
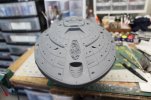
USS Voyager WIP Img - 297 by Steve J, on Flickr
Ventral saucer detailed and primed:
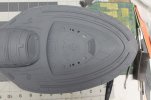
USS Voyager WIP Img - 298 by Steve J, on Flickr
Ventral secondary hull, fantail, and nacelles primed:
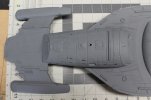
USS Voyager WIP Img - 299 by Steve J, on Flickr
Ventral priming done:
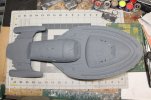
USS Voyager WIP Img - 300 by Steve J, on Flickr
Ready for spraying on her final colors:
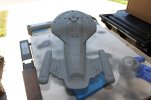
USS Voyager WIP Img - 301 by Steve J, on Flickr
Masking for shuttle bay door was sealed using Micro Mark liquid masking film:
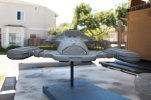
USS Voyager WIP Img - 302 by Steve J, on Flickr
Dorsal saucer detailed and primed:
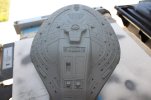
USS Voyager WIP Img - 303 by Steve J, on Flickr
Nice shot under masking and primer:
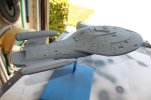
USS Voyager WIP Img - 304 by Steve J, on Flickr
Taken with a camera flash gives the primer grey hull a bluish tint like the studio model had in most scenes; although, the model was painted a bluish grey to begin with:
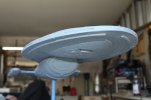
USS Voyager WIP Img - 305 by Steve J, on Flickr
Blue grey Voyager under camera flash:
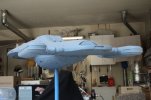
USS Voyager WIP Img - 306 by Steve J, on Flickr
Next... Tamiya chalks...
Saucer still masked after final priming coat:

USS Voyager WIP Img - 297 by Steve J, on Flickr
Ventral saucer detailed and primed:

USS Voyager WIP Img - 298 by Steve J, on Flickr
Ventral secondary hull, fantail, and nacelles primed:

USS Voyager WIP Img - 299 by Steve J, on Flickr
Ventral priming done:

USS Voyager WIP Img - 300 by Steve J, on Flickr
Ready for spraying on her final colors:

USS Voyager WIP Img - 301 by Steve J, on Flickr
Masking for shuttle bay door was sealed using Micro Mark liquid masking film:

USS Voyager WIP Img - 302 by Steve J, on Flickr
Dorsal saucer detailed and primed:

USS Voyager WIP Img - 303 by Steve J, on Flickr
Nice shot under masking and primer:

USS Voyager WIP Img - 304 by Steve J, on Flickr
Taken with a camera flash gives the primer grey hull a bluish tint like the studio model had in most scenes; although, the model was painted a bluish grey to begin with:

USS Voyager WIP Img - 305 by Steve J, on Flickr
Blue grey Voyager under camera flash:

USS Voyager WIP Img - 306 by Steve J, on Flickr
Next... Tamiya chalks...
trekriffic
Well-Known Member
- Joined
- Jan 6, 2012
- Messages
- 1,010
Here we go folks ... more pics...
Found some spots that needed light sanding after I sprayed with final hull color "A"... 70% light grey/30% grey.
I'll brush paint a little more hull color over the now smoothly sanded sections before airbrushing again:
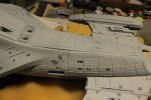
USS Voyager WIP Img - 307 by Steve J, on Flickr
Major seam/gap filling with AVES paid off. Looks very good along the edges of the spine plate:
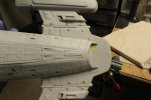
USS Voyager WIP Img - 308 by Steve J, on Flickr
Dorsal surfaces after second airbrush coat of hull color "A" ... light grey with a hint of blue:
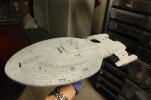
USS Voyager WIP Img - 309 by Steve J, on Flickr
Ventral surfaces still in primer. I'm out of paint though so will have to wait on final hull colors until my shipment arrives from Hobbylinc:
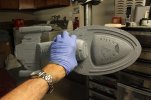
USS Voyager WIP Img - 310 by Steve J, on Flickr
Delta Flyer hand brushed with remnant of hull color I scrounged up at the bottom of the paint jar:
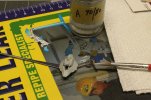
USS Voyager WIP Img - 312 by Steve J, on Flickr
Found some spots that needed light sanding after I sprayed with final hull color "A"... 70% light grey/30% grey.
I'll brush paint a little more hull color over the now smoothly sanded sections before airbrushing again:

USS Voyager WIP Img - 307 by Steve J, on Flickr
Major seam/gap filling with AVES paid off. Looks very good along the edges of the spine plate:

USS Voyager WIP Img - 308 by Steve J, on Flickr
Dorsal surfaces after second airbrush coat of hull color "A" ... light grey with a hint of blue:

USS Voyager WIP Img - 309 by Steve J, on Flickr
Ventral surfaces still in primer. I'm out of paint though so will have to wait on final hull colors until my shipment arrives from Hobbylinc:

USS Voyager WIP Img - 310 by Steve J, on Flickr
Delta Flyer hand brushed with remnant of hull color I scrounged up at the bottom of the paint jar:

USS Voyager WIP Img - 312 by Steve J, on Flickr
RocketFoot
Member
- Joined
- Sep 7, 2023
- Messages
- 42
I am a hard core Trekkie (I even watch The Lower Decks!) I gotta say, your dedication to detail, skills and patience really shine! Being late to the game, I wanted to jump to the end of this thread to see the finished project but I couldn't pass up reading the step by step procedures! Well done and I am looking forward to the finished Voyager!
trekriffic
Well-Known Member
- Joined
- Jan 6, 2012
- Messages
- 1,010
Thanks! The best is yet to come I think.That is looking absolutely fantastic.
trekriffic
Well-Known Member
- Joined
- Jan 6, 2012
- Messages
- 1,010
Thanks so much. This is one of those "hero" ships after all so it gets extra attention when it comes to detailing. Much like what I did with the Nemesis E.I am a hard core Trekkie (I even watch The Lower Decks!) I gotta say, your dedication to detail, skills and patience really shine! Being late to the game, I wanted to jump to the end of this thread to see the finished project but I couldn't pass up reading the step by step procedures! Well done and I am looking forward to the finished Voyager!
Still, there are some things I left alone but i corrected the most obvious errors or omissions in the kit I think. Now I move on to aztecing.
trekriffic
Well-Known Member
- Joined
- Jan 6, 2012
- Messages
- 1,010
Delta Flyer on fantail. A tiny rare earth magnet under Voyager's deck and a matching one in the underside of the shuttle hold the little ship in place.
Actually, though, it's a good sized craft; you could barely fit it inside the shuttle bay behind it:
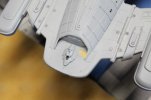
USS Voyager WIP Img - 320 by Steve J, on Flickr
Starting in adding aztec patterns using Tamiya grey chalk:
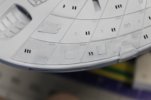
USS Voyager WIP Img - 321 by Steve J, on Flickr
Progress on hull panel random "aztecing" using Tamiya chalk.
After filling in the various panels to match what I could see on the poorly lit studio model I gave it a shot of Dullcote to seal the chalk.
Have to do the upper panels above the phaser strip before moving on to the underside.
Once all the aztecing is done I'll overspray with a thinned mix of the light grey basecoat for a more subtle effect:
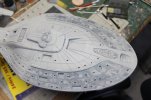
USS Voyager WIP Img - 322 by Steve J, on Flickr
I wanted the aztec panels on each side to match the other side so I took a photo of the finished starboard side paneling
and flipped it horizontally for reference while I draw and rub the port side in chalk. Saves me having to turn the model back and forth to copy the shapes:
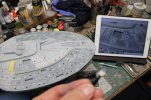
USS Voyager WIP Img - 323 by Steve J, on Flickr
Upper saucer Tamiya chalk aztecing complete and sealed with clear matte Dullcote:
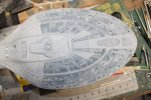
USS Voyager WIP Img - 324 by Steve J, on Flickr
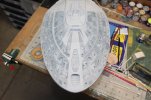
Dullcote darkened the aztecing somewhat but this is fine as I will be overspraying it with hull color A for a more muted aztec scheme:
USS Voyager WIP Img - 325 by Steve J, on Flickr
Actually, though, it's a good sized craft; you could barely fit it inside the shuttle bay behind it:

USS Voyager WIP Img - 320 by Steve J, on Flickr
Starting in adding aztec patterns using Tamiya grey chalk:

USS Voyager WIP Img - 321 by Steve J, on Flickr
Progress on hull panel random "aztecing" using Tamiya chalk.
After filling in the various panels to match what I could see on the poorly lit studio model I gave it a shot of Dullcote to seal the chalk.
Have to do the upper panels above the phaser strip before moving on to the underside.
Once all the aztecing is done I'll overspray with a thinned mix of the light grey basecoat for a more subtle effect:

USS Voyager WIP Img - 322 by Steve J, on Flickr
I wanted the aztec panels on each side to match the other side so I took a photo of the finished starboard side paneling
and flipped it horizontally for reference while I draw and rub the port side in chalk. Saves me having to turn the model back and forth to copy the shapes:

USS Voyager WIP Img - 323 by Steve J, on Flickr
Upper saucer Tamiya chalk aztecing complete and sealed with clear matte Dullcote:

USS Voyager WIP Img - 324 by Steve J, on Flickr
Dullcote darkened the aztecing somewhat but this is fine as I will be overspraying it with hull color A for a more muted aztec scheme:

USS Voyager WIP Img - 325 by Steve J, on Flickr
trekriffic
Well-Known Member
- Joined
- Jan 6, 2012
- Messages
- 1,010
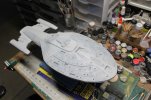
Next morning under my overhead bench LED tube light:
USS Voyager WIP Img - 328 by Steve J, on Flickr
The aztec (?) shapes are most visible under bright light.
The grey chalk I used, seen under the thinned basecoat, was a dead ringer for the color of the paint mix recommended in the instructions, a 50/50 mix of intermediate blue and white.
It recommended dry brushing the light blue gray paint mix over the area of the incised panels before overspraying with the base coat.
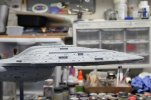
From the side the aztec (?) paneling is barely noticeable under the bright light:
USS Voyager WIP Img - 329 by Steve J, on Flickr
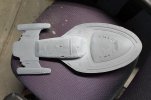
Now to spray the underside with hull color "A":
USS Voyager WIP Img - 330 by Steve J, on Flickr
I'll be laying the model top down on my "spraying table" next to the open garage door. It will rest on a clean sheet of white poster board.
Maybe unnecessary but I still decided to cover the spots on the topside where the model will touch the table with masking tape:
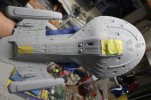
USS Voyager WIP Img - 331 by Steve J, on Flickr
One more rubbing with alcohol wipes for a clean surfaceand I'll be ready to use my new Iwata Neo airbrush
and my new air compressor to spray the underside with the light grey hull color "A". It's a mix of 70% light grey and 30% grey:
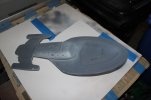
USS Voyager WIP Img - 332 by Steve J, on Flickr
Thanks for following along!

USS Voyager WIP Img - 328 by Steve J, on Flickr
The aztec (?) shapes are most visible under bright light.
The grey chalk I used, seen under the thinned basecoat, was a dead ringer for the color of the paint mix recommended in the instructions, a 50/50 mix of intermediate blue and white.
It recommended dry brushing the light blue gray paint mix over the area of the incised panels before overspraying with the base coat.
From the side the aztec (?) paneling is barely noticeable under the bright light:

USS Voyager WIP Img - 329 by Steve J, on Flickr
Now to spray the underside with hull color "A":

USS Voyager WIP Img - 330 by Steve J, on Flickr
I'll be laying the model top down on my "spraying table" next to the open garage door. It will rest on a clean sheet of white poster board.
Maybe unnecessary but I still decided to cover the spots on the topside where the model will touch the table with masking tape:

USS Voyager WIP Img - 331 by Steve J, on Flickr
One more rubbing with alcohol wipes for a clean surfaceand I'll be ready to use my new Iwata Neo airbrush
and my new air compressor to spray the underside with the light grey hull color "A". It's a mix of 70% light grey and 30% grey:

USS Voyager WIP Img - 332 by Steve J, on Flickr
Thanks for following along!
trekriffic
Well-Known Member
- Joined
- Jan 6, 2012
- Messages
- 1,010
Thanks Q! Yep... I have to make time for building.Loving the progress.
Really wishing I had the time to work on my trio of 1/1000 kits
Here we go...
Underside after airbrushing with enamel color "A" mix made from Revell tinlets... like the song... a lighter shade of shale...
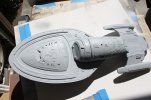
USS Voyager WIP Img - 333 by Steve J, on Flickr
My soft spot to lay the model upside down for the Tamiya chalk aztecing (?) operation. Spongy foam padding and a clean, but old. t-shirt:
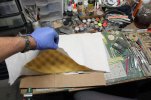
USS Voyager WIP Img - 334 by Steve J, on Flickr
Ready for the grey chalk treatment:
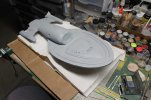
USS Voyager WIP Img - 335 by Steve J, on Flickr
Started in on the "aztec" underlayer for the center section of the ventral saucer bulge using "Grey" Tamiya pastel powder.
I had earlier finished the panels at the tip of the bulge.
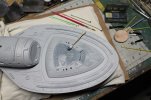
USS Voyager WIP Img - 336 by Steve J, on Flickr
Pastel chalks for aztecing work very well but look best with an overlay of some thinned down basecolor for a muted effect.
Much less masking involved too:
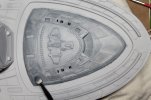
USS Voyager WIP Img - 337 by Steve J, on Flickr
Center section of lower saucer finished after chalking and sealing with Dullcote. Next will do the outer bands,
When done, everything will be overshot with more of the thinned basecoat "A" for a subtle effect like on top:
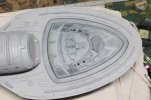
USS Voyager WIP Img - 338 by Steve J, on Flickr
This will look good under another shot of the basecoat:
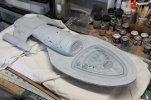
USS Voyager WIP Img - 339 by Steve J, on Flickr
trekriffic
Well-Known Member
- Joined
- Jan 6, 2012
- Messages
- 1,010
Here's a short vid I did a short while ago about how I go about applying Tamiya chalks for "aztecing"...
USS Voyager WIP Vid - 008 by Steve J, on Flickr
Since then...
Finished chalking the trench. Masked off around the rim panels for easier cleanup. Have begun chalking same:
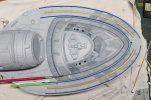
USS Voyager WIP Img - 340 by Steve J, on Flickr
Lower saucer aztec (?) complete and shot with Dulcote to seal. Just a few more areas that may need some aztecing
and then I can airbrush a thin coat of the light grey mix "A" over all:
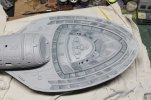
USS Voyager WIP Img - 341 by Steve J, on Flickr

USS Voyager WIP Vid - 008 by Steve J, on Flickr
Since then...
Finished chalking the trench. Masked off around the rim panels for easier cleanup. Have begun chalking same:

USS Voyager WIP Img - 340 by Steve J, on Flickr
Lower saucer aztec (?) complete and shot with Dulcote to seal. Just a few more areas that may need some aztecing
and then I can airbrush a thin coat of the light grey mix "A" over all:

USS Voyager WIP Img - 341 by Steve J, on Flickr
trekriffic
Well-Known Member
- Joined
- Jan 6, 2012
- Messages
- 1,010
Masking off for chalking:
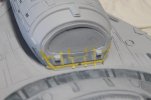
USS Voyager WIP Img - 342 by Steve J, on Flickr
Underchalk after unmasking and a shot of Dullcote. Tamiya gray pastel chalk:
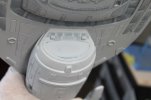
USS Voyager WIP Img - 343 by Steve J, on Flickr
Fantail "aztecing" for "J" colored panels.
These panels will be overshot with a 50/50 mix of Revell grey and light grey enamel so slightly darker then the main hull color.
Random patterns for the most part. They will be muted once the "J" mix is on:
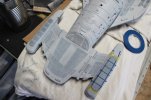
USS Voyager WIP Img - 344 by Steve J, on Flickr
I added aztecing/shading in chalk for the lower saucer "J" colored panels on either side of the secondary hull.
They will get an overshot of medium light grey but will be be visible underneath:
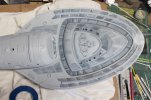
USS Voyager WIP Img - 345 by Steve J, on Flickr
Aztecing continues on fantail underside panels. The blue tape stretches and conforms to curves so great for curvy masking:
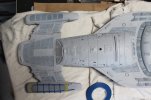
USS Voyager WIP Img - 346 by Steve J, on Flickr
Ventral saucer, fantail, and nacelle surface aztecing {?) chalk sealed with Dullcote clear matte lacquer.
Next I'll work on the secondary hull and the dorsal fantail surfaces.
Then I'll airbrush a thin layer of the basecoat over all the panels and any areas I have to touch up after closer inspection:
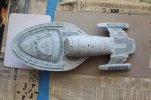
USS Voyager WIP Img - 347 by Steve J, on Flickr
Flash photo. Ventral fantail center panels chalked and sealed with Dullcote. The lacquer darkens the panels so you can really see the pattern.
The pattern was done by blotting the grey pastel powder randomly over the surface before a gentle rubbing.
It looks close to the photos I've seen of the studio model.
I will airbrush over this with the 50/50 mix which should look nice with the pattern barely visible underneath:
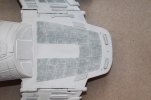
USS Voyager WIP Img - 348 by Steve J, on Flickr

USS Voyager WIP Img - 342 by Steve J, on Flickr
Underchalk after unmasking and a shot of Dullcote. Tamiya gray pastel chalk:

USS Voyager WIP Img - 343 by Steve J, on Flickr
Fantail "aztecing" for "J" colored panels.
These panels will be overshot with a 50/50 mix of Revell grey and light grey enamel so slightly darker then the main hull color.
Random patterns for the most part. They will be muted once the "J" mix is on:

USS Voyager WIP Img - 344 by Steve J, on Flickr
I added aztecing/shading in chalk for the lower saucer "J" colored panels on either side of the secondary hull.
They will get an overshot of medium light grey but will be be visible underneath:

USS Voyager WIP Img - 345 by Steve J, on Flickr
Aztecing continues on fantail underside panels. The blue tape stretches and conforms to curves so great for curvy masking:

USS Voyager WIP Img - 346 by Steve J, on Flickr
Ventral saucer, fantail, and nacelle surface aztecing {?) chalk sealed with Dullcote clear matte lacquer.
Next I'll work on the secondary hull and the dorsal fantail surfaces.
Then I'll airbrush a thin layer of the basecoat over all the panels and any areas I have to touch up after closer inspection:

USS Voyager WIP Img - 347 by Steve J, on Flickr
Flash photo. Ventral fantail center panels chalked and sealed with Dullcote. The lacquer darkens the panels so you can really see the pattern.
The pattern was done by blotting the grey pastel powder randomly over the surface before a gentle rubbing.
It looks close to the photos I've seen of the studio model.
I will airbrush over this with the 50/50 mix which should look nice with the pattern barely visible underneath:

USS Voyager WIP Img - 348 by Steve J, on Flickr
trekriffic
Well-Known Member
- Joined
- Jan 6, 2012
- Messages
- 1,010
Masking off for chalking:
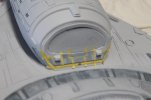
USS Voyager WIP Img - 342 by Steve J, on Flickr
Underchalk after unmasking and a shot of Dullcote. Tamiya gray pastel chalk:
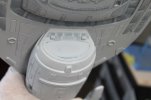
USS Voyager WIP Img - 343 by Steve J, on Flickr
Fantail "aztecing" for "J" colored panels.
These panels will be overshot with a 50/50 mix of Revell grey and light grey enamel so slightly darker then the main hull color.
Random patterns for the most part. They will be muted once the "J" mix is on:
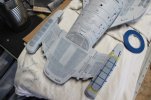
USS Voyager WIP Img - 344 by Steve J, on Flickr
I added aztecing/shading in chalk for the lower saucer "J" colored panels on either side of the secondary hull.
They will get an overshot of medium light grey but will be be visible underneath:
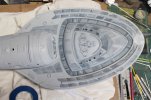
USS Voyager WIP Img - 345 by Steve J, on Flickr
Aztecing continues on fantail underside panels. The blue tape stretches and conforms to curves so great for curvy masking:
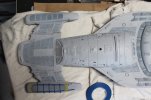
USS Voyager WIP Img - 346 by Steve J, on Flickr
Ventral saucer, fantail, and nacelle surface aztecing {?) chalk sealed with Dullcote clear matte lacquer.
Next I'll work on the secondary hull and the dorsal fantail surfaces.
Then I'll airbrush a thin layer of the basecoat over all the panels and any areas I have to touch up after closer inspection:
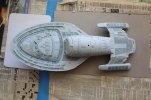
USS Voyager WIP Img - 347 by Steve J, on Flickr
Flash photo. Ventral fantail center panels chalked and sealed with Dullcote. The lacquer darkens the panels so you can really see the pattern.
The pattern was done by blotting the grey pastel powder randomly over the surface before a gentle rubbing.
It looks close to the photos I've seen of the studio model.
I will airbrush over this with the 50/50 mix which should look nice with the pattern barely visible underneath:
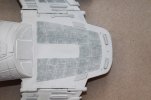
USS Voyager WIP Img - 348 by Steve J, on Flickr

USS Voyager WIP Img - 342 by Steve J, on Flickr
Underchalk after unmasking and a shot of Dullcote. Tamiya gray pastel chalk:

USS Voyager WIP Img - 343 by Steve J, on Flickr
Fantail "aztecing" for "J" colored panels.
These panels will be overshot with a 50/50 mix of Revell grey and light grey enamel so slightly darker then the main hull color.
Random patterns for the most part. They will be muted once the "J" mix is on:

USS Voyager WIP Img - 344 by Steve J, on Flickr
I added aztecing/shading in chalk for the lower saucer "J" colored panels on either side of the secondary hull.
They will get an overshot of medium light grey but will be be visible underneath:

USS Voyager WIP Img - 345 by Steve J, on Flickr
Aztecing continues on fantail underside panels. The blue tape stretches and conforms to curves so great for curvy masking:

USS Voyager WIP Img - 346 by Steve J, on Flickr
Ventral saucer, fantail, and nacelle surface aztecing {?) chalk sealed with Dullcote clear matte lacquer.
Next I'll work on the secondary hull and the dorsal fantail surfaces.
Then I'll airbrush a thin layer of the basecoat over all the panels and any areas I have to touch up after closer inspection:

USS Voyager WIP Img - 347 by Steve J, on Flickr
Flash photo. Ventral fantail center panels chalked and sealed with Dullcote. The lacquer darkens the panels so you can really see the pattern.
The pattern was done by blotting the grey pastel powder randomly over the surface before a gentle rubbing.
It looks close to the photos I've seen of the studio model.
I will airbrush over this with the 50/50 mix which should look nice with the pattern barely visible underneath:

USS Voyager WIP Img - 348 by Steve J, on Flickr
Similar threads
- Replies
- 10
- Views
- 3K
