Now… Voyager…
- Thread starter trekriffic
- Start date
trekriffic
Well-Known Member
- Joined
- Jan 6, 2012
- Messages
- 1,041
Thanks dude. I appreciate the support.Beautiful work man.
So as proof I do do windows...
Light test again. Most of the window ports in this shot have had at least one filling with white glue and will get more.
It really works great to diffuse the light from within. Love the backlit panels for the large window ports:
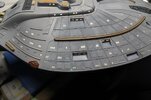
USS Voyager WIP Img - 409 by Steve J, on Flickr
Nice shot of the lit engines. After final cleanup and shading I will gloss coat with lacquer and apply decals:
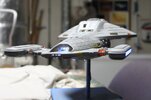
USS Voyager WIP Img - 410 by Steve J, on Flickr
Impromptu natural sunlight shot before decals. Early morning Voyager:
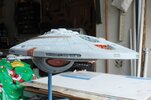
USS Voyager WIP Img - 411 by Steve J, on Flickr
Sitting in the morning sun:
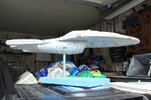
USS Voyager WIP Img - 412 by Steve J, on Flickr
Delta Flyer at dawn. Love how it stays put. Natural light shot:
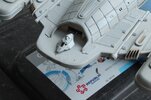
USS Voyager WIP Img - 413 by Steve J, on Flickr
Shuttle is held in place using tiny rare earth magnets:
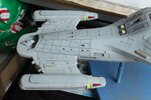
USS Voyager WIP Img - 414 by Steve J, on Flickr
Legs up au natural light:
USS Voyager WIP Img - 417 by Steve J, on Flickr
Pretty much ready for decals:
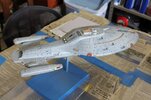
USS Voyager WIP Img - 422 by Steve J, on Flickr
trekriffic
Well-Known Member
- Joined
- Jan 6, 2012
- Messages
- 1,041
Thanks Q! Compliments are always welcome!
Time for an update I think ...
Cutting tiny strips of clear plastic sheet to be cut and used in the smaller rectangular lit window ports.
The windows already have been partly filled with white glue that has hardened.
Another drop of white glue will be dropped into each lit window prior to inserting the plastic window pane into the port:
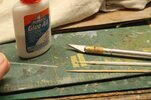
USS Voyager WIP Img - 424 by Steve J, on Flickr
You can see the plastic window panes reflecting in the light above the matte beige phaser strip.
This will be dulled though when I hit the ship with her Dullcote layers at the end:
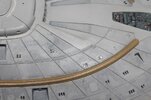
USS Voyager WIP Img - 425 by Steve J, on Flickr
Filling secondary hull window ports with white glue using a pointy toothpick. Check out the "luminous yellow" enamel paint on the nacelle:
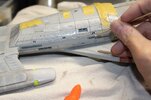
USS Voyager WIP Img - 426 by Steve J, on Flickr
After inserting really small clear plastic window panes into the openings to cover the second layer of white glue before it dries.
I got it down to about 60 seconds per window after lots of practice.
Fortunately all my effort to make the windows openings relatively uniform paid off with less need to measure, I could just make them mostly the same size so less need to really think:
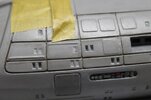
USS Voyager WIP Img - 428 by Steve J, on Flickr
Half the upper saucer small window inserts are done, they will appear more translucent once the glue dries:
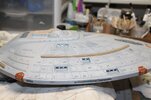
USS Voyager WIP Img - 429 by Steve J, on Flickr
Clamps back on while i move on to the decal stage:
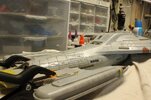
USS Voyager WIP Img - 432 by Steve J, on Flickr
Clamps ON! Finding small nits in the paint to clean up here and there.
Some are tiny remnants of Tamiya powder from the underlayer ... DOH!
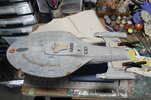
USS Voyager WIP Img - 434 by Steve J, on Flickr
After some cleanup she looks a bit cleaner. The final weathering/shading with acrylic wash I leave on will be very subtle.
She's still a relatively clean ship in this iteration:
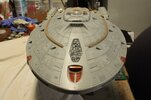
USS Voyager WIP Img - 436 by Steve J, on Flickr
Time for an update I think ...
Cutting tiny strips of clear plastic sheet to be cut and used in the smaller rectangular lit window ports.
The windows already have been partly filled with white glue that has hardened.
Another drop of white glue will be dropped into each lit window prior to inserting the plastic window pane into the port:

USS Voyager WIP Img - 424 by Steve J, on Flickr
You can see the plastic window panes reflecting in the light above the matte beige phaser strip.
This will be dulled though when I hit the ship with her Dullcote layers at the end:

USS Voyager WIP Img - 425 by Steve J, on Flickr
Filling secondary hull window ports with white glue using a pointy toothpick. Check out the "luminous yellow" enamel paint on the nacelle:

USS Voyager WIP Img - 426 by Steve J, on Flickr
After inserting really small clear plastic window panes into the openings to cover the second layer of white glue before it dries.
I got it down to about 60 seconds per window after lots of practice.
Fortunately all my effort to make the windows openings relatively uniform paid off with less need to measure, I could just make them mostly the same size so less need to really think:

USS Voyager WIP Img - 428 by Steve J, on Flickr
Half the upper saucer small window inserts are done, they will appear more translucent once the glue dries:

USS Voyager WIP Img - 429 by Steve J, on Flickr
Clamps back on while i move on to the decal stage:

USS Voyager WIP Img - 432 by Steve J, on Flickr
Clamps ON! Finding small nits in the paint to clean up here and there.
Some are tiny remnants of Tamiya powder from the underlayer ... DOH!

USS Voyager WIP Img - 434 by Steve J, on Flickr
After some cleanup she looks a bit cleaner. The final weathering/shading with acrylic wash I leave on will be very subtle.
She's still a relatively clean ship in this iteration:

USS Voyager WIP Img - 436 by Steve J, on Flickr
Pantherman
Well-Known Member
- Joined
- Feb 10, 2022
- Messages
- 4,039
Wow, such super detailing. Loving your work. PanthermanThanks Q! Compliments are always welcome!
Time for an update I think ...
Cutting tiny strips of clear plastic sheet to be cut and used in the smaller rectangular lit window ports.
The windows already have been partly filled with white glue that has hardened.
Another drop of white glue will be dropped into each lit window prior to inserting the plastic window pane into the port:
View attachment 110762
USS Voyager WIP Img - 424 by Steve J, on Flickr
You can see the plastic window panes reflecting in the light above the matte beige phaser strip.
This will be dulled though when I hit the ship with her Dullcote layers at the end:
View attachment 110763
USS Voyager WIP Img - 425 by Steve J, on Flickr
Filling secondary hull window ports with white glue using a pointy toothpick. Check out the "luminous yellow" enamel paint on the nacelle:
View attachment 110764
USS Voyager WIP Img - 426 by Steve J, on Flickr
After inserting really small clear plastic window panes into the openings to cover the second layer of white glue before it dries.
I got it down to about 60 seconds per window after lots of practice.
Fortunately all my effort to make the windows openings relatively uniform paid off with less need to measure, I could just make them mostly the same size so less need to really think:
View attachment 110765
USS Voyager WIP Img - 428 by Steve J, on Flickr
Half the upper saucer small window inserts are done, they will appear more translucent once the glue dries:
View attachment 110766
USS Voyager WIP Img - 429 by Steve J, on Flickr
Clamps back on while i move on to the decal stage:
View attachment 110767
USS Voyager WIP Img - 432 by Steve J, on Flickr
Clamps ON! Finding small nits in the paint to clean up here and there.
Some are tiny remnants of Tamiya powder from the underlayer ... DOH!
View attachment 110768
USS Voyager WIP Img - 434 by Steve J, on Flickr
After some cleanup she looks a bit cleaner. The final weathering/shading with acrylic wash I leave on will be very subtle.
She's still a relatively clean ship in this iteration:
View attachment 110769
USS Voyager WIP Img - 436 by Steve J, on Flickr
trekriffic
Well-Known Member
- Joined
- Jan 6, 2012
- Messages
- 1,041
Thanks! It's a pleasure to work on something larger for a change.Wow, such super detailing. Loving your work. Pantherman
trekriffic
Well-Known Member
- Joined
- Jan 6, 2012
- Messages
- 1,041
Voyaging along...
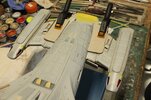
USS Voyager WIP Img - 437 by Steve J, on Flickr
I'm sure everyone is saying,
"Cripes! What's with the fracking clamp pics !??"
Honestly...
I have no idea...
Actually this is showing off the stripes I added to the nacelles using a black acrylic wash. Later I would brush the nacelles with a mix of clear matte enamel and the "A" hull color mix making it semi transparent. I wanted to make the stripes more subtle as an underlayer.
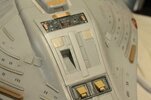
USS Voyager WIP Img - 438 by Steve J, on Flickr
Retouching the panels above the photorp launchers with a grey mix of enamel left some uneveness I will need to sand and polish out.
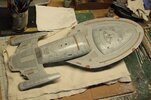
USS Voyager WIP Img - 439 by Steve J, on Flickr
Gloss coated again after the acrylic wash treatment for subtle shading.
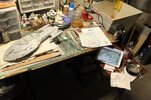
USS Voyager WIP Img - 441 by Steve J, on Flickr
Setting up to apply decals. I'll use my old iPad to look up reference photos I saved of the original studio model to help me properly locate some, if not all, of the myriad of tiny decals I have to apply.
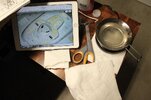
USS Voyager WIP Img - 442 by Steve J, on Flickr
I use a small coffee mug warmer to keep the decal water warm, it really speeds up the soaking time.
USS Voyager WIP Img - 443 by Steve J, on Flickr
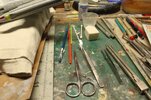
Various tools to cut decals before application of solvents and positioning with tweezers, brushes, and micro-brushes.
USS Voyager WIP Img - 444 by Steve J, on Flickr
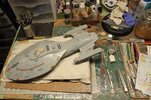
She's ready for her markings.
USS Voyager WIP Img - 447 by Steve J, on Flickr
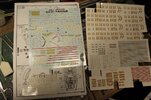
I have three sheets of decals to pull from - the Revelle kit decals, a large sheet with some extra detail decals I got from James over on AST, and some 1/1400 scale detail decals leftover from my NCC-1707-E build.
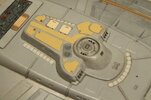
USS Voyager WIP Img - 445 by Steve J, on Flickr
Bridge module decals.
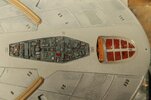
USS Voyager WIP Img - 446 by Steve J, on Flickr
Saucer bow auxiliary deflector and sensor pallet decals.
More to come...

USS Voyager WIP Img - 437 by Steve J, on Flickr
I'm sure everyone is saying,
"Cripes! What's with the fracking clamp pics !??"
Honestly...
I have no idea...
Actually this is showing off the stripes I added to the nacelles using a black acrylic wash. Later I would brush the nacelles with a mix of clear matte enamel and the "A" hull color mix making it semi transparent. I wanted to make the stripes more subtle as an underlayer.

USS Voyager WIP Img - 438 by Steve J, on Flickr
Retouching the panels above the photorp launchers with a grey mix of enamel left some uneveness I will need to sand and polish out.

USS Voyager WIP Img - 439 by Steve J, on Flickr
Gloss coated again after the acrylic wash treatment for subtle shading.

USS Voyager WIP Img - 441 by Steve J, on Flickr
Setting up to apply decals. I'll use my old iPad to look up reference photos I saved of the original studio model to help me properly locate some, if not all, of the myriad of tiny decals I have to apply.

USS Voyager WIP Img - 442 by Steve J, on Flickr
I use a small coffee mug warmer to keep the decal water warm, it really speeds up the soaking time.

USS Voyager WIP Img - 443 by Steve J, on Flickr
Various tools to cut decals before application of solvents and positioning with tweezers, brushes, and micro-brushes.

USS Voyager WIP Img - 444 by Steve J, on Flickr
She's ready for her markings.

USS Voyager WIP Img - 447 by Steve J, on Flickr
I have three sheets of decals to pull from - the Revelle kit decals, a large sheet with some extra detail decals I got from James over on AST, and some 1/1400 scale detail decals leftover from my NCC-1707-E build.

USS Voyager WIP Img - 445 by Steve J, on Flickr
Bridge module decals.

USS Voyager WIP Img - 446 by Steve J, on Flickr
Saucer bow auxiliary deflector and sensor pallet decals.
More to come...
trekriffic
Well-Known Member
- Joined
- Jan 6, 2012
- Messages
- 1,041
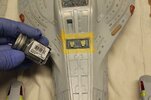
USS Voyager WIP Img - 448 by Steve J, on Flickr
Repainting again. Have to get it right before I apply decals all around it.
I ended up using an old bottle of Model Master Neutral Grey.
Testors Flat Gray ended up looking too dark. I want a light, medium grey.
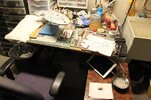
USS Voyager WIP Img - 449 by Steve J, on Flickr
Time for decals at last...
I have an old iPad I'll use to look at reference images of the studio model in my cloud album and on the internet.
Pinterest has a lot of studio model images too.
The images are vital for placement of all the really small detail decals.
I heat a small pan of water on a coffee cup warmer to speed up the soaking process. Probably saves me 20-30 seconds per decal.
Takes about 5 seconds for most decals to come free from the backing. Longer for bigger decals.
I will used Micro Set and Sol along with Solvaset to set the decals once in place.
First though...
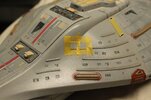
USS Voyager WIP Img - 450 by Steve J, on Flickr
The kit didn't include enough decals to cover the four photo-etch brass hatches that were not molded onto the hull along the sides of the spine,
So I decided to mask them off and paint them with Testors Light Ivory enamel which is a dead match for the decal escape pod hatches.
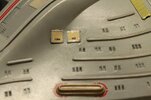
USS Voyager WIP Img - 451 by Steve J, on Flickr
My improvised escape pod hatches. Paint and leftover decal numbers and stripes.
The curves at the corners of the red striped brackets were brushed on using a fine striping brush.
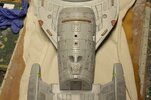
USS Voyager WIP Img - 452 by Steve J, on Flickr
Lower engineering hull decals in progress. Still needs escape pod hatches.
I did some cleanup beforehand using cotton swabs and Microset which is like thinned white vinegar for the most part.
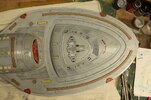
So the thinned black acrylic wash shading is very subtle at this point, it makes a big difference IMO, helps make the raised detail pop.
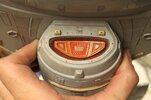
USS Voyager WIP Img - 453 by Steve J, on Flickr
Deflector housing decals done.
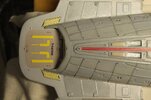
USS Voyager WIP Img - 454 by Steve J, on Flickr
Ventral saucer decals done.
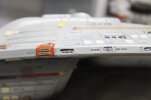
USS Voyager WIP Img - 455 by Steve J, on Flickr
Fantail and spine decals done. Small issue with the transporter pad decals not exactly fitting the pair of photo-etch brass emitters but…. I can live with it. I am happy that the decal placement matches side to side though so they match.
The little black squares in the corners of the upper grid panels along the spine were made from leftover decal material.
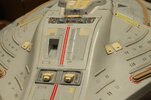
USS Voyager WIP Img - 456 by Steve J, on Flickr
Rim decals. Found images of these on Pinterest luckily.
USS Voyager WIP Img - 458 by Steve J, on Flickr
Upper spine decals. I used a mix of kit and other decals from my personal stash.
Almost caught up! Thanks for voyaging along with me...
trekriffic
Well-Known Member
- Joined
- Jan 6, 2012
- Messages
- 1,041
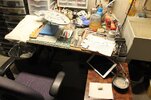
Time for decals at last.
I have an old iPad I'll use to look at reference images of the studio model in my cloud album and on the internet.
Pinterest has a lot of studio model images too.
The images are vital for placement of all the really small detail decals.
I heat a small pan of water on a coffee cup warmer to speed up the soaking process.
Probably saves me 20-30 seconds per decal. Takes about 5 seconds for most decals to come free from the backing. Longer for bigger decals.
I will used Micro Set and Sol along with Solvaset to set the decals once in place:
USS Voyager WIP Img - 449 by Steve J, on Flickr
The Revell kit didn't include enough decals to cover the four photo-etch brass hatches that were not molded onto the hull along the sides of the spine,
so, I decided to mask them off and paint them Light ivory which is a dead match for the decal escape pod hatches:
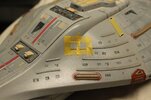
USS Voyager WIP Img - 450 by Steve J, on Flickr
My improvised escape pod hatches. Paint and leftover decal numbers and stripes.
The curves at the corners of the red striped brackets were brushed on using a fine striping brush:
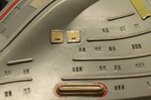
USS Voyager WIP Img - 451 by Steve J, on Flickr
Lower engineering hull decals in progress. Still need escape pod hatches.
I did some cleanup beforehand using cotton swabs and Microset which is like thinned white vinegar for the most part.
So the thinned black acrylic wash shading is very subtle at this point, it makes a big difference IMO, helps make the raised detail pop:
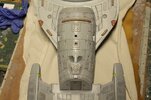
USS Voyager WIP Img - 452 by Steve J, on Flickr
Deflector housing decals done:
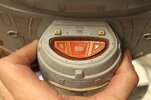
USS Voyager WIP Img - 453 by Steve J, on Flickr
Ventral saucer decals done:
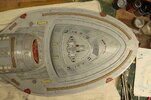
USS Voyager WIP Img - 454 by Steve J, on Flickr
Fantail and spine decals done.
Small issue with the transporter pad decals not exactly fitting the pair of photo-etch brass emitters but…. I can live with it.
I am happy that the decal placement matches side to side though so at least that matches.
The little black squares in the corners of the upper grid panels along the spine were made from leftover decal material:
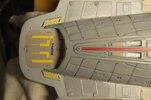
USS Voyager WIP Img - 455 by Steve J, on Flickr
More to come...
I have an old iPad I'll use to look at reference images of the studio model in my cloud album and on the internet.
Pinterest has a lot of studio model images too.
The images are vital for placement of all the really small detail decals.
I heat a small pan of water on a coffee cup warmer to speed up the soaking process.
Probably saves me 20-30 seconds per decal. Takes about 5 seconds for most decals to come free from the backing. Longer for bigger decals.
I will used Micro Set and Sol along with Solvaset to set the decals once in place:

USS Voyager WIP Img - 449 by Steve J, on Flickr
The Revell kit didn't include enough decals to cover the four photo-etch brass hatches that were not molded onto the hull along the sides of the spine,
so, I decided to mask them off and paint them Light ivory which is a dead match for the decal escape pod hatches:

USS Voyager WIP Img - 450 by Steve J, on Flickr
My improvised escape pod hatches. Paint and leftover decal numbers and stripes.
The curves at the corners of the red striped brackets were brushed on using a fine striping brush:

USS Voyager WIP Img - 451 by Steve J, on Flickr
Lower engineering hull decals in progress. Still need escape pod hatches.
I did some cleanup beforehand using cotton swabs and Microset which is like thinned white vinegar for the most part.
So the thinned black acrylic wash shading is very subtle at this point, it makes a big difference IMO, helps make the raised detail pop:

USS Voyager WIP Img - 452 by Steve J, on Flickr
Deflector housing decals done:

USS Voyager WIP Img - 453 by Steve J, on Flickr
Ventral saucer decals done:

USS Voyager WIP Img - 454 by Steve J, on Flickr
Fantail and spine decals done.
Small issue with the transporter pad decals not exactly fitting the pair of photo-etch brass emitters but…. I can live with it.
I am happy that the decal placement matches side to side though so at least that matches.
The little black squares in the corners of the upper grid panels along the spine were made from leftover decal material:

USS Voyager WIP Img - 455 by Steve J, on Flickr
More to come...
trekriffic
Well-Known Member
- Joined
- Jan 6, 2012
- Messages
- 1,041
Voyaging on...
Rim decals. Found images of these on Pinterest luckily:
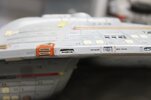
USS Voyager WIP Img - 456 by Steve J, on Flickr
Upper spine decals. I used a mix of kit and other decals from my personal stash:
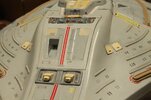
USS Voyager WIP Img - 458 by Steve J, on Flickr
Short videos...
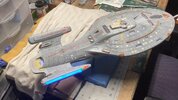
USS Voyager WIP Vid - 015 by Steve J, on Flickr
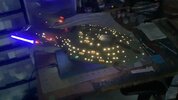
USS Voyager WIP Vid - 016 by Steve J, on Flickr
Got this at the craft store with a 50% off coupon.
This will provide an easier way to cut thin strips of decal paperthan using a ruler and an exacto knife.
Less likely to slice my fingers too:
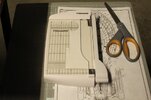
USS Voyager WIP Img - 459 by Steve J, on Flickr
Unlit window decals soaking in warm water:
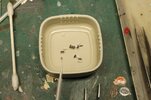
USS Voyager WIP Img - 460 by Steve J, on Flickr
After the dark window decals dried I gave her a shot or two of gloss cote lacquer to seal the beast. Have to gloss cote the secondary hull and under saucer next.
She'll get a few shots of dull cote for her final coat.
Some high resolution detail shots follow. Click or tap the images to expand to ludicrous size:
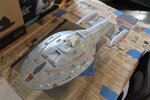
USS Voyager WIP Hi Res Img - 461 by Steve J, on Flickr
Upper hull and engines after a final shot of Testors gloss cote. Next will be her dull coats:
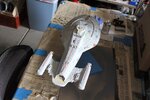
USS Voyager WIP Hi Res Img - 462 by Steve J, on Flickr
Midday garage light photo of upper hull right after sealing with Testors clear gloss lacquer:
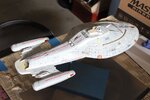
USS Voyager WIP Hi Res Img - 463 by Steve J, on Flickr
Dorsal surfaces sealed with gloss cote. Will spray with dull cote next:
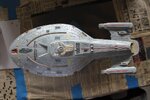
USS Voyager WIP Hi Res Img - 464 by Steve J, on Flickr
More to come and overcoming a small disaster due to my own stupidity.
Rim decals. Found images of these on Pinterest luckily:

USS Voyager WIP Img - 456 by Steve J, on Flickr
Upper spine decals. I used a mix of kit and other decals from my personal stash:

USS Voyager WIP Img - 458 by Steve J, on Flickr
Short videos...

USS Voyager WIP Vid - 015 by Steve J, on Flickr

USS Voyager WIP Vid - 016 by Steve J, on Flickr
Got this at the craft store with a 50% off coupon.
This will provide an easier way to cut thin strips of decal paperthan using a ruler and an exacto knife.
Less likely to slice my fingers too:

USS Voyager WIP Img - 459 by Steve J, on Flickr
Unlit window decals soaking in warm water:

USS Voyager WIP Img - 460 by Steve J, on Flickr
After the dark window decals dried I gave her a shot or two of gloss cote lacquer to seal the beast. Have to gloss cote the secondary hull and under saucer next.
She'll get a few shots of dull cote for her final coat.
Some high resolution detail shots follow. Click or tap the images to expand to ludicrous size:

USS Voyager WIP Hi Res Img - 461 by Steve J, on Flickr
Upper hull and engines after a final shot of Testors gloss cote. Next will be her dull coats:

USS Voyager WIP Hi Res Img - 462 by Steve J, on Flickr
Midday garage light photo of upper hull right after sealing with Testors clear gloss lacquer:

USS Voyager WIP Hi Res Img - 463 by Steve J, on Flickr
Dorsal surfaces sealed with gloss cote. Will spray with dull cote next:

USS Voyager WIP Hi Res Img - 464 by Steve J, on Flickr
More to come and overcoming a small disaster due to my own stupidity.
Pantherman
Well-Known Member
- Joined
- Feb 10, 2022
- Messages
- 4,039
Oh no, I almost don't want to look at the next post as you're build is fantastic. PanthermanVoyaging on...
Rim decals. Found images of these on Pinterest luckily:
View attachment 111355
USS Voyager WIP Img - 456 by Steve J, on Flickr
Upper spine decals. I used a mix of kit and other decals from my personal stash:
View attachment 111356
USS Voyager WIP Img - 458 by Steve J, on Flickr
Short videos...
View attachment 111357
USS Voyager WIP Vid - 015 by Steve J, on Flickr
View attachment 111358
USS Voyager WIP Vid - 016 by Steve J, on Flickr
Got this at the craft store with a 50% off coupon.
This will provide an easier way to cut thin strips of decal paperthan using a ruler and an exacto knife.
Less likely to slice my fingers too:
View attachment 111359
USS Voyager WIP Img - 459 by Steve J, on Flickr
Unlit window decals soaking in warm water:
View attachment 111360
USS Voyager WIP Img - 460 by Steve J, on Flickr
After the dark window decals dried I gave her a shot or two of gloss cote lacquer to seal the beast. Have to gloss cote the secondary hull and under saucer next.
She'll get a few shots of dull cote for her final coat.
Some high resolution detail shots follow. Click or tap the images to expand to ludicrous size:
View attachment 111361
USS Voyager WIP Hi Res Img - 461 by Steve J, on Flickr
Upper hull and engines after a final shot of Testors gloss cote. Next will be her dull coats:
View attachment 111362
USS Voyager WIP Hi Res Img - 462 by Steve J, on Flickr
Midday garage light photo of upper hull right after sealing with Testors clear gloss lacquer:
View attachment 111363
USS Voyager WIP Hi Res Img - 463 by Steve J, on Flickr
Dorsal surfaces sealed with gloss cote. Will spray with dull cote next:
View attachment 111364
USS Voyager WIP Hi Res Img - 464 by Steve J, on Flickr
More to come and overcoming a small disaster due to my own stupidity.
trekriffic
Well-Known Member
- Joined
- Jan 6, 2012
- Messages
- 1,041
if this concerns my disaster, don't worry my friend. I've made enough weirdly dumb gaffs on my models over the decades to get pretty good at fixing them, and sometimes I end up improving them. Heck if it is too damaged to fix I could always turn it into a battle damaged ship! It would be my first…Oh no, I almost don't want to look at the next post as your build is fantastic. Pantherman
Anyway, I had a brain fart and sprayed on too much Gloss Cote on the underside of the fantail and watched in horror as the lacquer started wrinkling, my only hope was it didn't spread to the rest of the lower hull. I said a prayer to the styrene god as the cancer slowly stopped spreading. Luckily it was confined to the center, light grey section under the fantail and small areas at the roots of the winglets. No decals were damaged thankfully.
I took a few hours to,let it dry before wet sanding off the clear lacquer before I reached the original enamel layers of which there were multiple. I was glad of all the retouched enamel layers as it gave me room to sand off a layer or two before I'd touch plastic. So… after no more wrinkles were visible I ent on wet polishing with pads and films before giving it a light rub with 70% rubbing alcohol. Then i brushed on a fresh coat of the grey to match the adjoining undamaged paint. After that dried I wet sanded with the red Testors film, followed by pads, and a final rub with paper toweling as it is lightly abrasive.
I ended up with a brushstroke free surface matching the adjoining light grey paint; it actually looks better than before so… BONUS!
I'll wait another few days so the new paint is good and dry before giving her another QUICK shot of Glosscote. Voyager gets her Dull Cote layers then and she's done- except for the base, the Aero Wing and the Delta Flyer for which I am still working on getting decals printed.
I may end up having to piece together some decals and/or hand brush something if my decal guy doesn't get back to me. That would be a shame because I won't be able to paint some of the details I can get using decals.
I will work on painting some engine and windows on the two shuttles while the model sits and dries In the garage with me.
Last edited:
trekriffic
Well-Known Member
- Joined
- Jan 6, 2012
- Messages
- 1,041
Time for some dullcote garage pics...
After three shots of dullcote. Bridge module port side detail. Backlit window detail.:
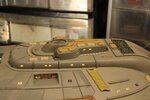
USS Voyager WIP Img - 472 by Steve J, on Flickr
Bridge and windows after dullcote:
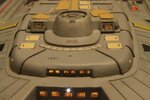
USS Voyager WIP Img - 471 by Steve J, on Flickr
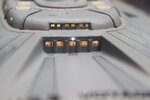
USS Voyager WIP Img - 467 by Steve J, on Flickr
Forward port saucer window cutout detail:
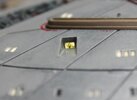
USS Voyager WIP Img - 470 by Steve J, on Flickr
Port side backlit window detail:
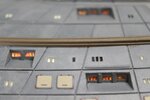
USS Voyager WIP Img - 468 by Steve J, on Flickr
Good closeup of the rooms behind the windows:
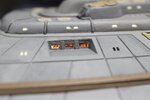
USS Voyager WIP Img - 469 by Steve J, on Flickr
Dorsal stern details after dull cote;
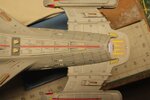
USS Voyager WIP Img - 474 by Steve J, on Flickr
Type 9 shuttles in bay. Stern window cutout detail:
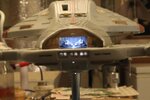
USS Voyager WIP Img - 465 by Steve J, on Flickr
Deflector and engineering hull details:
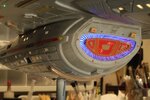
USS Voyager WIP Img - 475 by Steve J, on Flickr
Next I need to flip her over and spray the underside with the dull cote. She will be very flat when I'm done.
It really brings out the "rorschach/aztrec" paneling a little more as the gloss disappears, something I was aware of and am please with.
After three shots of dullcote. Bridge module port side detail. Backlit window detail.:

USS Voyager WIP Img - 472 by Steve J, on Flickr
Bridge and windows after dullcote:

USS Voyager WIP Img - 471 by Steve J, on Flickr

USS Voyager WIP Img - 467 by Steve J, on Flickr
Forward port saucer window cutout detail:

USS Voyager WIP Img - 470 by Steve J, on Flickr
Port side backlit window detail:

USS Voyager WIP Img - 468 by Steve J, on Flickr
Good closeup of the rooms behind the windows:

USS Voyager WIP Img - 469 by Steve J, on Flickr
Dorsal stern details after dull cote;

USS Voyager WIP Img - 474 by Steve J, on Flickr
Type 9 shuttles in bay. Stern window cutout detail:

USS Voyager WIP Img - 465 by Steve J, on Flickr
Deflector and engineering hull details:

USS Voyager WIP Img - 475 by Steve J, on Flickr
Next I need to flip her over and spray the underside with the dull cote. She will be very flat when I'm done.
It really brings out the "rorschach/aztrec" paneling a little more as the gloss disappears, something I was aware of and am please with.
trekriffic
Well-Known Member
- Joined
- Jan 6, 2012
- Messages
- 1,041
Thanks!Fabulous, simply fabulous
trekriffic
Well-Known Member
- Joined
- Jan 6, 2012
- Messages
- 1,041
Thanks! She photographs fairly well. I can see a few things to tidy up but not bad overall.That is awesome, what a fantastic build!
trekriffic
Well-Known Member
- Joined
- Jan 6, 2012
- Messages
- 1,041
Lower saucer and engineering backlit hull windows...
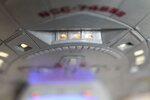
USS Voyager WIP Img - 476 by Steve J, on Flickr
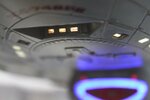
USS Voyager WIP Img - 477 by Steve J, on Flickr
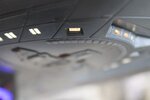
USS Voyager WIP Img - 478 by Steve J, on Flickr
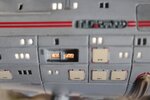
USS Voyager WIP Img - 479 by Steve J, on Flickr
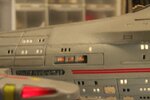
USS Voyager WIP Img - 480 by Steve J, on Flickr
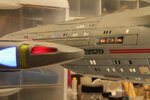
USS Voyager WIP Img - 481 by Steve J, on Flickr
Some hi-res pics of the final matte lacquer clear coats plus more low budget garage photos. Swipe of click to expand to full size...
Underside after first shot of dull cote. Semi-gloss sheen:
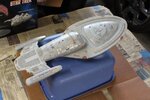
USS Voyager WIP Img - 482 by Steve J, on Flickr
Still wet after second shot of dull cote:
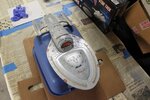
USS Voyager WIP Img - 483 by Steve J, on Flickr
Some fairly shabby garage photos after final touchups and clearcoats...
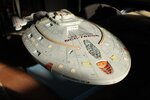
USS Voyager WIP Hi Res Img - 484 by Steve J, on Flickr
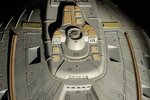
USS Voyager WIP Hi Res Img - 485 by Steve J, on Flickr
I'll post final final photos and vids once I get the decals to finish the Delta Flyer, the Aero Wing, and the base.

USS Voyager WIP Img - 476 by Steve J, on Flickr

USS Voyager WIP Img - 477 by Steve J, on Flickr

USS Voyager WIP Img - 478 by Steve J, on Flickr

USS Voyager WIP Img - 479 by Steve J, on Flickr

USS Voyager WIP Img - 480 by Steve J, on Flickr

USS Voyager WIP Img - 481 by Steve J, on Flickr
Some hi-res pics of the final matte lacquer clear coats plus more low budget garage photos. Swipe of click to expand to full size...
Underside after first shot of dull cote. Semi-gloss sheen:

USS Voyager WIP Img - 482 by Steve J, on Flickr
Still wet after second shot of dull cote:

USS Voyager WIP Img - 483 by Steve J, on Flickr
Some fairly shabby garage photos after final touchups and clearcoats...

USS Voyager WIP Hi Res Img - 484 by Steve J, on Flickr

USS Voyager WIP Hi Res Img - 485 by Steve J, on Flickr
I'll post final final photos and vids once I get the decals to finish the Delta Flyer, the Aero Wing, and the base.
Similar threads
- Replies
- 3
- Views
- 1K
