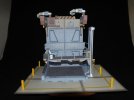
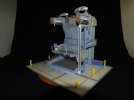
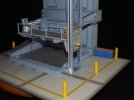
Patlabor Maintenance Facility

Thank you CT and Glorfindel.

The design and output of original pieces is new for me. Hope to one day be able to design a full model.
I do have some limited CAD experience.

Jim
 
Time for an update.
I've been forging ahead with this project, I want to have it finished so one can decide what to do for the Spring Contest.

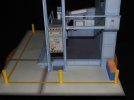
Anyway the posts were all rolled and assembled.

Base5_zps8e330e86.jpg

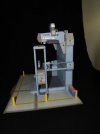
They were then installed to the shop floor. As well the Maintenance Station was also glued down to the floor.

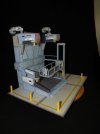
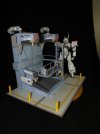
Here is how the display looks tonight.

Base6_zps1b5770e8-1.jpg

Base7_zpsb45b7e6b-1.jpg

As you can see here, what is a shop floor without a work bench. I had this in my inventory and scaled it down to match this build.

Base8_zps1191de6d.jpg

Base9_zps4b06d377-1.jpg

Base10_zps0f422744-1.jpg

Base12_zpsecc013fe-1.jpg

I brought Alphonse and Noa in to the scene. This is not their final position.

Base13_zpsbd64d595-1.jpg

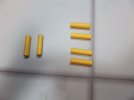
Let's see if you can recognize what these are.

Base14_zps19dff171.jpg

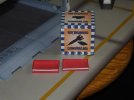
These are actually two drawers for a tall tool cabinet that is being constructed. Again it is something that was in my stash and I scaled it down from 1/6 to 1/30 to match the project. Most of the drawers are operational and I even have tools for it. I thought this would add more life to the dio.

Thank you for following.
Questions and comments are welcome.
Have a good evening.

Jim
 
Great work on the accessories. Cool that you can go to your stash, scale and build. I assume by stash you mean files that you print?

How would added painted weathering work on this? I would think you could seal the paper with a varnish then weather like a plastic model...?
 
Thank you Scott.
You can if you seal the paper with a clear coat, acrylic, varnish or future. Preferably before you build it.
If you plan ahead, you could always import the pieces into a graphics art program of your choice and add it before the build, as was done with the shop floor.

Jim
 
Good evening again.
Work on the rolling tool cabinet continues.
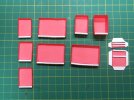
The drawers are now finished. Ran into some scaling issues with the coloured liners for the drawers. By reducing their size as much as was done and due to card thickness they no longer fit, too large, and had to trim them slightly to improve the fit. Also those u-channel pulls, being so small were a real challenge to fold. Used the edge of a steel ruler as a break to keep the fold even and neat.

RollingToolCabinet1_zps6239a126.jpg

RollingToolCabinet2_zpsfd9f0e65.jpg

The pulls still need a little work, but will deal with that after the cabinet is finished.

Today finished off constructing all the interior walls of the cabinet. Though small, they were basic box shapes.
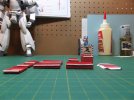
Also here is the printout of the casters for the cabinet. That is tomorrows project.

RollingToolCabinet3_zpsb40dd923.jpg

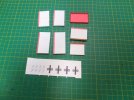
Here is what 's left of the pieces for the cabinet, the outer skins and the tools.

RollingToolCabinet4_zps5b7e95a3.jpg

After the casters are built, next up is assembly. Those tools, we will worry about after the cabinet is complete.

Thank you for watching.

Jim
 
Good afternoon fellow modelers.
We are really getting near the end of this project.
This weekend I was able to finish the rolling tool box and install it on to the base. Spent most of the time folding tools for the cabinet. Then figuring out a tool layout in the cabinet, before gluing them in position. Even simulated some cabling to store in the deep drawer.

Here are the finished casters.
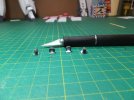
RollingToolCabinet6_zps148417df.jpg

These are the completed internal frame of the box and the outside skins and back.
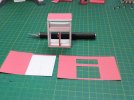
RollingToolCabinet7_zps79cbdd7e.jpg

The completed drawers with all their tools mounted and the finished cabinet. The original drawers were just all red inside and this clashed with the red handles on some of the tools, so black drawer mats were constructed and installed. Much better contrast and more realistic.
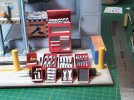
RollingToolCabinet8_zpsfb4274f3.jpg

The drawers were then slid into position and the cabinet glued to the floor. The drawers are not glued in place and freely slide.
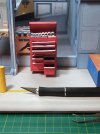
RollingToolCabinet9_zps167067ab.jpg

A top down view of the rolling tool cabinet.
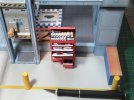
RollingToolCabinet10_zpsf71aabbf.jpg

This cabinet would definitely be easier to construct in it's native 1/6th scale as apposed to the 1/30th scale that I built it at. I think it turned out well.
Next up, to mount the Labor into the maintenance station and finalize the build.

Thank you for following.
Questions and comments are always welcome.

Jim
 
Good evening.
In working to finish this project off before the start of the BSC, I have been working on some detail items.
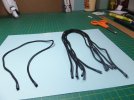
the kit supplied service cables were just flat pieces of paper. With the detail into this build this will just never do.
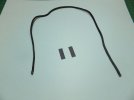
I decided to construct new cables. Went searching in Micheal's and found 1/8 parachute cord. This looked about right for this scale.
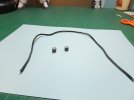
I cut six lengths for the cables. For the connectors I printed off some black on sheet card and cut off 1/4" x 3/4" pieces for the couplers. The ends of the cord were wiped with glue to keep them from fraying and left to dry.

Cables1_zps038ec218-1.jpg

The couplers were shaped to near cylinders.

Cables2_zps8567c707.jpg

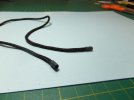
These were then wrapped around the cable to conform to the cord's diameter and glued to size. Glue was then added to the ends of the cord and the couplers slide up just past the ends and allowed to dry.

Cables3_zpsb41b939d.jpg

This was repeated for the rest of the cables.

Cables4_zpsfbbd92ed.jpg

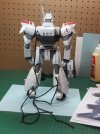
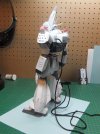
As only one of the service booms is inside the service area, three of the cables were attached to the Labor.

Cables5_zps2b2d2274.jpg

Cables6_zps5805c244-1.jpg

Tomorrows job will be to install the Labor into the Maintenance Station and finish off the rest of the details.

Thank you for watching.

Jim
 
Thank you Cave Dweller.
There are actually several other build threads here of mine.

Jim
 

Latest posts

Back
Top