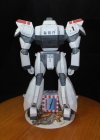
Patlabor Maintenance Facility

Hi Cave Dweller, thank you.
They were a bit of a challenge at first but got easier later on. Now the thumbs, that is another story. ::)

Jim
 
This really looks incredible my friend... do you use anything to reinforce the paper seeing how big it is? I mean I'm sure that it doesn't last long without being coated in something like a laquer or a polyethelene to keep it rigid... what would you use? The only thing that I would be worried about in that case is the ink running from the printed parts while it was being applied.
 
Thank you LrdSatyr8.
There are no internal structures in this model, just the thickness of the card is enough to support and strengthen it. If you were talking about a section that has a large internal space like a ship's hull or an aircraft fuselage, then internal structures would be required. I have a 4' figurine project that I built as an experiment and she supports herself quite fine. ( Note to self: half to get back to that someday and finish her. ;D )
I have models that are 10 yrs old and still perfectly fine. Some people do coat their builds with clear lacquer to help keep them clean ( finger oils, dirt and dust ) and to give the appearance of a harder, more shiny surface. I have not used this method as of yet. Water is the enemy of the inks. I have not heard of any problems of running from the use of spray lacquer on a model.

Jim
 
Like some of the other commenters on this thread, this is the first in-depth look I've had of paper card modelling. It's quite impressive!

What kind of card do you use? Is it sold at craft stores, or office stores? Can it be handled by a normal household printer or do you have them printed professionally? Sorry if I missed these questions earlier in the thread - there was a lot of pages to scroll through and I was too impatient to see more pictures! ;)
 
Hi Karl.
My standard card I use is 110 lb which can be had at most office supply stores. There are other weights and thicknesses that are also used, depending on the situation. Like for real small tubes standard 20 lb works best.
The thicker papers 1mm 2mm I get from an art supply.
As most printouts are Ltr size a standard printer is fine, as long as it can handle card. It needs a good heavy transport system, so some of the cheaper printers will not stand up. Personally I've had the best luck with the professional grade HP printers. If you require larger sheets you may require a large format printer or you could take it to a local printer. For 98% of the projects out there Ltr or A4 size is all that is necessary.
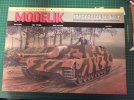
There are also preprinted kits out there you can purchase, and since print size is not an issue for them, many of those kits come in A3 format.

JagdpanzerIV_zps12cf1db2.jpg


Hope this helps.

Jim
 
Very interesting - I'm glad you've got this thread going so modelers like me who aren't all that familiar with the medium can get a chance to see what it's all about!
 
Your welcome Karl.
If you check out some of my other threads you can see what else can be done. Like the bird model and dio " Kingfisher", that I just completed and the U-boat build That was done for the BSC. I'm not a master of this medium but I do enjoy it for it's creativity, and am constantly learning to improve.

Jim
 
Well hello all. I've been on a bit of a hiatus since mid summer, and am now getting back into the swing of things again.
I will bring you up to date with what has been done.
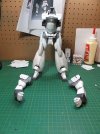
Started working on the shoulders and assembled the arm assembly.

Arms10_zps9c3aa60d.jpg

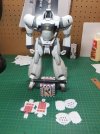
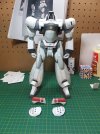
The arms were then attached to body and started working on the shoulder armor and light bars.

Arms11_zps2f35aeda.jpg

Arms13_zpsd856e34d.jpg

These were then attached to the shoulders. So here is where I am at tonight.


Body3_zps05406732.jpg


As well a short video of my AV-98 Ingram.

http://youtu.be/1YvZ9tRWQfY

From here I will be starting on the head.
I hope you will follow along.

Questions and comments are always welcome.

Jim
 
Good evening all.
Moving forward on the Ingram's head, I would like to give you an update.
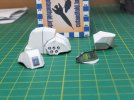
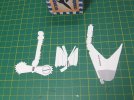
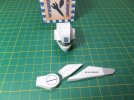
Progression on the head is slow, as most of the pieces are multifaceted and take time to shape and glue. At times only one glue tab at a time.
Started from the main block of the back of the head and work ones way outward.

Back section and fore head.

Head1_zps18fa0806.jpg

Lower jaw, face shield and crown piece.

Head3_zps9e391ee2.jpg

Head4_zpsf5f812f3.jpg

All the completed pieces so far.

Head5_zps2221aab9.jpg

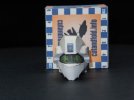
The assembled head as it is tonight.

Head6_zps0fb25d97.jpg

Head8_zps6359ab7a.jpg

Head10_zps5cc5aade.jpg


Head12_zpsefd1d05b.jpg

Head13_zps8b6749b2.jpg

Next are the antennae arrays, before we can attach this head.
Thank you for following.
Questions and comments are always welcome.

Jim
 
Impressive work. I find it very cool how you can get such cool shapes with paper. This build up is looking sweet.
 
Very cool , I was wondering about paper models so thank you for sharing and your work is very impressive...just one more facet of the hobby, paper as a medium..Thanx
 
Thank you Cargoman.

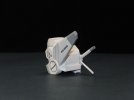
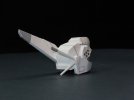
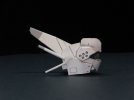
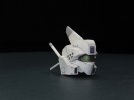
The head is now finished. Getting close now.
Worked on assembling and attaching the antennae arrays.

Head14_zps8642e16a.jpg

Head15_zps9f7beaf6.jpg

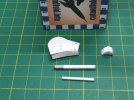
Used a toothpick and a pin as formers to roll these 2 tubes.

Head16_zpscf1ccdb9.jpg

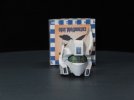
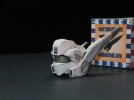
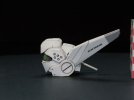
The completed head.

Head17_zps98c21d62.jpg

Head18_zps5a804e75.jpg

Head19_zpsca5e2dc8.jpg

Head20_zpsd765ce93.jpg

Head21_zps50f2c9fc.jpg

Head22_zpsd95b5586.jpg

Head23_zps13b6408d.jpg

Head24_zpsd24208a8.jpg

One more antennae to build for the neck area, then I can attach the head.

Thank you for watching.
Questions and comments are always welcome.

Jim
 
Amazing!

I love the detail of the head, the smaller the part the more complicated, but you pulled through.

Cheers man!
 

Latest posts

Back
Top