Revell 1/48 Lunar Module

Jim2001 said:
I think that's a bit harsh. :) how about:

To "pull a Grendels". Verb. To spontaniousy purchase, with uncanny foresight to it's future usefulness, a model kit which at the moment, captures ones attention.

...or am I wrong? Guys, help me out.


Well Jim, although you build a sweet model, I think you have it wrong here. You see, a scale model addict does not think about the future or the cost or consequence of a model kit purchase. All they think is...I GOTS TO HAVE THAT MODEL KIT........NOWWWWWW!!!!! Sad really...... ::) :p
 
Hehehehehe. Yup, I'm an addict too John. I guess we should be thankfull our drug of choice is styrene plastic! Your a good sport.
 
No worries Gents, just harmless fun, except to my storage space....... The floor is getting full.
 
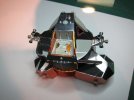
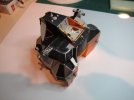
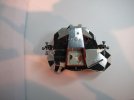
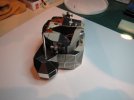
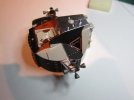
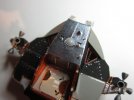
A little more progress on the LM. The mid section is coming along nicely. I have rivets to add but I found a way to get the position of the port tank support correct and the umbilical connection (the white thing below the hatch). There are so many small details to add here it's unreal but I can see it all taking form at last. Unfortunately there is no way I can finish this for the spring contest. I've put so much into this so far that I just can't rush it at this point. Too bad there isn't a category for "80% finished". ;)

IMG_1185.jpg
IMG_1186.jpg
IMG_1187.jpg
IMG_1188.jpg
 
What a nice job! Your attention to details on the Ascent stage is great to see! I love the rivets ... a lot of modelers make them oversize ... but yours look nice and subtle!! The little pieces of Kapton tape you're applying, really enhances the look of the build. ( Is this your first LM build or do you have a few of 'em under your belt? I've built 3 or 4 and I've still missed some of the details you're incorporating!)

Can I ask what you're using for reference? ( I just re-read your thread and didn't see a mention of it) I ask because you're picking up a lot of little things most LM modelers miss ... including me ... !

I'd also like to offer a word on your Descent Stage. The upper triangular 'supports' at the top of the landing gear should have the tapers going in the opposite direction. Easily fixed.

Again Jim, you're doin' a terrific job on this!
Thanx for posting!!

Pete
 
Can I ask what you're using for reference? ( I just re-read your thread and didn't see a mention of it) I ask because you're picking up a lot of little things most LM modelers miss ... including me ... !


As you've probably discovered, there is no one all encompassing reference for the LM. I have been collecting images for more than a year prior to this build. Everything from Grumman assembly and test images, to tourist shots of the LMs in the Smithsonian and KSC. I also didn't limit myself to just LM5 but I looked at all LMs including Spider. Each time I look at my collection I see something else I missed previously, so I've had to draw a line when it comes to the details I can achieve at 1/48.

I've only built one other LM and that was when I was 10. It was the Airfix LM5 and I almost bought it again to do this build but I went with the Revell/Monogram one since it's bigger and much more accurate.

I'd also like to offer a word on your Descent Stage. The upper triangular 'supports' at the top of the landing gear should have the tapers going in the opposite direction. Easily fixed.

Ah yes. I haven't put in the pyromark cones yet. Those are the original ones that Revell made and yes they are backwards. The decent stage is generally not finished yet. I am having some difficulty with fitting a flag carrier on the back of the ladder. This is due to the angle of the leg supports which has me considering redoing the whole area again. We'll see. Oh. And I have to remake the landing radar since I messed up the angles on it. It never ends.

As always I love seeing your updates!!

@Grendels: Cheers mate. Happy to post them.
 
nothing goes amiss hey... all the little things you are adding are making this... a master piece !

Keep up the good work.. it is pretty cool to see you go to town on this....

why isn't not that way in the first place...??? I guess it would be prohibitive ...!

Hope to see more of your excellent work soon !


Norm.

OUT!
 
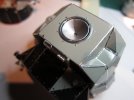
A little more progress on the detailing. Thanks for your kind words on this build. It's the first full build I've done in 15 years. I'm afraid I've caught the bug again. ;)

IMG_1215.jpg
IMG_1216.jpg

Ive added details around the navigation lights and installed the posts for the EVA handrail.

IMG_1219.jpg

The drogue is installed and all the metal has been added to that area.

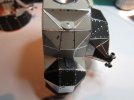
IMG_1220.jpg

Most of the rivets are in place now and I'm getting ready to attached the front, middle and back sections of this stage into one piece. After that, it will be the antennas and a few other small details in the aft section. After that, it'll be back to the decent stage and then the base. I recall a grey type of pulpy papier maché that used to come shrink-wrapped in a block. Just mix with water and it can be sculpted. Anyone heard of this (last I saw some was in the '70s)
 
Still looking great Jim! Just Awesome!

Jim2001 said:
...I recall a grey type of pulpy papier maché that used to come shrink-wrapped in a block. Just mix with water and it can be sculpted. Anyone heard of this (last I saw some was in the '70s)

That sounds like Celluclay. It's still available as far as I know. Check Michaels or Hobby Lobby, etc.
 
Yes that's it! So cool to see it's still around. When I was in kindergarten (45 years ago) I squished together a Christmas tree with that stuff. Great fun. I guess I'll see if I can squish together a lunar surface with it.
 
Yet another nice update!!

I just used celluclay for my Godzilla diorama. Just plan ahead, it will shrink up a little bit when it cures.
 
This is looking real good Jim! ... real good!

And another option for your base ... I've been using a piece of drywall as the base, remove the paper from one surface, apply a layer of 'spackle' ( the premixed stuff you use to patch holes in drywall) and with a wet fingertip, make some craters. Little broken bits of drywall also replicate rocks really nicely. Just sprinkle the bits on the wet 'spackle'. Then let it all dry, prime and paint.

With this model, you're setting the bar pretty high for us Real Space modelers ... atta boy!! ;)

Pete
 
Back
Top