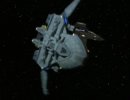
Revell - Maquis Fighter

@Mike, I don't know what kit you have, but ThePaintingClinic youtube channel has a superb build. I think he used Model Man Tom's light kit prize from last years SMA spring contest. Definately worth a look. It did look very hard though.

@merseajohn, Thanks man. I'm really proud so far. It's definately the hardest model I've done. Lighting it was the real challenge, but I think weathering is going to be tricky too. Not there yet! Still learning this stuff, so it's slow going.
 
Cheers, Scott!

Attached the wings and she's lookin' ready to raid!

2011-09-24_01-24-15_85.jpg


I'm looking to strengthen the bond between the wings and the lower hull. I've used a bit of bond-loc plastic weld. It's pretty severe stuff, but even at that I still feel like it needs more.

I was thinking some putty along the seam might do the trick. Ideally, I would put some greebles on there, but I'm not sure since the paint is down.

Any other suggestions guys, or do you think the putty should be sufficient?

2011-09-24_01-26-51_374.jpg
 
i wouldnt worry about it. in the future use some 5 min epoxy before painting. but since its not a toy i'm sure itll be fine. it's not like resin wings which like to eventually drag down so precautionary brass tubes are used as joints.
on another note...it looks sharp!
 
Thanks, Punk. The problem was I couldn't attach the wings before painting because of the engine grills.

The plastic weld I'm using is stronger than the 5 min epoxy equivalent, so I think I'm good there. I think it's 3,500 psi compared to epoxy at 2,500 psi.
 
Thanks, Q and Grendels.

I didn't bother with putty or anything else. These wings are on solid. If a wing should happen to fall off, It'll be easy enough to re-attach.

In retrospect, I should have added some details or piping to that 'step' where the wing connects to the hull.

I've attached the decal art I'll be using. Printed on a 125x70mm piece of clear decal paper.


[attachment deleted by admin]
 
That looks great!
Ya know...maybe I am just Klingon Crazed or Romulan Rummy, but I think I could see some of their influence in the design of this ship.
Like it could have been a Romulan Scout ship....or maybe a Klingon one?
Ya know, it's got the down pointing wings, and all the panel detailing, and an almost pronounced neck.....
Just something to consider 8)
 
Great progress here, Igard! You are almost there!
Also love the decals - excellent template, and I think they would definitely play a good role on the kit
 
Thanks, Mike and Solander. ;)

@Mike, I had the exact same impression about the Romulan Scout! It looks like the exact same bridge. I did a google search to find any info, but there are no details on this. Knowing the time constraints that the production staff had to deal with on TNG, I wouldn't be at all surprised.

In fact the first incarnation of this ship didn't have as much detail and was seemingly a bit smaller. Ro Laren flew it in TNG's penultimate episode, 'Pre-emptive Strike':-

Maquis_fighter_in_combat.jpg

I wonder if anyone will attempt a scratch build of that.
 
Decals applied.

2011-09-27_00-58-23_6.jpg


Halfway through applying the wash.

2011-09-27_23-05-17_745.jpg


I'm not sure if it's supposed to pool together like this.

2011-09-27_23-16-52_367.jpg


Grrr! :mad: Starting to rub off the wash and I'm making little chips in the paint! I thought the gloss coat would protect it. Maybe I was scrubbing too hard with the paper towel?

I've now managed to cover it up with some weathering, however, I need to avoid this in the future. Not all my models will be this heavily weathered.

2011-09-27_23-58-01_652.jpg


Started adding some light scoring.

2011-09-28_03-27-50_472.jpg


2011-09-28_03-28-02_891.jpg


2011-09-28_03-28-47_717.jpg


2011-09-28_03-29-02_165.jpg


2011-09-28_03-29-47_244.jpg


2011-09-28_03-30-06_455.jpg


2011-09-28_15-43-39_727.jpg


2011-09-28_15-44-40_907.jpg


2011-09-28_15-44-53_657.jpg


So, now I've just got to flat coat it.
 
when you get them let it dry and use a damp brush dampened in turps and just clean it up
 
Thanks, John.

spud said:
when you get them let it dry and use a damp brush dampened in turps and just clean it up

I'll try that next time. Thanks, spud.

I was just following the instructions on flory's models youtube channel. ie, let dry for 20 minutes, wipe it off with a paper towel, add water to remove more. I think maybe it had more to do with the gloss coat? Perhaps it was too thin? Perhaps the Model Master stuff is no good?

Anyway, really happy with the level of weathering. It was pretty much what I was going for. Apart from the chipping problem, it was very straight forward and easy to do.

Scoring was fun to do as well. I did feel like I was dusting for finger prints. I found a big one on one of the wings! ;D
 
looking good!!!!! i switch between a paper towel , q-tip and paint brush to remove the gunk. depending on what i am trying to do. Its a dirty job mate.
 
oh if its the water based stuff i duno if turps will be any good. but try it on some scrap first
 

Latest posts

Back
Top