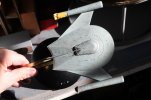
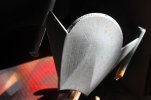
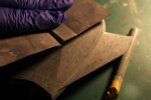
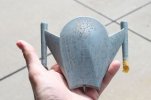
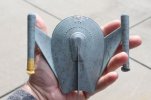
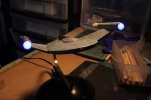
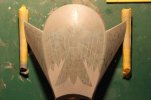
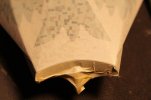
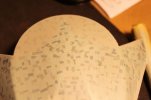
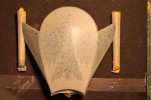
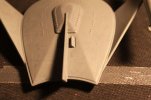
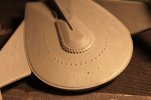
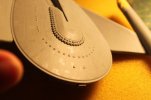
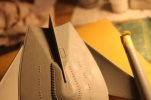
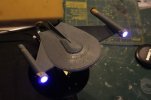
Romulan Bird-of-Prey from TOS

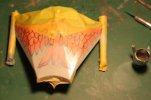
All done with the gold paneling now.

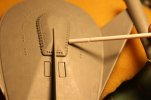
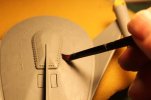
Here's the dorsal fin:
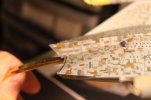
25064519092_12ae959c10_o.jpgAztec Paneling on Fin by trekriffic, on Flickr

Also the bow rim:
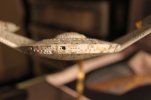
25182795685_677f5a99a2_o.jpgAztec Paneling Bow by trekriffic, on Flickr

The stern and sides are done as well. Mulling over the idea of overlaying the metallic panels with two shades of grey aztecing thinned with ModelMaster clear enamel so the metallic panels show thru. This aztecing would be larger panels alternating darker with lighter grey panels like those seen on the Enterprise D. This would be brushed on and lightly sanded before doing the final overspray with the airbrush.

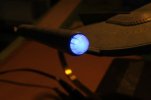
Anyway, while the paint dried I decided to do something I'd been thinking about for the bussards, something I'd seen in a SOTL calendar image showing a BOP flying low over the Romulan Capitol. I added some spokes to the rim of the domes. This further cements the notion this ship is influenced by Federation tech. Here's a test shot with the blue LED lighting one of the domes on the front of the nacelle:
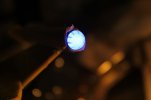
25156447106_5edf9bf9c0_o.jpgBussard Spokes by trekriffic, on Flickr

Before I could get started on the other dome; however, I noticed this:
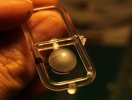
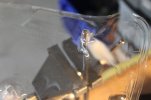
24887158090_bfac1b21f1_o.jpgCracked Bussard Dome by trekriffic, on Flickr

Crap! A large crack halfway across the dome!? As the part is still on the sprue I'm calling this a factory defect. The only thing I did with the part was to brush some Floquil flat base on the inside of the dome for diffusion purposes. No other stress was placed on the part that would have caused it to crack. So I'll be mailing in my UPC/Date code off the box with the parts replacement request form to Round 2. Hopefully they can ship out a new dome to me within the next few weeks.
In the meantime, I'll continue working on the paint job.
 
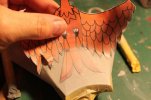
After mailing my replacement parts request form off to Round 2 this morning for a new bussard dome I came home from work during lunch and gave her an overcoat to mute the aztec. I found a 50/50 mix of ModelMaster Clear and HellBlau was about right to brush on over the aztecing. For areas where I obscured too much aztecing I dipped the brush in airbrush thinner, dobbed it on a rag to remove most of the thinner, and dragged it over the surface to thin the Hellblau mix and expose more of the paneling. Once this first coat fully cures in 2-3 days I'll go over it lightly with sanding films to bring back even more of the aztecing before the final very thin airbrush coats. Still deciding on the colors I want to use for the final coats; one thing I know is it will be a darker shade of grey on top than on the bottom. And the area behind the feathers on the stern and trailing edges of the wings underneath wil be even lighter, a mix of insignia white with the grey color of the underside.

Here is the ship as she appears right now in direct sunlight:

25109482331_c41b8b8acd_o.jpg' by trekriffic, on Flickr

25084452492_8e57a562ce_o.jpgOvercoating with Hellblau by trekriffic, on Flickr
 
These complex paintjobs take some time and effort but I think it's worth it to create that unique look I want with my builds.
Anyway, did some more work on it this morning...

Sanding film was used to thin the brushed overcoat after allowing 2 days for the paint to cure. This revealed more of the underlying paneling. As mentioned earlier, this is all in preparation for the final airbrush coats so the aztecing doesn't completely vanish in the process:

24892690419_9eaf8d7ee5_o.jpgLight Sanding of the Brushed Coat by trekriffic, on Flickr


Standing on my driveway for these shots. It's a nice sunny day here in Fremont, CA...
Here's the underside after sanding:

24629735354_26576eac92_o.jpgBottom After Light Sanding by trekriffic, on Flickr

There was a patch near the bow where, while brushing with the 50/50 Hellblau/clear mix, I got a little carried away trying to smooth out brushstrokes and removed some of the underlying aztec paneling. Doh! So, after allowing a day for the overcoat to dry, I went back in and restored the aztecing with a fine brush. After another day or so for the new aztecing to cure I'll reapply my Hellbalu mix to cover it up and blend it in with the rest of the paint.

Here's the top surface:

24892690109_b3616ce424_o.jpgTop After Light Sanding by trekriffic, on Flickr

Same issue with the one patch near the bow as regards restoration of the aztecing. She'll get her touchup with the brush and then a final sanding before final airbrush coats.

All the handbrushing with the Hellblau/clear mix had left a mildly rough texture behind but that's no longer the case. She's nice and smooth now.

Anyway, thanks for reading along!
 
That is a very nice result. I can see the difference in the smoothness of the surface before and after from the way the light reflects off the surface in your pictures.

Along the same lines as Q's question, could the bird be semi-transparent to let some of this paneling still show through? Not sure what your final intent is but that might be a cool looking effect.
 
Hagoth said:
Along the same lines as Q's question, could the bird be semi-transparent to let some of this paneling still show through? Not sure what your final intent is but that might be a cool looking effect.

I'm hoping for just such an effect with the decal being thin enough to allow some of the paneling to show thru but we'll have to wait and see on that I think.


Short update...

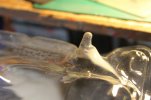
Now that I had the replacement outer bussard dome for the second nacelle from Round 2 (one of the two kit domes was cracked on the sprue so I sent away for a replacement from the factory) I set about stretching some clear plastic packaging to make the inner domes for "spokes" to be applied to...

The thin plastic was heated with a heat gun then quickly stretched over the round end of a paintbrush handle to make the domes that will fit inside the kit provided bussard domes:

25084876009_3909baf5c8_b.jpgStretching Clear Plastic to Make Inner Bussard Domes by trekriffic, on Flickr

25426312246_efbcea84b4_b.jpgClear Plastic Dome by trekriffic, on Flickr

After cooling, the dome was cut from the plastic tray. Eight thin pointed strips of adhesive backed aluminum mylar were then laid around the perimeter spaced evenly to create the spokes.
After that the dome was slid inside the kit dome which had been brushed with Floquil Flat Base the night before. This gave the bussard a nice even glow. The spokes really turned out nice I think:

25452459645_735fdc9e62_b.jpgBussard Dome Lit with Inner Dome in Place by trekriffic, on Flickr

25426315176_4d6d5e10c2_b.jpgBussard Domes Finished and Lit Up by trekriffic, on Flickr

After this light test the domes were removed and placed in a ziplock bag to protect them until I'm ready to glue them to the front of the nacelles near the end of the build.

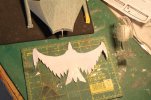
Moving along I took a photocopy of the decal sheet and cut out the lower raptor decal. The double-side scotch tape was applied to the underside along the rear feathers:

25084877819_ede55e056a_b.jpgBird Masking Template by trekriffic, on Flickr

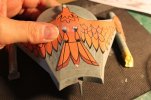
The raptor mask, now sticky with tape on the back, was positioned on the lower hull. Once I am sure the edges are well sealed I'll mix up a batch of the lower hull color, add a little white to it, and airbrush the aft underside of the ship and wings to give it some contrast with the area of the lower hull and wings forward of the raptor decal:

25359543691_09171a6c14_b.jpgBird Mask Appled to Lower Hull by trekriffic, on Flickr

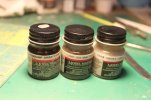
These are the colors I'll be thinning and airbrushing for the final hull coats:

25359543251_ff07419639_b.jpgHull Colors by trekriffic, on Flickr

24821909494_7571ff543a_b.jpgPaints for Final Hull Coats by trekriffic, on Flickr

Mix ratios will vary. My goal is for the upper hull to appear darker in value than the lower hull with the lower stern of the ship even lighter than the front.
 
Really looking forward to the anticipated result of the bird decal. Very cool progress update.
 
Thanks Hagoth! Appreciate the encouragement! :)

Today I airbrushed the underside...

The area aft of the feathers was airbrushed after masking with a 50/50 mix of Light Sea Gray and Dark Ghost Grey. To this mix was added an equal amount of Testors Flat White. Model Master Gloss Clear was then added for more transparency. This was then thinned with airbrush thinner to the consistency of milk before spraying:

24882815723_65377d74ed_b.jpgUnderside of Stern Airbrushed by trekriffic, on Flickr

After allowing a half hour to dry the raptor mask was carefully peeled off the underside. Some of the Hellblau paint layer stuck to the tape but that was of no concern since it would eventually be covered by the raptor decal:

25483421926_173acd1987_b.jpgMasking Template Removal by trekriffic, on Flickr

Here's the aft area after mask removal. The painted area appears more white in this photo than it actually is. Basically it's a very light neutral gray color.

25509525785_f0e7438318_b.jpgAft Underside After Mask Removal by trekriffic, on Flickr

After reapplying the mask the area forward of the raptor was airbrushed with the 50/50 Light Sea Gray and Dark Ghost Gray mix to which an equal amount of Model Master gloss clear enamel was added. No white was added this time though since I wanted it to be darker than the stern:

24878983254_fe3e448eb6_b.jpgForward Area Airbrushed on Underside by trekriffic, on Flickr

You'll notice I didn't airbrush the area that will be under the raptor decal; I wanted to leave the aztecing more pronounced there in the hopes some of it might show after applying the decal.

Soooooooo.... I'll let this dry overnite before airbrushing the top tomorrow.
Then I might go back with sanding films to smooth the finish and reveal a little more of the aztecing before sealing with Glosscote.
Once that's dry I'll poke out the windows and sensor ports that got clogged with paint so I can install fiber strands for lighting.
Then it wil be time for decaling this bird.
 
Looking incredible- you might want to reprint the bird decal at maybe 60% opacity on transparant decsl paper so your Aztec really shines through
Personally, I'd reverse the bird's color scheme (invert color in Photoshop) so the bird is a lovely blue- it'll match your nacelle glow

Really looking forward to where you take this- I've gotten a lot of inspiration from this thread! Lots of great ideas here on how to make areas devoid of details look "scale" via great paint apps!
 
Looking fab! Been following this build for a bit for some motivation/inspiration on my own kit in progress. Can't wait to see yours finished up. Amazing attention to detailing all the way.
 
So, over the weekend, I tried lightly sanding the top layer of paint fore and aft on the underside but it looked like crap; I really didn't like how the final paint coats was covering over all of my aztecing so... I tried wiping it off with thinner to start over but, as I was afraid of, it took off the underlying aztecing too so... I ended up repainting the aztec over the entire underside of the ship using what was still visible underneath as a guide when possible. Only took about 3 hours to do. Now I will apply an even thinner layer of the Hellblau mix to match the hull color currently on top. Then I'll try some thinner layers of the final two colors underneath once the Hellbalu dries. That should allow more of the aztecing to show thru. Ooooophda! This little ship is killing my neck and shoulders!
 
Whooo bummer. I'd try one of your little test panels first. If you have to do all that work again...
 
Update...

Well after the light coat of Hellblau mixed with Flat Base was good and dry I airbrushed more of my final colors fore and aft during my lunch hour. The only difference this time was adding Flat Base and just a little Hellblau to the mix before thinning with airbrush thinner. I am much more pleased with the results the second time around:

25534667022_12d793c47b_c.jpgStern Underside Redone by trekriffic, on Flickr

25026636523_044d8acda1_c.jpgBow Underside Redone by trekriffic, on Flickr

25026635533_b41a3558e2_c.jpgSecond Try by trekriffic, on Flickr

The aztecing is subtle still but clearly visible from less than 4 feet away. Beyond that and the main impression is of a grey hull which is what I was shooting for.
 
I mixed the following enamels for the upper hull and nacelles:
40% Gunship Grey
30% Light Ghost Grey
20% Hellblau
10% Flat White

After mixing in about the same amount of Flat Base I set to work with the airbrush:

25026065954_7421f28b52_c.jpgStern Upper Hull by trekriffic, on Flickr

25537867892_df380701d1_c.jpgBow Upper Hull by trekriffic, on Flickr

The effect is very subtle, the paneling is only visible from about 3 feet away. Once the paint is fully cured I'll give her a light going over with polishing film before applying the Glosscote.
 
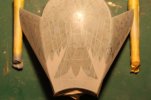
You guys are going to think I'm nuts but I still wasn't quite happy with the aztecing so... I went ahead and did a third round of handbrushed aztecing this time using copper instead of gold for some of the panles. I also used two shades of light and dark grey along with metallic silver. Afterward I airbrushed a new mix of Neutral Grey, Navy Blue, Gunship Grey, and Ghost Grey. Mixed that with some Floquil Flat Base and thinned to taste. Afterward I was finally satisfied. The silver panels really show up nicely when you tilt the hull at various angles to the light:

25799226231_b626f5b984_o.jpgHull After Third Round of Aztecing by trekriffic, on Flickr

25593614720_8b1c1ebcdc_o.jpgHull with Silver Panels Visible thru Overcoat of Grey by trekriffic, on Flickr

After drying overnight I started in on the fiberoptic installation...

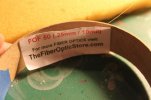
25894178655_627f1e3866_o.jpgFiber Optic Strand by trekriffic, on Flickr

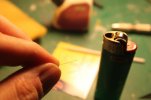
With the fiber still on the spool I carefully heated the end of the strand using a BIC lighter. The fiber bloomed into a tiny bulb:

25868275176_a763d2e14e_o.jpgBlooming the Ends by trekriffic, on Flickr

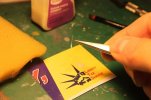
The strand was cut to length and dipped in clear parts cement:

25773399172_0381b7bd5b_o.jpgClear Parts Cement by trekriffic, on Flickr

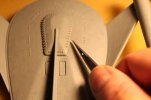
Using tweezers I placed the fiber strand into the hole I'd drilled out for each window and sensor port:

25868274816_cdb1afafce_o.jpgPlacing Strand in Sensor Ports by trekriffic, on Flickr

The flat end of a microbrush was handy for pushing the fiber optic bulb on the end of the strand into the hole. The fiber was a little undersized for the hole but the bulb was just the right size for pressing into the opening so the fiber was flush to the frame:

25868274736_d2d9f2f734_o.jpgPushing the Strand Flush with a Microbrush Handle by trekriffic, on Flickr

Any glue residue was cleaned up with a moistened brush:

25261456204_dd9104d5f8_o.jpgCleanup by trekriffic, on Flickr

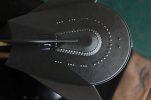
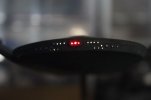
Here's some eye candy with the lights on after I finished installing all the fibers:

25773398452_7447c28b07_o.jpgLight Test after Fiber Installation by trekriffic, on Flickr

25894177445_dbba81a7a7_o.jpgBow Lights by trekriffic, on Flickr

25868274006_360561c3ea_o.jpgLight Test Complete by trekriffic, on Flickr

I'll give the enamel paint another day to cure before I hit her with a few coats of Glosscote before applying the decals.
 
Back
Top