Romulan Bird-of-Prey from TOS
- Thread starter trekriffic
- Start date
NecronautDrummer
Member
- Joined
- Sep 25, 2011
- Messages
- 804
Some stellar work! That aztecing is looking really sharp yet subtle now as well!
trekriffic
Well-Known Member
- Joined
- Jan 6, 2012
- Messages
- 1,041
Thanks for the comments guys!
Yesterday was decal day! WOOHOOOO!
Got all my tools and decal setting solutions out and organized:
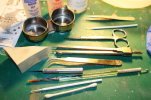 Decaling Tools by trekriffic, on Flickr
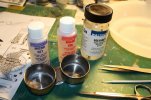 Decal Setting Solutions by trekriffic, on Flickr
Did the upper hull and wing decals first. One decal on the tail fin broke in two as did one of the scalloped decals on one of the wings but I was able to match the edges up precisely so you can't even see where the breaks occurred:
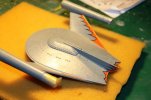 Upper Hull and Wing Decals by trekriffic, on Flickr
The big BOP decal that always makes me nervous was successfully applied. Having it printed in three sections really was a stroke of genius on the part of Round 2. It makes it a lot easier to apply the decal without wrinkling and tearing it; it also makes it much easier to squeeze out any trapped water. I took the advice from the instructions and cut the nacelle parts of the wing decal loose too to apply them last:
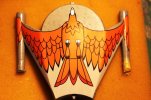 Lower Hull Bord-of-Prey Decal by trekriffic, on Flickr
One problem with the thin decal material was fragility. There were some places where the edges of the decal fragmented. Such as this area here:
 Decal Fragmentation by trekriffic, on Flickr
I resolved to repair the boo-boos using a sheet of old military aircraft decals I keep in my stash for things such as this:
 Using Spare Decals for Repairs by trekriffic, on Flickr
 Piece of Black Decal Material by trekriffic, on Flickr
 Applying Spare Decal Material to the Model by trekriffic, on Flickr
The repaired decal:
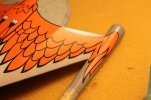 Completed Reapair by trekriffic, on Flickr
This big feather was missing its tip:
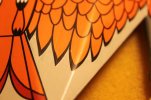 Feather Missing it's Tip by trekriffic, on Flickr
A new tip was overlayed and covered iwth a coat of liquid decal film. All the repairs were brushed with Micro SOL followed by a brushing of liquid decal film:
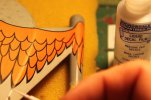 Repairing the Feather Tip by trekriffic, on Flickr
The reapaired tip:
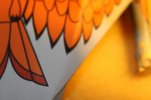 Reapaired Feather Tip by trekriffic, on Flickr
Another featehr was missing achunk from the side of it:
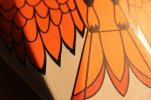 Another Feather to Repair by trekriffic, on Flickr
A short piece of spare black decal was laid on. looks good enough for government work eh?
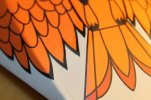 Feather After Repair by trekriffic, on Flickr
Here's a famous angle of the BoP from Balance of Terror to wet your appetites:
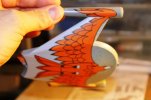 Famous Angle from Balance of Terror by trekriffic, on Flickr
Oh one other thing I did was add this mounting point to the port aft end of the ship:
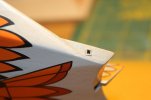 Port Mounting Hole by trekriffic, on Flickr
That's all for now. I'll let the decals dry overnight and seal them tomorrow with more gloss clear. Then she'll get a coat of matte flat before I go in with some pastel chalks.
Stay tuned my fellow centurions!
Yesterday was decal day! WOOHOOOO!
Got all my tools and decal setting solutions out and organized:
 Decaling Tools by trekriffic, on Flickr
 Decal Setting Solutions by trekriffic, on Flickr
Did the upper hull and wing decals first. One decal on the tail fin broke in two as did one of the scalloped decals on one of the wings but I was able to match the edges up precisely so you can't even see where the breaks occurred:
 Upper Hull and Wing Decals by trekriffic, on Flickr
The big BOP decal that always makes me nervous was successfully applied. Having it printed in three sections really was a stroke of genius on the part of Round 2. It makes it a lot easier to apply the decal without wrinkling and tearing it; it also makes it much easier to squeeze out any trapped water. I took the advice from the instructions and cut the nacelle parts of the wing decal loose too to apply them last:
 Lower Hull Bord-of-Prey Decal by trekriffic, on Flickr
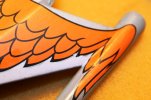
One problem with the thin decal material was fragility. There were some places where the edges of the decal fragmented. Such as this area here:
 Decal Fragmentation by trekriffic, on Flickr
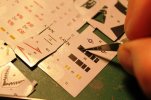
I resolved to repair the boo-boos using a sheet of old military aircraft decals I keep in my stash for things such as this:
 Using Spare Decals for Repairs by trekriffic, on Flickr
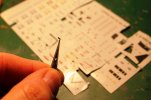
 Piece of Black Decal Material by trekriffic, on Flickr
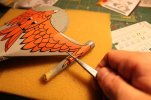
 Applying Spare Decal Material to the Model by trekriffic, on Flickr
The repaired decal:
 Completed Reapair by trekriffic, on Flickr
This big feather was missing its tip:
 Feather Missing it's Tip by trekriffic, on Flickr
A new tip was overlayed and covered iwth a coat of liquid decal film. All the repairs were brushed with Micro SOL followed by a brushing of liquid decal film:
 Repairing the Feather Tip by trekriffic, on Flickr
The reapaired tip:
 Reapaired Feather Tip by trekriffic, on Flickr
Another featehr was missing achunk from the side of it:
 Another Feather to Repair by trekriffic, on Flickr
A short piece of spare black decal was laid on. looks good enough for government work eh?
 Feather After Repair by trekriffic, on Flickr
Here's a famous angle of the BoP from Balance of Terror to wet your appetites:
 Famous Angle from Balance of Terror by trekriffic, on Flickr
Oh one other thing I did was add this mounting point to the port aft end of the ship:
 Port Mounting Hole by trekriffic, on Flickr
That's all for now. I'll let the decals dry overnight and seal them tomorrow with more gloss clear. Then she'll get a coat of matte flat before I go in with some pastel chalks.
Stay tuned my fellow centurions!
trekriffic
Well-Known Member
- Joined
- Jan 6, 2012
- Messages
- 1,041
Thanks Hagoth! You are too kind.
Small udpate...
After applying Tamiya pastel chalks for some minor weathering I sealed with Dullcote. Still need to attach the bussard domes and unmask the rear of the nacelles. I also made an arm with a power plug at the tip for use during photography sessions.
Just a little exhaust soot on the wings from firing her atomic missiles:
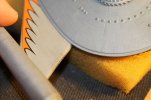 Weathering on Wing by trekriffic, on Flickr
Same for the plasma torpedo emitter on the bow:
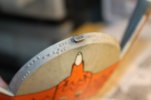 Plasma Torpedo Emitter Scoring Under Bow by trekriffic, on Flickr
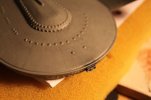 Weathering on Bow by trekriffic, on Flickr
Arm for photography which I need to cover with black velvet for shooting against my black velvet backdrop for "space" shots:
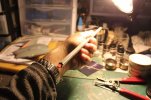 Photography Arm by trekriffic, on Flickr
The long arm plugged into the back of the BOP:
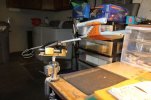 BOP on Photography Arm by trekriffic, on Flickr
You may note in these photos an unfortunate casualty of applying two coats of gloss for decaling and a few more coats of matte for weathering and sealing was the loss of the reflectivity of the paneling under the final grey layer which I really liked. I don't know if using a frisket with rectangles cut out to use in brushing on some Future would look as good or not. The nice thing about the subtle silver panels under the overlying grey color was just that, it was underneath not on top which would be the case if I added some paneling back using Future. Also the Future would not be nearly as subtle. I'll have to think about that; the paneling is still discernible however muted it may be.
Small udpate...
After applying Tamiya pastel chalks for some minor weathering I sealed with Dullcote. Still need to attach the bussard domes and unmask the rear of the nacelles. I also made an arm with a power plug at the tip for use during photography sessions.
Just a little exhaust soot on the wings from firing her atomic missiles:
 Weathering on Wing by trekriffic, on Flickr
Same for the plasma torpedo emitter on the bow:
 Plasma Torpedo Emitter Scoring Under Bow by trekriffic, on Flickr
 Weathering on Bow by trekriffic, on Flickr
Arm for photography which I need to cover with black velvet for shooting against my black velvet backdrop for "space" shots:
 Photography Arm by trekriffic, on Flickr
The long arm plugged into the back of the BOP:
 BOP on Photography Arm by trekriffic, on Flickr
You may note in these photos an unfortunate casualty of applying two coats of gloss for decaling and a few more coats of matte for weathering and sealing was the loss of the reflectivity of the paneling under the final grey layer which I really liked. I don't know if using a frisket with rectangles cut out to use in brushing on some Future would look as good or not. The nice thing about the subtle silver panels under the overlying grey color was just that, it was underneath not on top which would be the case if I added some paneling back using Future. Also the Future would not be nearly as subtle. I'll have to think about that; the paneling is still discernible however muted it may be.
trekriffic
Well-Known Member
- Joined
- Jan 6, 2012
- Messages
- 1,041
Well using Future to restore some of the paneling effect worked the trick. After brush painting panels all over the ship I thought the glossiness was a bit too strong so I sanded lightly with a fine grade polishing film (something finer than 600 grit) to take some of the shine off. Then I oversprayed with Dullcote. It turned out really well. The panels still glint when holding the model at an angle under a light but when looked at straight on in medium room light they are almost invisible. All in all I am quite pleased with the results. It's nice and subtle; I think light sanding and overspraying with a matte finish really kept the glossy Future panels from being too strong.
trekriffic
Well-Known Member
- Joined
- Jan 6, 2012
- Messages
- 1,041
Couldn't resist. Here are some quick pics of the finished ship on my workbench.
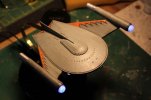 Finished by trekriffic, on Flickr
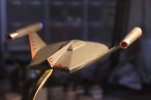 Finished by trekriffic, on Flickr
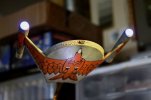 Finished by trekriffic, on Flickr
Lots more to come!
 Finished by trekriffic, on Flickr
 Finished by trekriffic, on Flickr
 Finished by trekriffic, on Flickr
Lots more to come!
Jason Abbadon
Member
- Joined
- Nov 1, 2015
- Messages
- 139
That looks terrible. You...you should give it to me. So you don't...embarrass yourself. Yeah.
trekriffic
Well-Known Member
- Joined
- Jan 6, 2012
- Messages
- 1,041
Jason Abbadon said:That looks terrible. You...you should give it to me. So you don't...embarrass yourself. Yeah.
You're right.:'(
But it's too late. I'm already so mortified. :
trekriffic
Well-Known Member
- Joined
- Jan 6, 2012
- Messages
- 1,041
LrdSatyr8 said:My jaw just literally hit the floor... am dumbstruck here... WOW!
Thanks! Wait 'til you see the final pics. I'm going to take some with my black "space" backdrop too.
trekriffic
Well-Known Member
- Joined
- Jan 6, 2012
- Messages
- 1,041
Thanks ozzman!
I'll start taking photos tomorrow. In the meantime, I thought you guys might like to see the square brass mounting tube I'll be using for some of the photos. It inserts into a square brass tube I mounted in the aft of the ship on the port side just for taking photos from the stern angle.
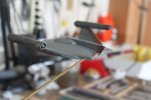 Brass Arm Inserted by trekriffic, on Flickr
 Brass Display Arm by trekriffic, on Flickr
I'll start taking photos tomorrow. In the meantime, I thought you guys might like to see the square brass mounting tube I'll be using for some of the photos. It inserts into a square brass tube I mounted in the aft of the ship on the port side just for taking photos from the stern angle.
 Brass Arm Inserted by trekriffic, on Flickr
 Brass Display Arm by trekriffic, on Flickr
Similar threads
- Replies
- 28
- Views
- 2K
