- Joined
- Mar 6, 2023
- Messages
- 2,128
Thank youNow that is what I would call a "Gold" Leader
Excellent work
Thank youNow that is what I would call a "Gold" Leader
Excellent work
Expanding your tool box is a good thing. That is one thing I enjoy the most about this hobby, pushing into new areas and knowing the next time it will be better. Looking good so far.Progress pics.. it's been a bit slow because I am using some new mediums (Scenic Woodlands molds, lightweight hydrocal, and sculptamold).
View attachment 120891
View attachment 120892
It looks amazing, all of the detail work you have put into this was well worth it. You nailed the weathering.I am calling this one done. I really enjoyed this build and the Bandai kit was very nice.
View attachment 120952
View attachment 120953
View attachment 120954
View attachment 120955
View attachment 120956
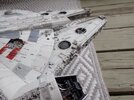
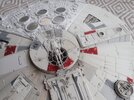



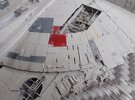
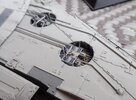

It's looking good, it's easier to add darker weathering than to take away. Which model an scale was this kit? I can't wait to see this finished.Got most of the main build done enough to be able to get the base colors laid down with all the various odd color panels. Testing a few streaking techniques here and there, but I think I need to go a bit darker with the weathering
View attachment 120996
View attachment 120998
here you can see the contrast between the unpainted plastic color of the engine deck and the As-20 color
View attachment 120989
View attachment 120990View attachment 120997
View attachment 120995View attachment 120993
View attachment 120991
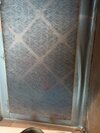
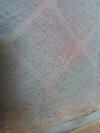
Looks like it might be time to change the filter in your spray booth. Just a thought!!The front is mostly finished, just some detailing and a mist coat over everything. Started on the back and the wings. The liquid mask was coming off of the areas that had multiple layers of paint. It also came off easier the thicker the masking was applied. I really like the effect that you are able to get with it. I want to try chipping media at some point. The red and pink I don't believe are the correct shades, but I'm hoping the mist coat will help to at least dull them down more.
You will probably notice on the last picture the tan spots. When I was mixing the yellow I almost dropped the bottle on the floor and spilled almost half of it out. I'm going to have to touch-up the green and gray obviously. Getting more clumsy the older I get.
View attachment 120855View attachment 120856View attachment 120857View attachment 120858View attachment 120859View attachment 120860View attachment 120861
Thank you sirIt looks amazing, all of the detail work you have put into this was well worth it. You nailed the weathering.
In my opinion, static could be a better choice.Lining the engine area with aluminium foil and building the mounts for my "engines" (courtesy of Light My Bricks). For the mounts, I cut a 5mL syringe in half, primed the halves then glued aluminium foil onto them the mounted them into the engine area - lining them up with the exhaust ports. I then glued the light bars in place and ran the wires back to the 2 expansion boards which I've glued in place. I've installed the landing lights in place and the wing lights are in place as well.
Here's a question for the group - should I have the landing lights on the flashing circuit or should I leave them static?
I'm happy with the engine test so far. Still waiting on my Shapeways engine inserts.
View attachment 120621
View attachment 120622
View attachment 120623
View attachment 120624
View attachment 120625
LOL, I actually have a two layer filter. The outer one is one of the cheapy fiber ones that is extremely porous. The inner one is a pleated one for actually filtering. The outer one I put on to catch most of the larger wet paint particles so the the pleated one would not need changed so often. It does look nasty but it actually looks much worse than it is.Looks like it might be time to change the filter in your spray booth. Just a thought!!
This is the Bandai 1/72 "Perfect Grade" version that comes with the light kit and photo-etch plus waterslide decalsIt's looking good, it's easier to add darker weathering than to take away. Which model an scale was this kit? I can't wait to see this finished.
Nice sounds like the one I got a couple years ago but it only came with water slide. I don't think it came with any photo etch or lights as I bought some etched parts separately at the time. But then that was a few years ago and maybe it did come with some lighting. It has over 600 pieces from what I recall. I am hoping to do mine in a diorama in docking bay 94.This is the Bandai 1/72 "Perfect Grade" version that comes with the light kit and photo-etch plus waterslide decals
They have a cheaper version that did not include the lighting kit or photo-etch and only had "stickers" instead of the water slide decals, but frankly, the difference in price was not really enough to get the "down graded" one, especially since it is stickers
Since my Y-Wing is vinyl, I cannot use an enamel panel liner either. I used Mr. Hobby's acrylic weathering paint solvent to do a wash. They don't have it listed on their English website, so maybe it's Japan only? There's a way to make your own with acrylic thinner and some detergent or something, but I use this product since it's simple and ready for use straight from the bottle.For those using Bandai kits a warning. The plastic in Bandai kits can dissolve under enamel thinner. I had this problem when using Tamiya panel liner on my earliest kits. Make sure to seal everything and using the thinner sparingly.
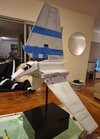
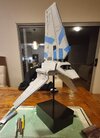
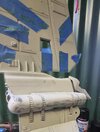
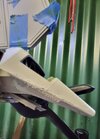
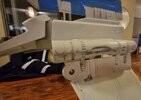
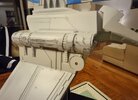
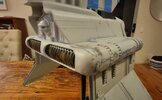
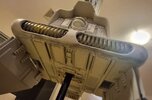
Thanks! The stabiliser warp is really bothering me - I'm trying to put it out of my mind for now although, after I posted, I tried tractioning it with a piece of tape. I doubt it'll work but it's something I guess for now.Coming along really nicely.
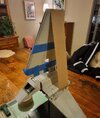
Goddamn I love this ship! You're doing the Lord's work friend! Can I ask, which edition is this?Got most of the main build done enough to be able to get the base colors laid down with all the various odd color panels. Testing a few streaking techniques here and there, but I think I need to go a bit darker with the weathering
View attachment 120996
View attachment 120998
here you can see the contrast between the unpainted plastic color of the engine deck and the As-20 color
View attachment 120989
View attachment 120990View attachment 120997
View attachment 120995View attachment 120993
View attachment 120991
Thanks!Goddamn I love this ship! You're doing the Lord's work friend! Can I ask, which edition is this?

Those old kits sure were a challenge with the gapsClamps released. Glueing the two halves together was probably the most stressful part of the build. The end seams sealed together well but the middle points on each side were persistently recalcitrant and I had to pay more attention to those separately. I left the model overnight and I got there in the end. I got a good deal I don't think it's going to come apart anytime soon.
I have moved onto applying putty to the seams using a Tamiya basic putty. I was going to thin it down at first because I was worried it would go on rough but after testing it on an area at the rear, I decided to apply it as is. I am pleasantly surprised with the result. With sanding first with an 80 grit, then a 120 grit, the seams have all but disappeared.
One thing which has become apparent - the stabiliser. I've had that in clamps for a couple of weeks in an attempt to straighten the bend in it but it hasn't worked. Now that it is installed, I don't have a lot of options in terms of addressing this. I'm thinking about using a hair dryer and heating it gently and seeing if I can coax it straighter but I'll leave it for now. Over the next week I want to touch up the surface layer and move onto weathering and detailing.
View attachment 121115
View attachment 121114
View attachment 121116
View attachment 121117
View attachment 121118
View attachment 121119
View attachment 121120
View attachment 121121
Oh man! I have only ever seen one of them in the wild - in the box - and it had a hefty price tag on it. I didn't know there were different versions of the kit. I'll be watching your build in earnest.Thanks!
Bandai did incredible work on it and I am just trying to do their details justice
It is the "Perfect Grade" 1/72. There is a "Standard" edition which is the same, minus the light kit and photo-etch, and only has stickers instead of waterslide decals. My advice is if your willing to spend that much, the price difference between the two works out better to get the one with the extras
View attachment 121132
I personally never wanted to make major adjustments to the neck. It just never bothered me. I'd say go for it as it is.Those old kits sure were a challenge with the gaps
Looks great though. I really should just scrap plans for adjusting the neck and build as is.
