Zoukei-Mura J2M3 Raiden

Edbert

Well-Known Member
Joined
May 16, 2024
Messages
619
Build is underway, really enjoying these kits!

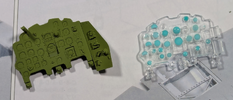
Based on my experience with their Bf109, it was better to use their opaque dash and insert a decal for each gauge as opposed to the sheet of gauges adhered behind a clear plastic (painted of course) dashboard. So without really looking close enough I started down that path with this one. Turns out there's only one decal for gauges and they are all combined. I did consider cutting each one out, but only briefly. I chose to use the clear version.
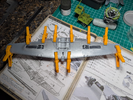
1735682737951.png
That panel on the right side will be moved over after painting.
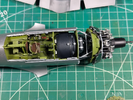
1735682853557.png
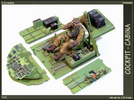
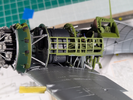
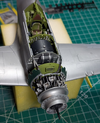
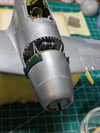
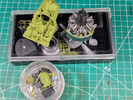
The engine was really complex, and is incomplete in this shot. The cockpit base is complete but just a base coat of color before adding detail paint and a clear.
 
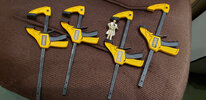
Agree... where did you get the mini-clamps (at first I thought they were plastic clothespins)? They look really useful!
 
One thing I'm noticing now is the interior green paint. Are you sure this is correct? (If it isn't, of course, it's a bit late to do anything about it :) ) The reason I ask is because AFAIK, Japanese planes were painted on the inside with a kind of translucent varnish that came in various tints depending on the manufacturer, rather than opaque paint like their opponents.
 
Agree... where did you get the mini-clamps (at first I thought they were plastic clothespins)? They look really useful!
I bought these from Satan himself.

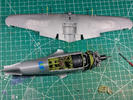
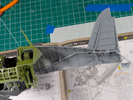
They are not ideal, meaning they do not work well for everything. This wing is just an example of where they do work, but I have larger ones, stronger ones and still use tape and rubber bands in some cases.
 
One thing I'm noticing now is the interior green paint. Are you sure this is correct? (If it isn't, of course, it's a bit late to do anything about it :) )
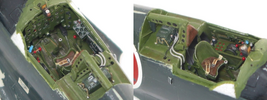
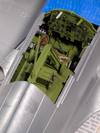
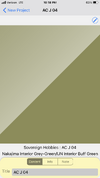
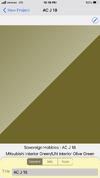
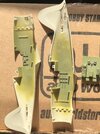
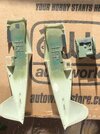
It is TOTALLY wrong for early war and IJN. But late-war years and homeland defense aircraft they used a green that was similar. I do think I missed the mark a little, mine is a bit too bright. The correct color would be a darker color and I hope a clear coat or two might darken it a tad.

Examples of other people's work/interpretation are easy to find, but you'll find pretty quickly that it varies, A LOT.

1735942662799.png

1735942696610.png

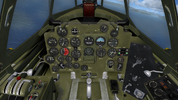
Also, game developers lean towards a dark Lime or light olive color.

1735942770519.png


If you look at the first two pictures posted in this thread you can see the color appears different depending on the lighting. The IP is in both and looks totally different.
 
I bought these from Satan himself.
Hmm, thanks for the link, and the review!
I've been using these, but the jaws are parallel, and I'd love to find something smaller that adapts to non-parallel surfaces...
They do have a quick release, and pretty fine ratcheting mechanism though. I also use them for woodworking.

OH NO! Mr. Bill!

17359503218107461615371200655509.jpg
 
Last edited:
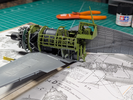
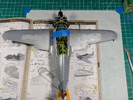
It is an odd thing, to put the engine/cockpit into one half of the fuselage (that is normal) and then attach wings. Wait, what about the second half of the fuselage? Instructions are clear.

1736381791000.png
The reason is clear, all the spars and beams and control linkages underneath the cockpit have to be connected.

1736383421531.png
I did not paint much of that even if it is connected.

1736383517508.png
It connects all the way back too, like the Bf109 I was working on.

1736383552735.png
No glue for the 2nd half yet, just testing.

1736383599199.png
That white bit there is an EverGreen replacement for something the tweezers sent to oblivion. Additional note, I did not fix that seam on the main beam behind pilot-armor, I thought it would be covered by the fixed part of the canopy. However, that is externally exposed (just figured it out) so I will have to deal with that.
 
It looks like pulling one of those levers would actually do something! Loving it...

:oops: just zoomed in on instructions:

"...please see shape of belly which is organically swelling"

...reminds me of instant noodle directions:
"Add contents and shake yourself vigorously "
 
Last edited:
One thing I'm noticing now is the interior green paint. Are you sure this is correct? (If it isn't, of course, it's a bit late to do anything about it :) ) The reason I ask is because AFAIK, Japanese planes were painted on the inside with a kind of translucent varnish that came in various tints depending on the manufacturer, rather than opaque paint like their opponents.
Good evening everyone.
By this late in the war, they should consider themselves lucky to have paint to use at all.
If you delve into the subject on the old
J-Aircraft site you may come to similar conclusions. https://j-aircraft.com/
Plenty there to keep you busy.
Robert C. Mikesh, stated in his 2000 Monogram Publications book, he believed that there was only about 6-8, different interior colors used on all the manufacturers interiors, over the course of the conflict. I don't recall if the 6-8 were included in some of the aircraft from the Sino-Japanese conflict. Where dark grey, for the Ki-27 Nate was reported and chronicled and dark blue was used in the Ki-10 Perry.
One of the 'mistakes' I'll call it, was earlier kit manufacturers, calling out a metallic blue, or transparent blue-green coating as an interior color. I don't think this is correct, 50 years later.
Nothing my friend is absolute, and I'll climb out on a limb. This may have been used in prototype and early production runs, but I don't believe any evidence has come to surface yet. These colors were usually used for components not seen by the pilot from the inside the cockpit.
Without hi-jacking a thread here, the amount of paint produced, the amounts used and where and how they were applied, nothing is absolute.
My two favorite colors. Anything close, is good
enough.

IMG_6627.png

IMG_6626.png
 
Back
Top