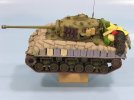
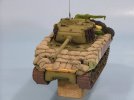
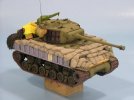
Battlewagon: M4A3E8 ETO

Hey E ,

Great lookin' high lights !! Those casting Numbers are Really gonna PoP once you lay some washes on it !!

Rock-On !!
 
hello errains top work with the painting so far just one question new to the air brush seen so how do paint all the bags and equipment now they are stuck to the model???

im painting them off then putting them on ive seen alot of people do it your way so please do tell????


many thanks

john
 
:) Hey, Errains,

your green boy ( ;) ) is getting really "solid", man,

Just a little doubt: how have you done the M2 cover ?? ??? Is under that cover really an M2 ?? it would be a very good trick to spare an M2 that wouldn´t be seen at all, ah? that would be very smart!

Salud, Errains ;)
See you,
RG
 
New pictures of the ye ol Battlewagon will be forthcoming soon. Other commitments over the past couple of months have just concluded so I'll be back at the workbenches following the Thanksgiving holiday here in the States

Sorry for being gone for so long :-\
 
Eric
Will be waiting for these new pics, it is certain that these advances will be extremely good. :eek:


Cheers

Richard
 
Basic Color

Greeting to Everyone! ;)

I hope everyone here in the States had a great Thanksgiving Holiday with family and friends!

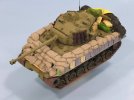
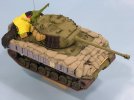
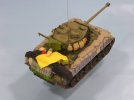
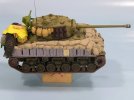
After being out of pocket for several weeks I was able to return to my workbenches and get cracking on the ye ol Battlewagon. As you can see I have laid in the basic colors for this build and will be moving on to the “weathering” phase. I know the colors look rather harsh but with numerous layers of Washes/Filters/Glazes and further detailed painting it is hoped that these will be much more subdued and blended into a common OD-ish color pallet.

I’m keeping this post short for now as I just wanted to get these pictures out there for any constructive feedback from the community. Once I have gotten further along in the finishing process I’ll post an in-depth “guide” to how I completed the painting the weathering thingy.

Everyone Enjoy!

P17a.jpg
P17b.jpg
P17c.jpg
P17d.jpg
P17e.jpg
P17f.jpg
P17g.jpg
 
Alright Rains you've got to expect somebody to ask: How in the heck did you paint all the stowage with it attached like that?

Inquiring minds want to know.
Tony lee
 
Hi erains

I need to know how do you paint all the equipment when it's stuck to the tank please do tell

Geegad
 
I wish to thank you all for your comments.

As for painting the attached items and stowage it was done mostly with masking, which took about two hours to do. Despite the time I think the results came out pertty good. Most of the Stowage was painted by hand. BTW I'll be redoing most of the stowage as the colors didn't quite come out as planned, to "day-glow-ish". After that its on to the weathering, so stay tuned. :D
 
First Layer: Color Filtering

Hello Gang!!! ;D

The past couple of weeks have involved applying the first layer of filters to bring in the colors.

P18a.jpg

P18b.jpg


To begin with Battlewagon got a shiny coat of Pledge floor wax with future, since I couldn’t find any regular ol Future. The Pledge floor wax was shot through the AB s straight from the bottle and did not have any issues and cleaned up well with water and Windex.

P18h.jpg


This entire filtering layer was applied using Winsor and Newton oils in conjunction with Winsor and Newton Liquin Original. Liquin Original is a semi-gloss medium that speeds drying, improves flow and reduces brush stroke retention. A little practice is need in using the Liquin Original but it really helps with the use of oils. Additionally Mona Lisa Oderless Paint Thinner was also used, this product is a mild thinner that will not attack the under laying surfaces as aggressively as other thinners. I highly recommend both products if you are going to use oil paints.

P18j.jpg
P18i.jpg


Starting with the Turret and then moving on to the hull this first filter was applied to the lowest points and then on to the higher points. What this mean is that the filter was applied on to the surfaces under the stowage and then I move to whatever was laying on the previously filtered surface. (not sure if that makes any sense). The results are subtle, but you can see more color depth, which will be built upon with each additional filtering layer that will be applied. (BTW the Air ID panal has NOT be filtered as of yet)

P18d.jpg

P18c.jpg

P18f.jpg
P18e.jpg

P18g.jpg


The next layer will be shadows and pin washes.

Thanks for looking and for your Comments

Coming Soon!...
SigBanner.jpg
 
PROOF OF LIFE

Just wanted to post a couple of pixz to show that I'm still alive and in the "home stretch" in finishing the ol' Battlewagon. So let me know what you think and how I'm doing thus far.

Thanks and Enjoy 8)

P19b.jpg

P19a.jpg
 

Latest posts

Back
Top