BF109 F-2 (1/48)

Chris I can just sit here and learn with my eyes at what you do. The depth in the parts looks truly astounding. Love watching your work come to fruition.
 
Gee, my first comment... ;D

I have yet to attempt a ICM kit, but have the Zveda in the stash... how does these kits compare?

Your's is looking primo!
 
Thanks fella's :)

Barney ...I havent built any Zveda kits ,so I cant really compare . What I can tell you is the ICM 109 is a great little kit ...not recomended for a beginner due to the lack of locating pins and the fact the whole front from the cockpit forward requires some careful building to keep everything straight ....But Im enjoying it ,I have the main airframe together now ..needed a few spots of filler but nothing major ....pics later ;)

Chris.
 
Great progress so far Chris!!! Love that Donkey!!!!!! Keep the fires lit!! ;)
 
Chris S said:
The more I look at this kit ,the more Im impressed .For such a cheap price it certainly gives some of the bigger manufacturers a run for the money .

Chris, these are very good news ! ! :D
´
Can I ask you if you know in what year was made this model ? the model kit, I mean...
´
Cheers Chris
RG
 
Thanks guys :)

Jelly ...I think it was released in 2007 ? ...or around then ;)

Well, I got most of the main airframe assembled ,one or two small areas needed a bit of attention ,but nothing major .
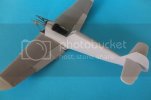
DSCF4856.jpg

There was a small ridge where the two fuselage sides meet ,so I sanded those out and will need to rescribe the panel lines in where they meet ,and I will make a new plate for the rear of the cockpit .
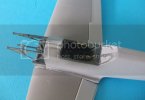
DSCF4857.jpg

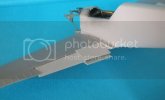
the biggest jobs were ...the wing tips , on my kit the tips were molded too thin which left a step where they join the wing .To fix that I rolled out some Milliput ,cut it to shape and layed it on the tip (underside only ) once it dried I sanded to shape ....
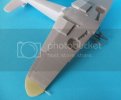
DSCF4860.jpg

The only other problem was where the belly joined the fuselage underneath ,again it wasnt too bad ,but I added a bit of filler and sanded to tidy it up ,still nedd to rescribe the panel lines ....
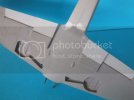
DSCF4861.jpg

You can see from the first pic I have positioned the flaps lowered a bit ,Im also leaving the flaps on the radiator housings open a bit ...these have not been fixed in place yet as I need to add some rib detail to the inner face of the flaps .....
DSCF4859.jpg

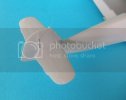
The tail feathers went together nicely ....
DSCF4858.jpg

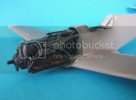
And a handy thing about the way the kit goes together means I dont need to fit the engine until a later stage ...which is good because I forgot to paint the inside of the lower wing at the front ,which can be seen as Im leaving the engine cowls open , you can also see in this pic how good the fit at the front of the wing root is .....
DSCF4862.jpg

Thats it for now ....

Thanks for looking .

Chris.
 
Wow your on one heck of a roll then dude. the bird look beaut. any I think I hear a hurricane calling me
 
Thanks DB ...I got a Hurricane calling too ;D

Chris.
 
Just got a chance to get caught up with your thread Chris. As always, solid work. :) That ICM looks like a really nice kit.

Jason
 
Thanks guys ;)

Anthony ,the kit makes it real smooth mate :)

Chris.
 
Another Great SBS tip from you, Chris!!! the progress is looking awesome :D
 
Thanks ER ;) ...hoping to hit paint tomorrow :)

Chris.
 
Looking good, and it's coming up pretty fast too.

8)

Cheers!
 
Thanks Flipflop ,sorry about the late reply ;)

Moved on a little more with the 109 .

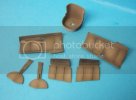
Some of the panels will be left open and the radiator flaps will be open too ,so I added a bit of detail to the insides ,its not really acurate ,but its just to give something to look at ,although even with the engine panels open you cant see much of the inside face because of the curve in the panel. These where then painted up along with the undercarriage doors .

DSCF4866.jpg

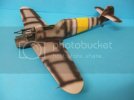
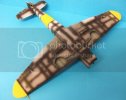
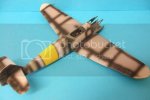
Then I moved on with the main airframe ,I fixed the chin cowling in place and made up a new panel that goes above & behind the seat in the cockpit ,the IP was installed too . Tthen onto some paint .First up I painted the wing tips and the fuselage band with White ,these areas get painted Yellow so the white just helps the colour a bit . Then everything got a preshade ,after which I painted the Wheel wells ,cowling insides and the radiator flaps on the wings with RLM02 . Once dry I masked up and painted in the Yellow recognition areas ....fuselage Band & wing tips ,Forgot to double tape on the wings and got a little yellow overspray ,but its no biggy ...it'll cover .

DSCF4867.jpg

DSCF4869.jpg

DSCF4868.jpg

I will get the Blue on tomorrow

Thanks for looking.

Chris.
 

Latest posts

Back
Top