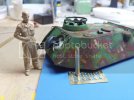
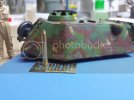
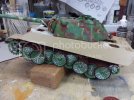
Jagdturret

;D ;D ;D

Excellent !

I'm fairly certain I'm putting the wheelbarrow in his hands --- another guy is begging for a crown and his Pfaust replaced with a scepter . He already has the perfect grin on his face
. I have this unending desire to have crumpled , steel-truss members draped upon the wall . But not from a fire-escape -- A Ferris wheel 8) .. with a couple or more of the brightly painted carriages on the street and hanging from the wreckage .
I have ideas . I want it all super-spot on with ' anomalies ' like that seamlessly stitched in

I'm off today after working the weekend :)
Been cleaning the cave and now I'm working on the mock-up of the street scene again .

I've lengthened it another 6 and a half inches - I had to .
The only reason I hadn't already was just trying to keep the physical size down -- but what's another 6 inches ? ;)
I'd like to do the ground floor wall on the other side ,, so you're looking through the store-fronts broken windows and doors -- :eek:
Pics and story later tonight for sure .

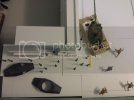
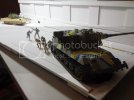
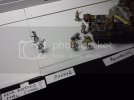
....... I was moving stuff to clean when I stacked the Panther's turret on the Krote's body ;D
Really gives a more vivid contrast in scale than just seeing them side by side :eek:

ciao
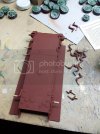
 
O K .
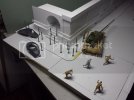
Here's a summation of what's up so far :

I think I can take better pics with a potato . Maybe not . And Photobucket is insisting on a kitty again -- I've quit fighting with it ...


20160613_150616_zpsa2ozcto1.jpg

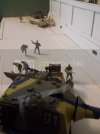
These guys in the 222 , up on the sidewalk , had thier tires shot up in the ambush at the end of the street - and they backed down around the corner to retreat .

The Panther came in from outside the city center to give the infantry armor support .

The other armor car is a 223 radio car assisting them .
Other infantry are waiting and laughing at the 222 crew .

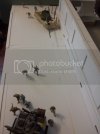
The deck-screws are peoples -- there's probably going to be a couple more than that . I gotta get everyone built ;)


20160613_150046_zps6gwlktjt.jpg20160613_150305_zpsnlenyo0y.jpg20160613_150423_zpsyrneh8nt.jpg
20160613_150904_zps1zo3sli3.jpg

20160613_150219_zpsxhxkuxxm.jpg

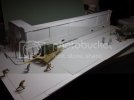
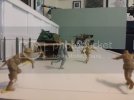
These guys have more infantry up ahead of them across the street and are getting ready to snake around the corner and snuff out a basement --

20160613_150533_zpszgepdtjz.jpg20160613_150904_zps1zo3sli3.jpg


It's been a few hours , and the Panther has backed down to it's current spot - being replaced by the Sturmschildkrote .
Now there's a bunch of other infantry congregating at that corner waiting to move thru

I was going to have the Panther's radioman posed to the left , doing radio stuff . I should put an Etch-A-Sketch in his lap .. . sitting in there waiting to leave . . SkeTching that Photobucket kitten ;)
 
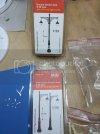
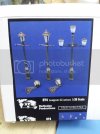
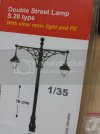
I've been acquiring various street lamps to see what will work best .

I've got a couple more in-route , but here's some from Mig and Verlinden .

The Verlinden are definitely a better value --

20160613_210314_zpskzzwkj26.jpg20160613_210353_zpsw8cagj0a.jpg


You would think that the horizontal portions would be more substantial than PE , and they are with the Verlinden but not Mig

20160613_210412_zpstcsdjxb9.jpg
20160613_210644_zpscj1cfhdl.jpg


The Mig PE is only .15 mm - - 5-6 mm is pretty thin for a casting @ 1:1 ::)
The Verlinden's PE is double at .31 mm

The clear resin for the lamps is nice on the Mig .
I have one from Plus Models in-bound that's cast from all clear . It's a fancy triple .

I plan on using one of the wall lamps adjacent the steps
 
20160614_105035_zpsjnekftc5.jpg


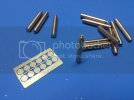
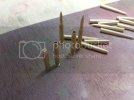
One of the sets of KT 8.8 cm ammo .

I saw they had separate rims for the base , so they'd be easy to shorten to the 770
Very nice -- hefty 23 grams of solid brass - -- I had assumed they were hollow :p , but it makes way more sense they're turned from bar-stock at this scale

Waiting on the UPS man ;D ... he should have my Scale Hobbyist order and a bunch of dog food for me

Most of the additional figures are in this shipment and I'm back in the mood for people-building ;)
 
O M G :eek: :eek: Look at the size of the box they put it in !!


20160614_195159_zpscijdrcdt.jpg

That's a lot of packaging invested in that tiny thing - -- - maybe the animal rights people were worried about the dog ;)
It' actually the exact same size as the Tamiya Panther box
LOL

In addition to the box they packed the body in this double-wall , vac-formed container :

20160617_141452_zpsjjhn3qsk.jpg

They were quite concerned for it

.................... and now I'm gonna build it burned up with holes in it -- - bwa hahahha
 
Point , Tamiya ;)


20160615_094002_zpshtzhxslr.jpg


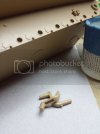
The Voyager case is on the left ( that set is only the cases , no projectile . ~ $ 6 )

9 bucks gets you spent casing and ready rounds from Tamiya and the empties are way more accurate .
Tamiya bores out the interior deeper and broader , resulting in a more accurate case wall thickness .

I need to find a set with separate shells


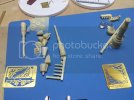
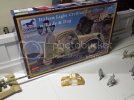
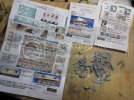
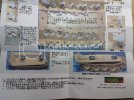
I bought this active suspension system made by Atelier Infinite from HLJ :

20160614_171602_zps3u48klcl.jpg20160614_171611_zpsvvd9u1mb.jpg


::) I ordered it more to see what it was all about .

I can do better than that . ( my dead dad would describe it as " prettty Mickey Mouse " :D )

What's the deal with the two sockets sitting in there ?
That's how much weight it will hold up ? I'm fairly doubtful . the springs are super tiny . ( you can barely see them there to the right of the pile of resin parts .)

I now plan on adding some torsion springs for any axles I need displaced by debris in the street --- won't be much .
 
Oh , It's getting finished . Bandana Man !! ;D


I have everything I need now -- either on hand or in-route .


More back story -

20160614_140843_zpsktnwraer.jpg20160614_140859_zpsnzqficon.jpg


The belligerents are down in the druggist's basement . -- huffing the hew-doo and what-not ;D

These store-fronts are off the dio but relevant to future street debris . gotta have a mannequin from the tailor's ;)
I'm having a meet and greet with all the characters once I get everyone built - . just so I know everyone's comfortable with their post .
. . . I hope that nun isn't there -
Maybe I'll have my Cocker do it .. . . .
 
I'm going the simplest route to a pose-able suspension .

That AM set is crazy .
To their credit , they call it a " Movable Suspension " . It's moved me to do something else ;)

For a static display - assuming you don't want to fix the wheels to the dio's terrain - all you need is a something to hold the swing arm where you place it ( and keep it from falling out of the hull when you handle it )


A friction connection is plenty .


20160616_100607_zpsrf4efwj6.jpg


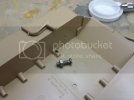
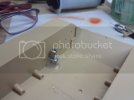
The kit uses those pins to align the swing-arms into the ' neutral ' position by engaging in that groove in the arm :

20160616_100907_zps4lwstun1.jpg


For this dio I only need a few wheels displaced upward - none downward as would be also needed for really uneven terrain - so I've freed the arm to move upward from the pin on the hull but not downwards .

20160616_101127_zpsthaqqztu.jpg


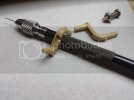
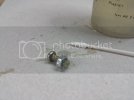
Ideally , a small wood-screw driven axially into the interior end of the arm via the little hole in the hull receptacle would secure the arm and provide friction BUT trying to get a driver in there without modifying the hull is a pain -- well , maybe a little off-set driver would fit ,, and I don't have any screws on hand that are small enough anywaze :p . they need to be tiny ,. but with a washer and fiber washer . Yep 8) much more elegant .


20160616_102602_zpsqugfxjwy.jpg


I'm leaving enough wheels in the neutral position so I needn't worry about losing the proper height .
If you were doing all or most of the wheels you would need to establish some stops to prevent it getting wild on you .
But again - you would only really need a couple for each side to act as a reference


The good thing is you can cut the pin away at any time - so you could set up the interior portion and be ready for whatever terrain later on :


20160616_110220_zps3ieaagmg.jpg
 
Nice done with the adjustable suspension.
By the way, I had to google the word huffing and I figure there is not much of resistance in that basement. :)
 
20160616_171153_zpsbqsypgzi.jpg

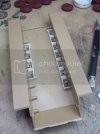
That's looking aft . cofferdam'd to conserve epoxy and keep it neat .
I'm basically leaving the back corners and the right-front fixed .
I don't need them displaced plus I don't want anything in the way of the interior build for the radioman's spot .


I coated the ends with grease prior to placing them into the holes to avoid additional fun & colorful language ;) :

20160616_182031_zpstpmhv8px.jpg
20160616_174013_zpsqx7icz0h.jpg20160616_181310_zps6swjzxs0.jpg
 
Yes I did, no straight forward explanation but I think it means chopping/removing stuff, ill guess some proper huffing is handy.
 
:eek: news to me - I've never heard of it ;D


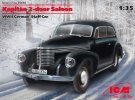
I'm thinking adding this parked car - in front of the bistro :

ICM00035476_0_l.jpg

Sitting there with only a few bullet holes from the gunfight 8)
..... the other little car will be parked at the opposite corner but more involved in the whole ' collateral damage ' thing ;)


This whole scene began at like 4:30 - 5 a.m. - just before sunrise

The 222 , on patrol , surprised these huffin-ninnies ( I think there's a J or two in there . as in swimming )
A fire- fight breaks out and the 222 pulls back to the corner until the cavalry arrived .
After that , they pulled further back to their present location to make repairs .

I ordered a whole mess of spent 20 mm rounds to litter the street , especially at the corner .
 
these 5 swing-arms are fixed :


20160618_201423_zps27ld5fxj.jpg


and it behaves as expected


20160618_204031_zpswtilmmjb.jpg


I just cut the kit's positioning pin ( stud ? ) away for all the poseable ones -- so they can go up or down as far as space will let them .


Time to start the Friuls . and finish painting the wheels
 
;D ;D

The street with the 222 & 223 is Lange Reihe strasse .

I have personal experience with said Hamburg street , like 30 years ago
and it's appropriate for the build ;)


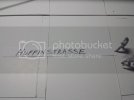
Huffinstrasse is now the name for this whole dio 8)
 
Started any figurepainting for the dio? Me myself are doing that right now. Trying to find a technique thats suits me.
 

Latest posts

Back
Top