Omega 7 Helicarrier
- Thread starter Quaralane
- Start date
Grendels
Active Member
- Joined
- Nov 24, 2009
- Messages
- 9,092
From back in my model rocket days there was a product called sanding sealer, made by Pactra if I remember correctly. Sealed up balsa with one coat, and you could brush it on.
I just looked and it is no longer being made by Pactra, but the company is now called Midwest. Good stuff for sealing up balsa, smooth as glass when you are done.
I just looked and it is no longer being made by Pactra, but the company is now called Midwest. Good stuff for sealing up balsa, smooth as glass when you are done.
Quaralane
Well-Known Member
- Joined
- May 22, 2009
- Messages
- 11,263
Part of where I learned by elmers glue trick, actually, Grendels.
At this point, though, the wood's sealed up fairly well.
Got greeblies, and a 1/700 Changewind One to do now
Also need to decide if i want to put in the hangar decking
At this point, though, the wood's sealed up fairly well.
Got greeblies, and a 1/700 Changewind One to do now
Also need to decide if i want to put in the hangar decking
Quaralane
Well-Known Member
- Joined
- May 22, 2009
- Messages
- 11,263
All right, then.
Here's the latest on the build:
As I mentioned in the last video, I added another layer to the bottom of the control island with balsa
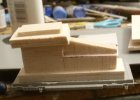
Given how much glue it was taking to completely seal the grain on some parts, I opted to use Squadron white putty on the control island and the fan mounts
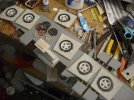
Sanded that down with sanding screen
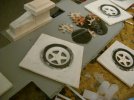
Glued the fans into their mounts
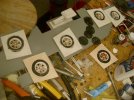
Cut out the elevator for "Changewind One" after doing some scaling work.
Then I opened up the hole in the flight deck for the new elevator.
Current plan is to show the elevator at mid-height, bringing CW up to the deck
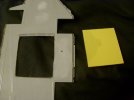
I used some more balsa to address one HUGE issue with the ship as it sat now.
Namely, I built a hangar deck to be visible through the side ports
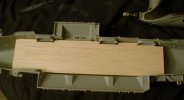
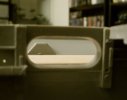
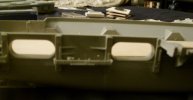
After looking again at the movie version of this thing, I decided to change the bow prfile to something a little more "aerodynamic."
Namely, I took a saw and my Dremel and cut off a sloping section
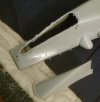
This was covered with styrene that I attached very firmly to the existing hull with Gorilla Glue and then ground and sanded to the proper size and shape
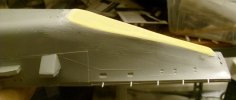
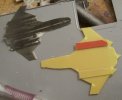
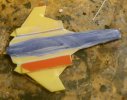
Given that my previous "Changewind One" build was to show the "premier" aircraft of the group, I decided I needed a version at 1/700 scale for this build.
So, I took a picture of her as she sits on the wall now
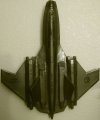
Did the math to get the scale right, then printed her at scale
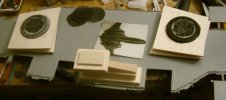
Built her up with a combination of plastic card, Aves, and balsa

Youtube link:
Omega 7 HelicarrierSMA 2013-Part 03
Here's the latest on the build:
As I mentioned in the last video, I added another layer to the bottom of the control island with balsa

Given how much glue it was taking to completely seal the grain on some parts, I opted to use Squadron white putty on the control island and the fan mounts

Sanded that down with sanding screen

Glued the fans into their mounts

Cut out the elevator for "Changewind One" after doing some scaling work.
Then I opened up the hole in the flight deck for the new elevator.
Current plan is to show the elevator at mid-height, bringing CW up to the deck

I used some more balsa to address one HUGE issue with the ship as it sat now.
Namely, I built a hangar deck to be visible through the side ports


After looking again at the movie version of this thing, I decided to change the bow prfile to something a little more "aerodynamic."
Namely, I took a saw and my Dremel and cut off a sloping section

This was covered with styrene that I attached very firmly to the existing hull with Gorilla Glue and then ground and sanded to the proper size and shape

Given that my previous "Changewind One" build was to show the "premier" aircraft of the group, I decided I needed a version at 1/700 scale for this build.
So, I took a picture of her as she sits on the wall now

Did the math to get the scale right, then printed her at scale

Built her up with a combination of plastic card, Aves, and balsa


Youtube link:
Omega 7 HelicarrierSMA 2013-Part 03
ModelMakerMike
"It's Slobberin' time""
- Joined
- May 28, 2011
- Messages
- 1,838
Yes! Nice job on the Changewind 1 !
;D ;D
;D ;D
CheesyGrin
New Member
- Joined
- Sep 1, 2012
- Messages
- 152
Very ambitious for sure! This will be fun to watch. Great progress thus far.
Quaralane
Well-Known Member
- Joined
- May 22, 2009
- Messages
- 11,263
Thank you, CheesyGrin.
Okay, new update time on the Helicarrier build.
Built up a detail piece to give me a "command center" like the movie version had.
Did this with sheet styrene, measuring the front off the detail pieces I plan on using
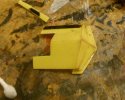
Glued that into place on the new front hull
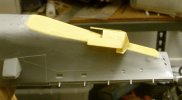
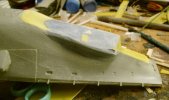
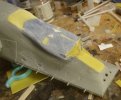
Used styrene and balsa for the rough fillers after attaching
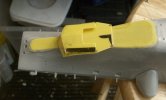
Filled the assembly with Aves Apoxie Sculpt and blended that to the hull with files, sanding screen, and my Dremel
Decided I needed a second set of fans for detailing under my fan housings.
Like the first set, these were cut from thin card.
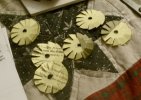
Then, they were put into place on the underside of the housings
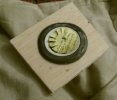
Started detailing the housings with an edge piece and support arm
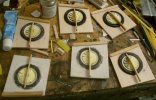
Used some sheet styrene to box in my hangar.
This is mostly to avoid seeing huge openings when looking through the elevators
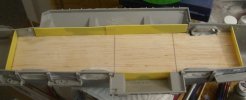
Youtube link:
Omega 7 Helicarrier-SMA 2013-Part Four
Okay, new update time on the Helicarrier build.
Built up a detail piece to give me a "command center" like the movie version had.
Did this with sheet styrene, measuring the front off the detail pieces I plan on using

Glued that into place on the new front hull

Used styrene and balsa for the rough fillers after attaching

Filled the assembly with Aves Apoxie Sculpt and blended that to the hull with files, sanding screen, and my Dremel


Decided I needed a second set of fans for detailing under my fan housings.
Like the first set, these were cut from thin card.

Then, they were put into place on the underside of the housings

Started detailing the housings with an edge piece and support arm

Used some sheet styrene to box in my hangar.
This is mostly to avoid seeing huge openings when looking through the elevators

Youtube link:
Omega 7 Helicarrier-SMA 2013-Part Four
ModelMakerMike
"It's Slobberin' time""
- Joined
- May 28, 2011
- Messages
- 1,838
Good progress, mi amigo!!!
;D ;D ;D ;D
;D ;D ;D ;D
Cave_Dweller
New Member
- Joined
- Mar 18, 2011
- Messages
- 812
Sweet. I see you've recycled junk mail into parts for a scale model, and I applaud you sir! What better use of this, next to campfire fodder.
Quaralane
Well-Known Member
- Joined
- May 22, 2009
- Messages
- 11,263
Not a lot to show in this update, but I am still getting work done.
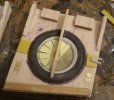
Started detailing the lower fan mounts with some balsa, styrene card, etch, and other bits.
The etch I'm using is actually the replacement guns from the ParaGrafix set for the Moebius Galactica.
The guns on the mounts are the kit-supplied guns from the Moebius Galactica
I've also used some balsa to form the support braces
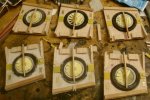
Closeup detail on the underside
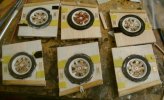
The upper sides of the gfan mounts got a similar, yet slightly different arrangement of the bits.
The inboard edges didn't get the same amount of detailing because they will be at least partially hidden by the flight deck.
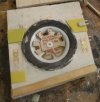
Closeup of the upper fan mount detailing
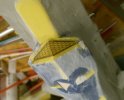
I also went in and added the "gallery windows" for the Columbia's Command Deck.
These may look familiar as well. They're the "museum pod" windows from the ParaGrafix etch for the Moebius Galactica.
I thought they would work well for the detail I wanted
Youtube link:
Omega 7 HelicarrierSMA 2013-Part Five
Started detailing the lower fan mounts with some balsa, styrene card, etch, and other bits.
The etch I'm using is actually the replacement guns from the ParaGrafix set for the Moebius Galactica.
The guns on the mounts are the kit-supplied guns from the Moebius Galactica
I've also used some balsa to form the support braces

Closeup detail on the underside

The upper sides of the gfan mounts got a similar, yet slightly different arrangement of the bits.
The inboard edges didn't get the same amount of detailing because they will be at least partially hidden by the flight deck.

Closeup of the upper fan mount detailing

I also went in and added the "gallery windows" for the Columbia's Command Deck.
These may look familiar as well. They're the "museum pod" windows from the ParaGrafix etch for the Moebius Galactica.
I thought they would work well for the detail I wanted

Youtube link:
Omega 7 HelicarrierSMA 2013-Part Five
