Sd.Kfz.6/2 3.7cm Flak
- Thread starter Chris S
- Start date
Big-John
New Member
- Joined
- Sep 17, 2011
- Messages
- 1,052
Chris S said:;D ;D ....Not quite John ,got a Dauntless to get some paint on tomorrow
Chris.
Well then, I'll be glad to see an update on the "weng" thing.
Chris S
Its a bit like being handcuffed to a lunatic !
- Joined
- Feb 14, 2011
- Messages
- 4,573
:
 ;D
;D
Spud ,I just remembered ..Ken done an SBS on welds in his Robot jobbie ,except he used Sprue ,I use Milliput ...same thing otherwise
http://www.scalemodeladdict.com/forum/index.php/topic,4766.30.html
Chris.
Spud ,I just remembered ..Ken done an SBS on welds in his Robot jobbie ,except he used Sprue ,I use Milliput ...same thing otherwise
http://www.scalemodeladdict.com/forum/index.php/topic,4766.30.html
Chris.
spud
Irish and proud of it :)
- Joined
- Jun 29, 2011
- Messages
- 6,918
I have my kit already just hope my lhs can get the few replacements needed from Japan if not I may have to scratch some bits wich I don't want to do with that kit.
Any how Ive no idea what I want next, I do know I want somthing I don't have
Any how Ive no idea what I want next, I do know I want somthing I don't have
Chris S
Its a bit like being handcuffed to a lunatic !
- Joined
- Feb 14, 2011
- Messages
- 4,573
Hi folks 
Just a little update ,I havent had much time on this one over the last day or so ,but I thought I'd let you see a little trick which makes the building and painting of the body assembly much easier .
If you follow the instructions you will be adding the steering column very early in the build ,this will mean a lot of messing about building & painting sub assemblys as you go ,which can be quit time consuming and irritating !
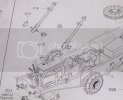
However if you use this simple tip you can build most of the upper body as one unit which can then be set on to the chassis once built and painted .
So ...all that is needed is a simple cut & pin . Cut the steering column where I have maked it with the arrows ...
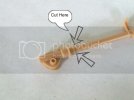
Once cut ,just drill both parts and insert a pin in one side ,it doesnt matter which side the pin goes in ,its just there to help alignment and strenghten the joint .
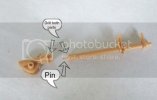
And thats it !! ..Now leave the column to the side as its not needed until near the end of the build ,its just a matter of setting the bottom end in place on the chassis and sliding the column through the firewall to meet it , This also keeps the column out of the way when you're painting the cab area .
With that sorted all I had to do was line up the main body parts ...Guards,cab floor & rear bed ...on the chassis ,once happy I fixed them together with a few spots of CA ( super glue ) ,when the CA was dry i removed the body (now one unit) from the chassis and run some thin poly around all the joins to secrue the parts together and left it back on the chassis to dry .
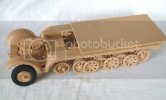
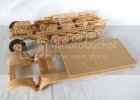
The main reason I like to do the body this way is because the join at the step area can be problematic and I find its better to sort that now rather than try to do it with the paint on .
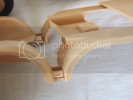
After that I made a start at the cab ,Havent got a lot done ,as I mentioned I havent had much time at it .There isnt much in there anyway ,apart from the Dash there is only a few levers & pedals .
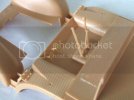
The etch pedals are worth a mention here ,they are stamped with a 'K' on one and a 'B' on the other ,so be sure to get them the right way up !
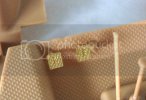
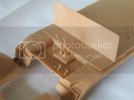
You may have noticed that I have removed the mounting points for the seats .If there is one thing that looks wrong in every HT kit I have seen its the seats ,they always just look terrible and ...well ...this one is no different !!!!
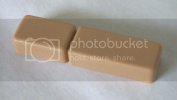
I'll be making new ones from my trusty Milliput very shortly ...But thats it for now .
Thanks for looking.
Chris.
Just a little update ,I havent had much time on this one over the last day or so ,but I thought I'd let you see a little trick which makes the building and painting of the body assembly much easier .
If you follow the instructions you will be adding the steering column very early in the build ,this will mean a lot of messing about building & painting sub assemblys as you go ,which can be quit time consuming and irritating !

However if you use this simple tip you can build most of the upper body as one unit which can then be set on to the chassis once built and painted .
So ...all that is needed is a simple cut & pin . Cut the steering column where I have maked it with the arrows ...

Once cut ,just drill both parts and insert a pin in one side ,it doesnt matter which side the pin goes in ,its just there to help alignment and strenghten the joint .

And thats it !! ..Now leave the column to the side as its not needed until near the end of the build ,its just a matter of setting the bottom end in place on the chassis and sliding the column through the firewall to meet it , This also keeps the column out of the way when you're painting the cab area .
With that sorted all I had to do was line up the main body parts ...Guards,cab floor & rear bed ...on the chassis ,once happy I fixed them together with a few spots of CA ( super glue ) ,when the CA was dry i removed the body (now one unit) from the chassis and run some thin poly around all the joins to secrue the parts together and left it back on the chassis to dry .


The main reason I like to do the body this way is because the join at the step area can be problematic and I find its better to sort that now rather than try to do it with the paint on .

After that I made a start at the cab ,Havent got a lot done ,as I mentioned I havent had much time at it .There isnt much in there anyway ,apart from the Dash there is only a few levers & pedals .

The etch pedals are worth a mention here ,they are stamped with a 'K' on one and a 'B' on the other ,so be sure to get them the right way up !


You may have noticed that I have removed the mounting points for the seats .If there is one thing that looks wrong in every HT kit I have seen its the seats ,they always just look terrible and ...well ...this one is no different !!!!

I'll be making new ones from my trusty Milliput very shortly ...But thats it for now .
Thanks for looking.
Chris.
Chris S
Its a bit like being handcuffed to a lunatic !
- Joined
- Feb 14, 2011
- Messages
- 4,573
Thanks a lot fella's 
Back in with a small update ....
Spent a little time this evening making seat cushions ....dont tell anyone they'll only laugh at me :-X
The seats in the Sd.kfz.6 are very similar to the seats in the Sd.kfz.7 , they're basically cushions fixed down to the metal shelf ,a pretty simple thing .
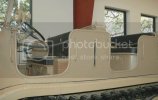
Here's how they look in good condition in a restored '7'
Now here's what you get in the kit ???
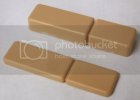
And this is my effort after playing with some Milliput ,I've tried to make them look very worn and saggy ,bearing in mind the vehicle is going to be well worn and damaged too ...
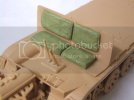
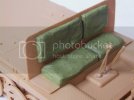
Not quite finished with them yet the Milliput is still wet ,so once its set I will remove them and fettle them a bit more
Thanks for looking.
Chris.
Back in with a small update ....
Spent a little time this evening making seat cushions ....dont tell anyone they'll only laugh at me :-X
The seats in the Sd.kfz.6 are very similar to the seats in the Sd.kfz.7 , they're basically cushions fixed down to the metal shelf ,a pretty simple thing .
Here's how they look in good condition in a restored '7'

Now here's what you get in the kit ???

And this is my effort after playing with some Milliput ,I've tried to make them look very worn and saggy ,bearing in mind the vehicle is going to be well worn and damaged too ...


Not quite finished with them yet the Milliput is still wet ,so once its set I will remove them and fettle them a bit more
Thanks for looking.
Chris.
Similar threads
- Replies
- 8
- Views
- 103
